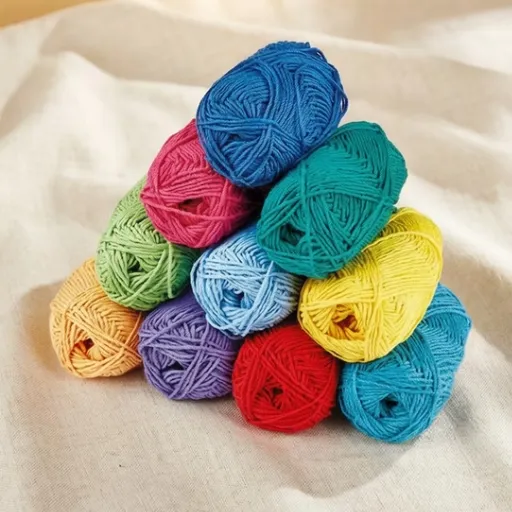


From practicality to creativity, relaxation to artistry, crocheting is one of the most satisfying hobbies one can venture into. Whether you are just getting started or are in the advanced stages of refining various techniques, every stitch is a crucial building block. One such building block is the ability to single crochet two rows, a skill that makes it possible to construct intricate items like scarves and blankets. This article outlines the exact steps you need to take in order to master this fundamental technique. By the end of it, you will feel ready to take your skills and personal projects to higher levels.
What are the essential steps to begin a second row in crochet?

For crocheting the second row, first turn the work sideways to prepare for the next row. Then cast on the correct amount of stitches for the turning chain, serving as the height for the specific type of stitch to be used at the end of the row, e.g., single crochet requires a chain of one, and double crochet uses three. Proceed by grabbing either the first stitch of the previous row or the stitch you are instructed to begin with, and yarn over followed by completing the stitch you plan to use for the rest of the row. Move across the row while maintaining consistent stitch placement and even tension as these are crucial for yielding a beneficial end result.
Understanding the importance of turning chains
turning chains are critical for setting the height of each row and preserving the scope of the work. In the absence of the proper turning chain, rows can become uneven, which will distort or mess up results. In my case, controlling the edges of the crochet is achieved by being meticulous with the correct number of chains for each stitch type, whether single, half-double, or double. This effectiveness reinforces the structural integrity of the pattern, which would have otherwise compromised the edges. In essence, this approach—while subtle—leads to dramatic polish and unity in the finished crochet pieces.
How to properly position your crochet hook for the second row
To ensure a clean and even design, it is important to place your crochet hook correctly for the second row. After completing the turning chain, insert the hook into the next stitch according to your pattern – this is generally the first or second stitch away from the hook, based on the stitch in use. Ensure that the hook goes under both loops of the stitch to control the stitching tension and structure. This step assists in preserving the spacing alignment, averting gaps or loose edges as you advance through the project.
Identifying the correct stitch to start your new row
As I begin a new row, my attention is on what stitch my pattern recommends. I fill in this step with as much detail as I can because it will aid with integrating the stitch. For example, in the scenario where a single crochet row is indicated, my first step involves putting my hook into the first stitch. In contrast, for taller stitches such as double crochet, I will skip the first stitch and start in the second to account for the turning chain height. Throughout the years, I have come to understand that my instruction check and the alignment with the turning chain has been the reassuring element to accomplish clear edges and fill gaps in my work.
How does starting the second row differ for various crochet stitches?

The manner in which the second row is started differs depending on the height of the stitches put into the row. For single crochet, which is less tall, you usually work into the very first stitch because there is less height to account for. For taller stitches such as half-double, double, or treble crochet, you will skip the first stitch because the turning chain will serve as a substitute for the height of the first stitch. This is important so that the row is level and is in line with the stitches to avoid gaps and preserve clean edges throughout the project. A pattern may be provided, so be sure to follow it as it may differ slightly from the provisions here.
Starting a second row with single crochet stitches
In single crochet stitches, whenever I commence the second row, I always ensure to start with a chain one. This chain serves as the turning chain and provides the necessary height to keep the stitches even. I then proceed to turn the work, so I can make the next chain, and put the hook on the first stitch of the row underneath. This creates a clean edge, which I follow throughout the row with my single crochet stitches. The approach is simple, but paying attention to the details really makes a person’s work stand out.
Techniques for half double crochet and double crochet second rows
In starting the second row of half double crochet, first, use two chains, which is referred to as the turning chain, and helps retain the row’s height. Turn your piece of work, then yarn over and insert your hook into the first stitch of the previous row and yarn over again while you pull through. There are three loops on your hook, yarn over again then pull through all three loops. Repeat the steps for the second row double crochet but change the value for the turning chains to three instead of two. After all of your work is completed, use the hook to pull yarn over, do this for the first or designated stitch below, then pull the soda through followed by yarn over with the loop through one, then over with the loop over the rest of the last two loops, then open with a loop over the rest of the last two loops. Following these, one is guaranteed uniform and structured rows designed for the project.
Adapting your approach for more complex stitches
With more complicated stitches, consistency in tension and following the pattern instructions is crucial. Try breaking it down into multiple steps and concentrate on one part at a time, such as the foundational stitches and movement of the yarn. Storing markers at certain positions aids in master patterns, while swatches grant the freedom to practice sketching without affecting the actual project. Remembering that patience and precision are key to these advanced stitches is essential since they tend to require more detail.
What common mistakes do beginners make when starting a second row?

one of the most prevalent errors beginners make concerning rows is incorrectly counting the stitches on the foundation row for the second row. This usually results in variations in the pattern’s alignment and jagged edges. Another common mistake is not having an even tension, which can lead to the stitches being too tight or too loose. Moreover, beginners sometimes forget to include the turning chain or think of it as a normal stitch, which could disrupt the complete alignment of a row. Being aware of stitch placement along with practicing consistent tension and monitoring tension helps beginners avoid these setbacks.
Avoiding tension issues in your foundation chain
Maintaining tension in your foundation chain begins with hand position and focused practice. The yarn must be fed between your fingers in such a way that allows for proper tension, without either pulling or letting go. If you find yourself getting too tight, use a larger hook on the foundation chain. This will help in avoiding the chain becoming too stiff or uneven. Lastly, allow yourself ample time. Rushing through will make your results inconsistent. With persistent endeavor, it will become second nature to achieve an even foundation chain.
Preventing accidental increases or decreases at the beginning of rows
To prevent unintentional increases or decreases at the beginning of rows, I always follow a step-by-step approach to ensure that my work is neat and uniform. This is what I suggest:
- Understand the Turning Chain – Unaccounted for increases and decreases can usually be attributed to the turning chain. Make sure to check whether the turning chain works as a stitch for your pattern. If it does, do not work into the base of the turning chain. If it doesn’t, be sure to.
- Place Stitch Markers – Using stitch markers can save a lot of time, so I recommend using them. I like to place them on the first stitch of each row, so that when I am working back across, I know exactly where to begin. This means I eliminate the possibility of accidentally adding or skipping stitches.
- Count Your Stitches – Keeping track of your stitches after finishing each row may save you a lot of trouble in the long run. In particular, I find it essential to take a recount on bigger pieces so I can try to spot any mistakes before they become too large.
- Check Your Edges – A common reason for unbalanced edges is unexpected increases or decreases. Keeping track of the edges of your project is important—consistent edges suggest you are working with the correct stitch count.
- Follow Your Pattern Carefully – Starting instructions for each row may be precisely indicated in patterns. If, for instance, the pattern reads “chain three counts as first double crochet”, make sure you perform the subsequent stitch into the correct space.
Integrating practices with your routine as suggested will help you avoid blunders and keep a consistent stitch count, which will ensure that your craftsmanship looks sophisticated and refined.
Troubleshooting uneven edges in your crochet project
the uneven borders of a crocheted piece are often a result of carelessness with the technique and how the pattern was read. So, to achieve more consistent uniformity, ensure that your stitches are not looser in some rows and tighter in others. This is a frequent problem. Also, make sure to properly execute the first and last stitch of every row; missing these or adding additional stitches easily gives rise to edge problems. Note that turning chains are crucial and also need to adhere to pattern requirements since they influence edge alignment. With this in mind, remember to verify that the total number of stitches per row is correct. Words cannot express the relief that comes from cultivating this habit. Following these steps will allow you to attain the desired smooth and uniform edges on every attempt.
How can you ensure a neat transition from the first to the second row?

To make the first transition to the second row seamless, the edges begin with ensuring that the foundation chain is not too loose nor too tight. Pay careful attention to the turning chain as you begin the second row; it must match the height of the stitch that you plan to use. (For example, a chain-3 must be used if you want to use a double crochet on the second row). In order to avoid gaps and unwanted space, always begin your first stitch into the correct base stitch, which is usually the first or second chain stitch depending on the pattern. Following this procedure will ensure that the transition is smooth and professional.
Mastering the art of consistent tension across rows
maintaining an even level of tension throughout the rows is primarily a matter of technique and awareness. I concentrate on measuring the tension I apply with respect to the yarn and hook during the project, and I check my grip often. I also consider how I post the yarn onto my fingers because different ways of finger placement require different assessments. Working on swatches allows me to practice some basic pattern control for the different patterns I attempt. Eventually, the application of conscientious effort over time leads one to muscle control that is uniformly distributed, which improves all of the pieces created.
Tips for counting stitches accurately to maintain your pattern
Accurate counting of stitches and working on a pattern requires proper lighting so each stitch is visible. Use a stitch marker to delineate the start of rounds or particular stitch segments in bigger patterns. To catch mistakes early on, periodically cross-check your counting while working. For more complex patterns, a row counter or a tally system may prove useful. Furthermore, the first review of the work needs to be taken slowly to ensure precision in moving on to other sections.
What are some advanced techniques for starting the second row in different crochet patterns?

In regard to beginning row two of a crochet pattern, I never fail to remind newcomers to adapt their technique to the stitch type being worked. For patterns which have a realistic element repetition such as a single crochet, I use a chain-one turning chain to make the transition as effortless as possible. Regarding taller stitches, such as double or treble crochet, the turning chains that are made, two or three for taller stitches, must be made so that the correct amount of stitch height and tension is achieved. In the case of more elaborate and textured patterns such as shell or cluster stitches, I caution placing the first stitch as described, usually at the top of the turning chain, in order to hold the worked pattern. Attention to details here will impact the project in a good way as the rows are added.
Adapting your approach for crochet in the round
In crocheting a round, the crucial adjustment is figuring out how to move from one round to the other while maintaining the centers and symmetry alignment. Start with either a magic ring or an adjustable loop for a more closed and controlled center or a chain-based circle for a much more open centered base. Always remember to place a marker at the start of a round so as to track your stitches along the way. Rounds, as opposed to turning chains bound by slip stitch, creates a clean edge between rounds. A workable spiral pattern is one that has continuous rounds without needing to join the rounds. The method you select will depend on the combination of the esthetic and planning requirements.
Starting the second row in ripple or chevron patterns
In Ripple and Chevron patterns, the attention to the design is fascinating when rotating to the second row while ensuring that the design retains its peaks and valleys. I advocate for spotting the clear high points and low points within the foundational row from my past experiences. When you reach the peak (increase) sections, remember to work in several stitches into one stitch as it preserves the angle of ascent. While in the valleys (decrease), I find using a focused decrease technique like double crochet two stitches together helpful so that the stitches smoothen the inward pull. Do not lose sight of the requirement of counting stitches and maintaining the overall balance to fit the pattern. Your chevron or ripple pattern will maintain its crisp, dynamic texture along progression by paying attention to the elements outlined above.
Techniques for seamless color changes at the beginning of a new row
To obtain smooth transitions in color for the start of a new row, change the color on the last stitch of the previous row by finishing with the new hue. This is done by stopping at the last yarn-over before completing the stitch and pulling the new color through to finish. Either weave in the old color tail or incorporate it while working along the edge to secure the weave. This method minimizes the risk of gaps and irregular tension at the junctions of different colors, thus enhancing the overall professional appearance.
How can you practice and improve your second row crochet skills?

Repetition and focus on minute details are essential in practicing and improving your second-row crochet skills. While trying this for the first time, paying attention to keeping consistent tension within my stitches was very beneficial for me. I recommend simple repetitive patterns like single or double crochet to help cement muscle memory. Remember to be mindful of where your hook goes at the beginning and end of each row. Consistency in these two areas will determine if your row edges will be straight. This is a simple goal that anyone can achieve. Do not rush; instead take it slow and be sure to count stitches and fix any mistakes right away. This approach will slowly improve your technique and allow you to attempt more challenging patterns.
Recommended exercises for perfecting your turning chain technique
To perfect your turning chain technique, start by practicing consistent chain tension—aim for each chain to be evenly sized. Work on creating turning chains with varying stitch heights (e.g., single crochet, double crochet) to understand how they correspond to different patterns. Repeat small swatches where you turn and create the first stitch after the chain to ensure smooth transitions. Pay attention to where the hook is inserted after the turning chain to avoid gaps and maintain uniform edges. Regularly practicing these focused exercises will sharpen your skills and significantly improve the quality of your crochet projects.
Exploring video tutorials and online resources for visual guidance
the best methods for mastering crochet techniques, such as the turning chain, include video tutorials and online resources. Seeing experienced crafters demonstrate step-by-step methods helps clarify truly intricate concepts and guarantees that you are applying the correct methods. A number of video sharing platforms, including YouTube, cater to all skill levels and have an abundance of instructional footage, which makes self-paced learning possible. I suggest looking for videos that demonstrate the turning chain and its application in various stitches—these visual guides can greatly enhance your understanding alongside your newfound confidence. Moreover, online crochet communities and forums can offer valuable peer recommendations and expertly curated resources that enhance the overall learning experience.
Reference
- The Woobles – How to Crochet in Rows: A detailed guide on starting a second row in crochet, including flipping your work and continuing into the previous row of stitches.
- By Golden Berry – How to Crochet the Second Row: This tutorial explains the process of creating a turning chain to begin the second row.
- YouTube – How to Move Up to Your Second Row of Crochet: A video tutorial focusing on transitioning to the second row using single crochet stitches.
Frequently Asked Questions (FAQs)
Q: How do I crochet the second row after completing the first row?
A: To crochet the second row, first turn your work so the back of the first row faces you. Chain the appropriate number of stitches for your chosen stitch (e.g., chain 1 for single crochet, chain 2 for half-double crochet, or chain 3 for double crochet). Then, insert your hook into the first stitch of the previous row and complete the stitch. Continue across the row, working a stitch into each stitch of the previous row.
Q: What is a chain stitch and why is it important for starting a second row?
A: A chain stitch is one of the most basic crochet stitches and is crucial for starting a second row. It creates a foundation for your next row of stitches and provides the height needed for different stitch types. The number of chain stitches you make at the beginning of the row depends on the stitch you’re using for that row.
Q: How many chains should I make at the beginning of the second row?
A: The number of chains to make at the beginning of the second row depends on the stitch you’re using: – For single crochet: Chain 1 – For half-double crochet: Chain 2 – For double crochet: Chain 3 – For triple crochet: Chain 4 These chains count as the first stitch of your new row.
Q: What are some basic crochet stitches I should know for crocheting the second row?
A: Some basic crochet stitches you should know for crocheting the second row include: 1. Single crochet (sc) 2. Half-double crochet (hdc) 3. Double crochet (dc) 4. Triple crochet (tr) Mastering these stitches will give you a solid foundation for most crochet projects.
Q: How do I start the next row when making a crochet blanket?
A: To start the next row when making a crochet blanket, turn your work so the back of the previous row faces you. Chain the appropriate number of stitches for your chosen stitch type. Then, insert your hook into the first or second stitch of the previous row (depending on your pattern) and work across the row using the specified stitch. Remember to maintain consistent tension for even results.
Q: Are there any crochet tutorials you recommend for beginners learning how to crochet in rows?
A: Yes, there are many excellent crochet tutorials available for beginners. You can find helpful videos on YouTube channels like Bella Coco Crochet, Naztazia, and Hopeful Honey. These tutorials often cover basic crochet stitches, how to start crocheting, and techniques for working in rows. Additionally, websites like Crochet.com and AllFreeCrochet offer written tutorials with step-by-step instructions and photos.
Q: What crochet terms should I be familiar with when learning how to start a second row?
A: When learning how to start a second row, it’s helpful to be familiar with these crochet terms: 1. Turn: Rotating your work to begin the next row 2. Chain (ch): The foundation stitch for starting new rows 3. Stitch (st): A single crochet stitch 4. Skip: To pass over a stitch without working into it 5. Insert hook: Placing your crochet hook into a stitch or space 6. Yarn over (yo): Wrapping the yarn around your hook 7. Pull through: Drawing the yarn through a loop on your hook
Q: How do I know which stitch to insert my hook into when starting the second row?
A: When starting the second row, you typically insert your hook into the first or second stitch of the previous row, depending on your pattern and the stitch you’re using. For most basic stitches, you’ll insert your hook into the first stitch after your turning chain. However, some patterns may instruct you to skip the first stitch and begin in the second. Always refer to your pattern for specific instructions, as this can vary depending on the design and desired edge appearance.