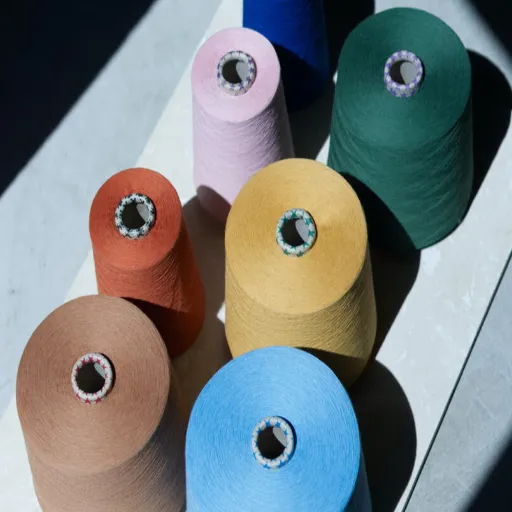
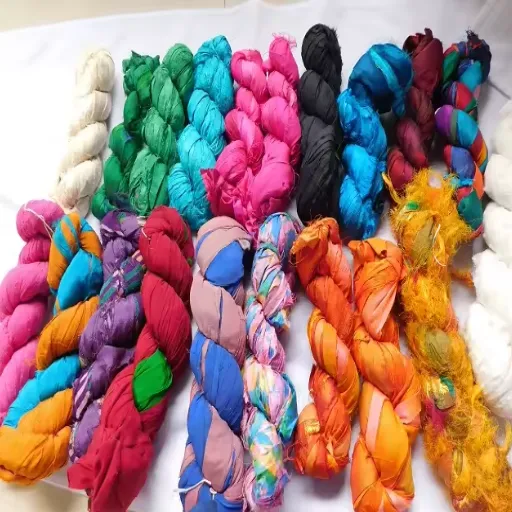


DIY projects can be very exciting and creative; however, they can be even better if the supplies are affordable and easy to come across. Acrylic yarn fits this description perfectly; it is durable, widely available and most importantly, inexpensive. With that being said, one of its struggles is the limited variety of colors that accompany it. This guide seeks to address that by outlining precise and detailed methods on how to dye your own acrylic yarn. From explaining how the chemical structure of acryllic fibers affects the dyeing process to listing the proper materials needed for the best results, this guide covers everything. If you are new to crafting and want to adopt a hands-on approach to color introduction, or are seasoned and looking to build on your arsenal of skills, this guide is meant for you. With the pages of this guide, you will be able to convincingly, and with great accuracy, dye the acrylic yarn with ease.
Can You Actually Dye Acrylic Yarn? Understanding the Basics

Acrylic yarn can indeed be dyed, albeit the methodology differs from dyeing cotton, or wool. Unlike natural fibers, acrylic is a synthetic fiber made from polymers, meaning it does not absorb traditional dyes. To successfully bond with acrylic, special synthetic dyes, such as disperse dyes, must be used. Application of heat is necessary to unlock the fiber’s structure so the dye can seep into the fibers and firmly cement onto them for enduring results. While these processes may be more difficult compared to natural fibers, dyeing acrylic yarn is fully possible with the right practices and materials.
What Makes Acrylic Yarn Different from Natural Fibers
Natural fibers incorporate the acrylic yarn distinguishing features of its composition and properties. Unlike fibers that originate from animals and plants, natural acrylic yarn is a synthetic fabric extracted from polymerized acrylonitrile. The lightweight nature of this material, as well as its resistance to moisture and UV-light lends credence to the assertions of the composition bearing the acrylonitrile polymer. Furthermore, the absence of natural pores in acrylic fabric has an impact on the ability of the fabric to absorb dye and retain color, though specialized methods may enable the fabric to retain color adequately. These factors render the acrylic yarn versatile, but unlike natural fibers, deem it distinct in textile usage.
Why Traditional Dyes Don’t Work Well on Synthetic Fibers
As a result of the chemical structure of synthetic materials, traditional methods of dyeing them is ineffective. Unlike synthetic fibers, wool and cotton are natural dyes with polar functional groups, through which they easily bond with water-soluble dyes and port molecular structures. In contrast, acrylic and polyester fibers have a low hydrophobic surface porosity, non-polar molecular structure, and, as such, significant barriers to dye absorption. Moreover, most traditional dyes are unable to undergo strong chemical bonds with enduring bonds to be formed with synthetic polymers. As a result, disperse dyes or specialized techniques that can penetrate the non-porous surfaces of the fibers need to be used.
The Science Behind Dyeing Acrylic: Dye Molecules and Synthetic Materials
Difficulties with dyeing come from the molecular structures of the fibers. These are extremely low in porosity and chemically inert along with possessing high moisture absorption resistance. Again, disperse dyes remain the most effective option, as they are non-ionic, finely dispersed particles which can diffuse through tightly packed polymer chains of acrylic fibers.
It usually needs heating, application of pressure, and the use of designed carriers to assist with dye diffusion and forming van der Waals or hydrogen bonds between the dye and the fiber. Moreover, some cationic dyes are used for their capacity to ionic bond with modified acrylics or co-polymer acrylics. This approach guarantees the color’s resistance to fading on synthetic materials, which is essential given these materials’ inherent difficulties with traditional dyeing processes.
What Types of Dyes Work Best for Acrylic Yarn?

Basic (cationic) dyes are the most appropriate dies for acrylic yarn. These dyes are made to ionically bond with the negative charge sited onto the acrylic fiber during its manufacturing process. As can be expected, basic dyes have a strong ionic bond which ensures that the yarn maintains its desired color and does not fade over time. It is always best to select basic dyes for acrylic fibers due to their unparalleled adherence to the fabrics, brilliance of color, and lack of bias against harsh conditions.
Rit DyeMore: The Go-To Solution for Synthetic Fibers
Rit DyeMore was designed specifically for use with synthetic fibers like polyester, acrylic and nylon which traditional dyes cannot properly penetrate. This propriety dye makes use of a special bond with synthetic fibers at higher temperatures to ensure that the colors they take on are vibrant. For the best results, items should contain a minimum of 35% synthetic material. The dyeing process calls for heating water to boiling point because the yarn’s structure is best suited for bond without losing its rigidity. Rit dye is best suited with its variety of colors, and its applicability makes it the secret to professional-looking synthetic clothes and fabrics.
Acrylic Paint vs. Fabric Dye: Which Should You Choose?
The first thing to consider in detail is the fabric type and finish required for the item when it comes to choosing between acrylic paint and fabric dye. Paint and dyes differ in the way they affect mechanical properties of the fabric as well. Descriptive designs such as paintings that require detail can be achieved through acrylic paints as they possess a wide range of color options, albeit at the compromise of flexibility, due to the stiffness it incurs. With excessive use or washing, acrylic paints will eventually crack over time. However, fabric dyes will not have such issues due to the way it colours the fabric. It works on a material’s inner structure to ensure dependable and uniform coloring while preserving the texture’s softness. Socks can be knitted from any fabric such as cotton, wool, or even synthetic acrylic yarn. Both natural and synthetic fibers require specialized dyes to yield the best results. For more soft and vibrant outcomes, fabric dye is preferable while acrylic paint best works for non-porous surfaces that require decorative details.
Exploring Alternative Dyeing Methods for Acrylic Yarn
Natural fabrics like cotton or wool absorb dye easily while synthetic fibers like acrylic absorb pigments at a slower rate. Certain techniques need to be applied in order to successfully bond pigments into the structure,specifically disperse dyes. Steam softening acrylics by heating them unlocks the yarn’s polymer chains, making it possible to firmly bond dye molecules. Through the immersion method of dyeing, yarn can sit in a dye bath heated to around 200°F (93°C), setting the desired color.
Another plausible option is the use of dyes or markers with alcohol bases that can be diluted with isopropyl alcohol for a chosen depth. This technique is ideal for artistic or small-scale projects which require precision without the need for industrial grade dyes. Although bond strength is compromised in comparison to heat-setting methods, it proves satisfactory for decorative pieces or items that are not frequently washed.
These approaches allow crafters to target the issues presented by the synthetic nature of the yarn, resulting in vivid and reliable outcomes when dyeing acrylic yarn, therefore broadening its creative potential.
Step-by-Step Guide to Dyeing Acrylic Yarn at Home

To dye acrylic yarn at home, you will require the following materials:
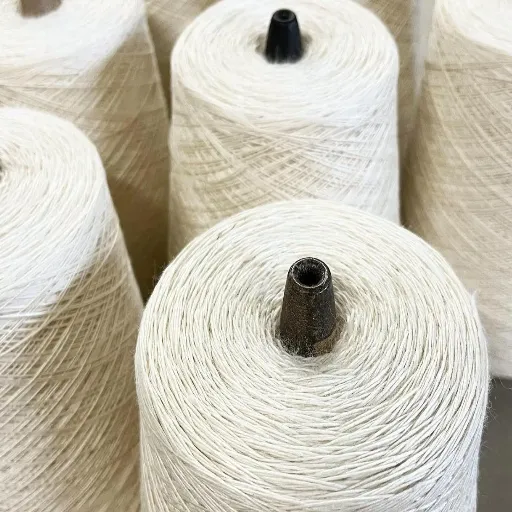
- Acrylic yarn (preferably white or light-colored for best results).
- Disperse dyes specifically designed for synthetic fibers.
- A large pot or container suitable for heating water.
- Gloves for hand protection.
- A wooden or plastic stirring utensil.
- Vinegar or a similar fixative (if suggested by your dye manufacturer).
- Warm water and a heat source (e.g., stovetop).
- Step 1-Prepare the Yarn: First off, it’s of utmost importance to soak the acrylic yarn in warm water. This allows for a more even application of the dye on the compound fibers. Make sure to let the acrylic yarn step for half an hour or so.
- Step 2-Mix the Dye: Ensure to prepare the dye according to the manufacturer’s strategies, mainly calculate the amount of powder and water mix to get your desired color bob, and guarantee it’s layered with water. In this powder-dye, stir it thoroughly until it’s fully dissolved into the warm water.
- Step 3-Heat the Yarn and Dye: Put the yarn in the pot and add dye to it. Take care not to let the temperature run above ‘medium’ Set the temperature to be in between 200°F and 212°F (93°C to 100°C), as this will allow the disperse dye to activate.
- Step 4-Rinse and Dry: Following the desired depth of color for the yarn is achieved (generally, within 30 to 45 minutes), the yarn should be removed and rinsed in lukewarm water until the water runs clear. Gently squeeze out the excess water without wringing. Either hang or lay the yarn flat to dry completely.
It’s paramount to follow these steps point by point to achieve a professional look while dyeing acrylic yarn at home.
Essential Supplies You’ll Need for the Perfect Dye Job
To successfully achieve the desired outcome in dyeing yarn, especially acrylic yarn, having the correct materials and tools is very important. Outlined below are all required tools and materials:
1. Acrylic Yarn – Synthetic acrylic yarn of high quality to ensure optimum dye retention.
2. Disperse Dye – Disperse dyes tailored for synthetic fibers such as acrylic.
3. Heat Source – A stove or any other source of heat
4. Large Pot – Stainless steel or non-reactive pot for the dye bath.
5. Water – Sufficiently clean water for making the dye slurries and for washing
6. Measuring Tools – Accurate measuring cups and spoons for the required quantities of dyes and other additives.
7. Protective Gear – Gloves & apron, and perhaps a mask to protect the hands and clothes during the operation.
8. Fixative Agent – Appropriate mordant such as white vinegar or any other suitable substance used to make the dye adhere reliably.
9. Stirring Utensil – A stirrer which does not react with components of the dye bath preferred for constant stirring of the dye solutions.
10. Drying Rack or Surface – Sufficient area for drying yarn post-dyeing.
These materials, when used together with the detailed method provided, guarantee maximum dye uptake and bright, durable shades on acrylic yarn. Professional results require meticulous preparation and proper attention to the tools used.
Preparing Your Acrylic Yarn: From Skein to Dye-Ready
To achieve an even level of adherence of dye on acrylic yarn, preparation approaches must be exercised scrupulously. Begin by removing the yarn skein and re-winding it back into a hank as this enables sufficient dye penetration. Further, prevent tangling during the dyeing process by securing the hank with figure eight ties using neutral string.
Subsequently, give the yarn a good clean to get rid of all remnants, such as oils or industrial oils, processes and film coverings. This is best done with a mild detergent and warm-water bath, giving several rinses with the last one being clear. After washing, put the yarn in a pre-treatment solution usually consisting of water and a bit of fabric softener or conditioner to make the fibers more ready for dyeing. Make sure the yarn is soaked for at least half an hour before the next steps.
Maintaining professional results demands these steps be exercised. Ensuring the acrylic fibers are prepped for dye, applying these guidelines enhances the prep work done while minimizing uneven dyeing.
The Hot Water Method: Temperature Control for Best Results
Careful maintenance of temperature in the dyeing process of acrylic yarn is crucial. 190°F and 212°F which is 88°C to 100°C is the sweet spot. This range needs to be maintained in order to assist in softening the acrylic fibers for them to bond with the dye. To avoid any unwanted chemical reactions, use a pot made of stainless steel or enamel. A reliable thermometer should always be used to monitor the temperature. The water should be Increased gradually to the desired range while mixing it in order to achieve even dye distribution. Aggressive boiling should be avoided at all cost, this could damage the fibers. Uniform absorption of color is obtained through this controlled method, preserving the strength of the dye on synthetic fibers while avoiding patchiness.
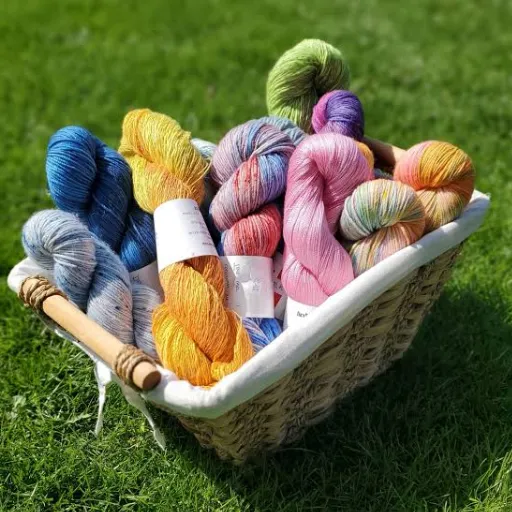
Creative Techniques for Unique Acrylic Yarn Colors

To create gradients on acrylic yarn, you can use the dip-and-lift method, which dips the yarn into the dye bath incrementally over time. Grab a small section of the yarn and submerge it in the dye bath so that it dries whilst absorbing color. More of the yarn needs to be lowered but the previously dyed section also needs to be raised so there is a smooth transition in shades. This may require multiple attempts to get the correct gradient. Keep the temperature steady and make sure to move the dye bath lightly so it does not color unevenly.
For creating dappled effects, small concentrated portions of color may be added directly onto the yarn with sprays or droppers. Lay the yarn on a covered flat surface and spray or drizzle the dye so that it produces free patterns. Let the dye permeate the fibers before heat setting the yarn of choice as instructed by the dye’s manufacturer. This technique creates vibrant texture on yarn surfaces.
For variegated yarn, prepare multiple baths with different colors and soak different parts of the yarn in each dye bath. If you want distinct blocks of color, tie off portions of the yarn. Shake and turn the yarn in the dye baths to blend the colors and create a deep multi-colored look. Control the timing and overlap of immersion to control the color saturation and placement.
How to Create Ombre and Gradient Effects on Acrylic Yarn
While performing gradient effects, start with disperse or specialty acrylic dyes designed for synthetic fibers. Prepare a dye bath with water according to the manufacturer add the dye and any necessary add mixtures. For an ombre effect, place one end of the yarn into the dye bath. Gradually, the yarn will have to shift and be pulled out to create a soft transition from dark to light. For a gradient effect, add dye to the bath or change the dye concentration for each section of yarn to achieve build-up layering. Maintain consistent stirring to avoid dividing lines between colors. After achieving the desired effect, rinse the yarn thoroughly and apply a color fixing agent, or heat set to lock in the color. Always keep safety instructions in mind while working with synthetic dyes.
Speckle and Variegated Techniques for Multi-Colored Yarn
Speckle dyeing pertains to the application of small and specific amounts of dye powder or solution onto a damp yarn in a controlled manner. For this technique, the prepared yarn should be placed flat on a surface or shallow container and sprinkle the dye powder directly on the fibers with a brush or pipette. Increasing the amount of dye and it’s proximity to the desired point increases the intensity of the speckles. Heat setting (through steaming or immersing yarn in heated water) ensures good binding of the dye and the fibers.
In Variegated Dyeing some sections of a strand of yarn are dyed in different colors. This is typically obtained by dipping a specific section of the skein in separate solutions. This can also be achieved with the help of hand painting or sectional immersion. To create seamless transitions or sharper contrasts, managing the overlapping points between colors using either complementary or gradient hues, which also aids in achieving the desired aesthetic. Careful control of color placement with the saturation rate ensures uniform dye uptake while avoiding muddiness. Consistently monitoring dye concentration, temperature of the solution, and the type of fiber used achieves professional results.
Bleaching and Color Removal Options for White Acrylic Base
Both bleaching and color removal pose challenges on white acrylic materials due to the properties of acrylic fibers being prone to damage from stronger oxidizing agents. Unlike natural fibers, these are mainly synthetic polymers which means they do not respond to normal bleaching treatments. Typically, methods that incorporate delicates designed for synthetics, such as oxygen bleaches, can be safe and effective. These products utilize weaker oxidative mechanisms that slow down fiber destruction while still achieving color lightening.
Another option is the use of sodium hydrosulfite or thiourea dioxide as reductive bleaching agents, which remove color from acrylic textiles through chemical reduction. Still, it is important that testing be conducted on small, out-of-sight areas. Bleach containing chlorine should be avoided since they tend to permanently weaken the fabric’s fibers. Followed restrained soaking temperatures and controlled pH values in combination with instructions provided by the manufacturer will ensure a successful process.
Troubleshooting Common Acrylic Yarn Dyeing Problems
1. Unequal Dyeing: Unequal dyeing usually comes from lack of pre-washing or not enough agitation during the dyeing stage. Filled washing machines create a situation in which there cannot be uniform dye distribution. To fix this, make sure the yarn is properly washed free of oils and residues, and that there is adequate stirring in the dye bath to facilitate the movement of fluids at dyeing.
2. Color Banding: Color soaking should not be confused with color banding because the cause of soaking in a color is wearing or vigorously scrubbing the fabric. Make sure that appropriate dye fixative containing an amine reactive with acrylic fibers is used and rinse the yarn sufficiently with lukewarm water till it is clear.
3. Faded Pigments: Faded pigments might be permanent if dyeing temperature is maintained at low levels or dyeing duration is insufficient. Keep a close watch on the temperature acrylic fibers are normally high and keep the dyeing time long enough for the fabric to pick up the bisecting dark adri motherboard and not array tea glove airborne diatom layer plate.
4. Weak acid damage: Weak acid damage can result from inappropriate treatment with weak acids which can lead to collapse of finely woven materials or a combination of applied chemicals which fail to stabilize the pH within the membrane esophagus saccus. Test these on a small sample or mockup model for a better estimate before bulk to tailor-made goals, and use a pH controller to uphold the constructor’s optimal condition for acrylics during the dying process.
Preventing Yarn from Becoming Stiff or Tangled During Dyeing
Using the correct ratio of water to yarn is necessary to achieve complete saturation and uniform dye distribution. To control pliability, introducing a conditioning aide, or a fabric softener during the rinse phase can aid in the control of pliability impacting yarn stiffness. For the purpose of tangling, the yarn should be secured into loose hanks and tied with figure-eight knots at several places. This secures moderate motion while allowing dye penetration around the hanks. Moderate agitation along with placing the yarn into mesh bags during the dyeing procedure can minimize the risk of tangling. The yarn needs to be treated gently during movement to prevent over twisting and knotting which would otherwise disturb the structure of the yarn.
Solutions for Color Bleeding and Fading Issues
In order to prevent color bleeding, a commercial fixative or a combination of water and white vinegar can be used to pre-soak the yarn, setting the dye prior to the dyeing process. The dyeing procedure also needs to include cold water rinses to get rid of excess dye fragments. For fading problems, undertones of the dye must be lightfast, and there must be sufficient fixation stage during application for the dye to adhere to the surface. Color retention can further be enhanced by not allowing the yarn to be exposed to the sun for long, as well as not using strong detergent during washing. In addition, keeping the yarn in a cool dry place helps prolong the vibrancy of the color, while the use of pH-neutral detergents helps prolong the life of the yarn.
References
Frequently Asked Questions (FAQ)
Q: What type of dye should I use to dye my own acrylic yarn?
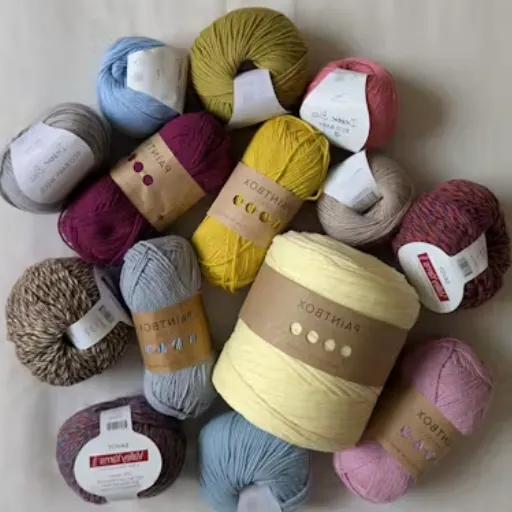
A: For dyeing acrylic yarn, all-purpose dyes like Rit or iDye are recommended as they can dye acrylic yarn with acrylic fibers effectively.
Q: Can I use Kool-Aid to dye my acrylic yarn?
A: Yes, Kool-Aid can be used to dye acrylic yarn, especially for lighter shades. However, the longevity of the color may not be as strong as with professional dyes.
Q: How do I change the color of my yarn if I want to dye it a darker color?
A: To change the color of your yarn to a darker shade, you can overdye it using a darker dye. Make sure to use enough dye to achieve the desired intensity.
Q: Is it possible to dye cotton yarn the same way I dye acrylic yarn?
A: No, cotton yarn requires different dyes as it does not dye well with the same products used for acrylic. Look for dyes specifically designed for cotton fibers.
Q: What should I do if my dyed yarn ends up in a tangled mess after dyeing?
A: If your acrylic yarn becomes a tangled mess, gently untangle it while it is wet. You can also use a little fabric softener to help ease the knots.
Q: Where can I find support or advice for dyeing yarn?
A: You can find support and advice in online forums, such as Quora or dedicated crochet forums, where fellow crocheters and knitters share their experiences and tips.
Q: How can I ensure the colors I use will last on my hand-dyed yarn?
A: To ensure longevity, use high-quality dyes and fixatives. Additionally, always follow the dye manufacturer’s instructions for setting the color.
Q: What are some recommended posts for beginners wanting to dye their own yarn?
A: For beginners, we recommend posts that cover the basics of dyeing, safety precautions, and easy recipes for dyeing with Kool-Aid or Rit, as well as success stories from the forum community.