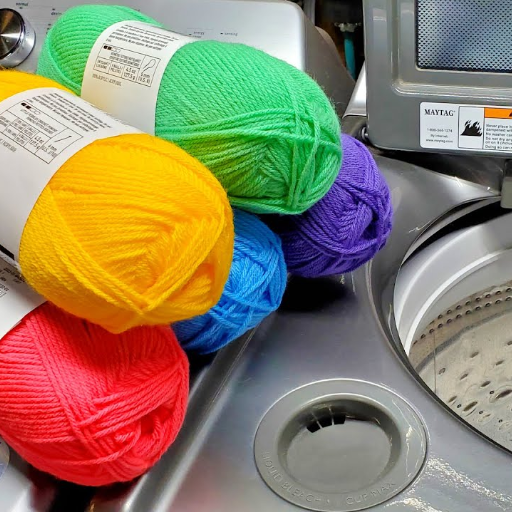

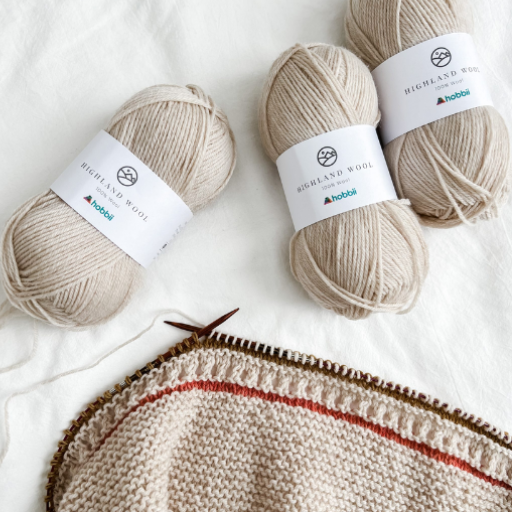


Blocking techniques are especially significant in yarn crafts, especially when working with acrylic yarn. Natural fibers are quite the opposite, but acrylic demands a different method for the completion and detail of the piece. This blog post focuses on steam blocking for acrylic yarn in a structured manner. We will study the properties of the behavior of acrylic fibers together with the tools and materials required before expounding step-by-step the process of effective blocking. Our comprehensive exploration is suitable for both beginners and experienced yarn artisans because it will enable you to learn how to get the best results for your yarn projects. Warm up, people; we will see how steam blocking can change and improve your textile art. Let the art speak for itself.
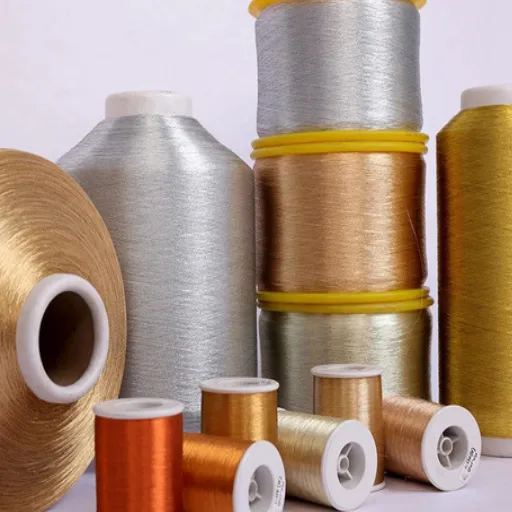
Can You Block Acrylic Yarn?

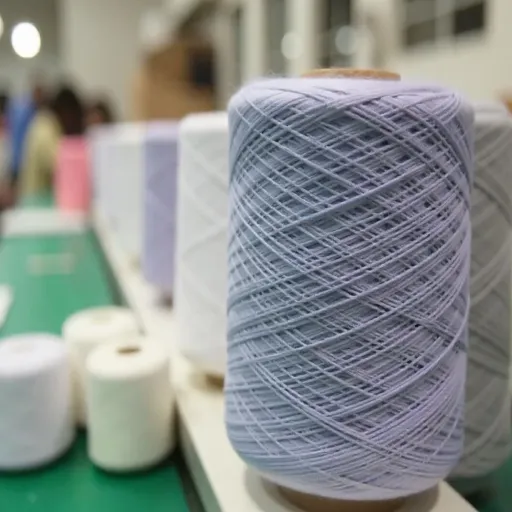
Acrylic yarn can be hand-blocked, but the technique differs from the one used with natural fibers. Wool, for example, will respond to wet blocking techniques efficiently because of its natural stretch and memory, while acrylic fibers never stretch due to their synthetic nature. Thus, the best method for acrylic yarn is steam blocking. In this technique, steam is applied so that the fibers can be gently softened and positioned into their intended form, but the structure of the yarn is not changed even after the process. This method not only improves the overall appearance of your project by giving a neat arrangement of the stitches and flattening the fabric but also gives a finish that shows that acrylic yarns can be as elegant and well-cut as natural fibers.
What Does Blocking Mean for Acrylic Yarn?
Blocking acrylic, in my case, is mainly done with the help of steam, which is the last stage of the work with yarn. Given the fibers he’s working with, although it seems counter-intuitive, such water-like treatment of acrylics cannot be done, hence carefully controlled steam is used instead. In the case of an acrylic yarn project, sometimes I steam the whole project to help the fibers relax and the fabric and the stitches to be the needed size. In this way, the stitch processes improve the draping of the finished work, and the overall impression of the work looks ‘cleaner’ and more professional. I use steam blocking to leverage the strong plasticity of acrylic yarn. As a consequence, the visual and structural result is the most appealing.
Why Would You Block Acrylic Yarn?
There are a variety of reasons as to why blocking acrylic yarn is essential. First of all, steam blocking techniques, when used, improve the final appearance of a piece by keeping stitches in place, which flattens and smooth fabrics. This technique also shapes the piece, supporting the edges and curves of the ornamented pattern, which is essential in laceworking or complex designs. In other words, blocking methods can be steam control techniques that help keep a specific size by letting the fabric rescale to size, therefore providing unity and details to the piece. When using this technique, it is better to set the steam temperature between 212°F and 220°F. Flame should not come into contact with the yarn as this may cause changes or bursting. Using a pressing cloth or barrier can help reduce the chances of such issues, ensuring synthetic fibers relax without losing structure.
Is There a Need to Block Acrylic Projects?
Blocking acrylic projects is not mandatory, but it is highly beneficial for achieving a more refined and professional finish. Steam blocking helps define patterns, smooth out irregularities, and align the fabric without altering the yarn’s inherent properties. The process enhances the drape, which is especially important for garments and decorative items, presenting the piece in its best form. Technical parameters to observe include maintaining a steam temperature between 212°F (100°C) and 220°F (104°C). It is essential to apply steam indirectly, using a barrier like a pressing cloth, to prevent potential heat damage to the acrylic fibers. This careful approach ensures the yarn is shaped effectively while preserving its synthetic integrity.
Exploring Blocking Methods for Acrylic Yarn

What Does Blocking Mean for Acrylic Yarn?
Blocking acrylic yarn refers to manipulating the structure of the synthetic fibers by applying steam to them. This procedure anchors the stitches and secures the final item’s dimensions and aesthetics. With heat and moisture from the steam, the acrylic fibers can become more stress-relieved and settled into a consistent and orderly form, which is particularly important when finishing yarn projects to a professional standard.
Why Would You Block Acrylic Yarn?
Acrylic yarn blocking comes in handy for more than one reason or purpose. More so than not, it also improves the project’s aesthetics by smoothing out any uneven stitches and preventing curling or stretching that is undesired from the stitches. This is more pronounced for garments, blankets, and accessories types of knitted projects where the fit is more important than the aesthetics. The other advantage of blocking is the improvement of the drape and texture of the knitted or woven piece so that at the end, there is a well-structured and neat surface of the object that reveals good craftsmanship.
Is There a Need to Block Acrylic Projects?
Although not every acrylic project requires blocking, it is advisable for pieces where accuracy and looks matter. Finished items such as lacework or cabled projects require blocking to bring out their designs. Furthermore, it is also essential when the gauge is supposed to be constant or when the final appearance of the whole project is unsatisfactory due to lumpiness or misshaped. Accepting blocking as the final step of a finish will raise the standards and endurance of any acrylic yarn project.
How Does Steam Blocking Work?
Our kindergarten experience is steam-blocking stitches, which use steam heat to relax the acrylic yarn, enabling it to be remolded into the desired shape. First, I lay my project on a heat-resistant surface with a pressing cloth supporting it so the yarn is not exposed. Then, I would use a steam iron or a steam gun and move around the fabric like a hovering aircraft, which doesn’t touch the surface but lets steam go through the fabric. The heat allows the acrylic fibers to relax and move into position as the tension is released. This technique enhances the visual aspect by making stitches even and ensuring that the end measurements are as per my requirements on the gauge. With moderate distress and the most cautious surroundings, the steamed yarn does not get mangled, and the result is tidy with no imperfections.
What is the Wet Block Method?
As far as my research is concerned, the wet block method is not as popular as other materials when using acrylic yarn. This, however, does not mean that it cannot be used for some projects. A wet block means the immersion of the completed piece into a vessel filled with water entirely permeated with the liquid. Soaking is done, and then, to avoid wringing, I only remove some water. The piece is patted dry on a towel. I stretch the piece to the required shape. The picture shows how the piece would look when using various elbow rests with a gentle pull. It’s essential not to flood the acrylic, as too much water may compromise its structure. In this situation, I always control the holding time; I do not keep it longer than ten minutes. This method doesn’t incorporate heat, for example, steam blocking, which can be more harmful for specific acrylic blends to increase the drape and stitch definition instances in the project.
Are There Other Blocking Methods Used?
It is evident from the study of materials that there are other different blocking techniques used for yarn projects. In addition to wet and steam blocking, spray blocking is practiced in this field. This method includes spraying a fantastic mist of water onto the project until it is moist, then pinning the piece onto a flat surface to dry. Using this method, much less water is soaked than wet blocking, and it is therefore more suitable for projects that do not require much shaping. Similarly, blocking wires is helpful in the edges and tension for larger projects such as shawls and blankets. All these processes are utilized depending on the yarn type of the project, its requirements, and the suitable finish to allow variety in how the finished knitted products will appear.
How to Steam Block Your Acrylic Projects

Steam-blocking acrylic projects involve a precise sequence of steps to ensure effective results:
- Preparation:
- Begin by gathering necessary tools, including a steam iron, blocking mats, T-pins, a gentle ruler or tape measure, and a clothes steamer if preferred.
- Ensure the workspace is clean and flat to accommodate the project piece.
- Position the Piece:
- Lay the finished acrylic project flat on the blocking mats, carefully arranging it to approximate the desired final shape.
- Use T-pins to secure the edges, ensuring equal tension throughout to maintain the intended dimensions.
- Steam Application:
- Fill the steam iron or clothes steamer with water and set it to a delicate or wool setting to prevent excessive heat exposure.
- Hold the iron or steamer a few inches above the fabric to avoid direct contact, which can melt the acrylic.
- Gently pass the steam over the entire piece, allowing the steam to penetrate the fibers and relax their structure.
- Shaping and Adjustment:
- As the steam softens the fibers, meticulously adjust the project’s shape, ensuring symmetry and alignment.
- Utilize the ruler or tape measure to verify dimensions and adjust as necessary while the piece is still flexible.
- Cooling and Setting:
- Allow the project to cool and dry completely on the mats in its pinned arrangement. This cooling period sets the fibers in place, retaining the blocked shape.
- Final Assessment:
- Once dry, unpin the project and perform a thorough visual inspection to confirm that the fabric is smooth and even and meets the desired dimensions and appearance.
By following these detailed steps, blocking your acrylic yarn project effectively enhances its presentation and functionality, resulting in a polished piece that reflects meticulous attention to craft.
What Tools Are Needed for Steam Blocking?
In my approach to steam-blocking acrylic projects, I gather several essential tools that ensure precision and effectiveness. Firstly, a steam iron or a clothes steamer is core, set to a delicate or wool setting to prevent overheating that could damage the yarn. Blocking mats provide a flat, heat-resistant surface vital for maintaining the project’s shape during the blocking process. T-pins are indispensable for anchoring the project, allowing for even tension and proper configuration. A pressing cloth is also used to protect the fibers from direct steam exposure. A gentle ruler or tape measure assists in confirming accurate dimensions throughout the procedure. Together, these tools facilitate a controlled and accurate steam-blocking experience, yielding a well-finished and professionally presented project.
Step-by-Step Guide to Steam Blocking
In my pursuit of a successful steam-blocking technique for acrylic projects, I have distilled the process into straightforward steps:
- Gather Your Materials:
- Assemble a steam iron or garment steamer, blocking mats, T-pins, a pressing cloth, and a measuring tape.
- Prepare the Workspace:
- Ensure your workspace is clean and flat. Place blocking mats down to provide a stable base for your project.
- Arrange the Piece:
- Lay the project flat on the mats and secure its edges with T-pins. This step is crucial for achieving the desired shape and maintaining even tension.
- Steam Application:
- Fill the steamer or iron with water and set it to a wool or delicate setting. Hover the steamer a few inches above the project, gently sweeping the steam across the surface to relax the fibers.
- Shape the Item:
- Adjust the project with your fingers for symmetry as you steam, and use a ruler to check dimensions. Ensure that the piece maintains its intended shape.
- Cooling Phase:
- Leave the project pinned and allow it to cool completely on the mats. This cooling period is essential for setting the yarn in its new form.
- Final Inspection:
- Once dry, remove the T-pins and inspect the piece thoroughly to ensure consistent drape and evenness.
These steps, grounded in authoritative resources, will help you achieve a professionally finished look for your acrylic projects. They minimize the risk of damaging synthetic fibers while enhancing the overall appearance.
Tips for Achieving the Best Blocking Results
Achieving optimal blocking results requires attention to detail and precision. Here are some expert tips combining insights :
- Understand Your Fiber:
- Know the nature of your yarn, whether it’s synthetic or natural. Acrylics require lower heat settings compared to natural fibers to avoid damage.
- Optimal Tools and Setup:
- Utilize high-quality tools such as stainless steel T-pins to prevent rusting, and invest in durable blocking mats that can withstand repeated use.
- Accurate Measurements:
- Use a digital measuring tape for precise measurement. This helps maintain accurate dimensions throughout the blocking process.
- Strategic Pinning:
- Pin strategically by starting from the corners and then securing the midpoint of each side. This method ensures even tension across the entire piece.
- Utilize Blocking Wires:
- Incorporate blocking wires for pieces with straight edges or lace patterns to maintain consistent borders without stretching areas out of shape.
- Steam Intensity:
- For acrylics, set steam iron or steamer to a “warm” or “wool” setting with continuous steam output of approximately 30-40 grams per minute to prevent overheating.
- Allow Sufficient Cooling Time:
- Leave the project pinned until it feels cool and dry. This cooling phase is critical for locking the fibers into the desired shape and dimension.
Implementing these tips can help you achieve a professionally polished end product that emphasizes the beauty and precision of your fiber work.
Does Wet Blocking Work on Acrylic?

Wet blocking is advised against acrylic yarn as its advantages are cut short due to its water solubility. Compared to natural fibers, acrylic Yarns don’t have high moisture retention and are opposed to any change with moisture content only. There are issues with elasticity, making it impossible for wet blocking to produce any changes, so steam blocking becomes chic. Traditionally, water alone has not caressed the secretion and left the entire project damp with the hopes of change, which never can come about. Instead, enabling steam to be used on the yarn is wise as it adds refinement to its production.
How to Wet Block Acrylic Yarn
I usually do not recommend wet blocking for acrylic yarn precisely because its synthetic properties make it less likely to change shape due to water. However, if this is the case, I do it cautiously. If this has to be done, I have it with caution. I first take an acrylic piece and dip it into lukewarm water with soap until it is completely soaked. After around 10 minutes, I take the piece out haphazardly, pressing it against the wall to remove most of the moisture but being careful not to squeeze too much. I dispose of it and put it in the towel so it doesn’t lose shape and air dries. The piece is allowed to dry in this position till absolutely dry. I do, however, still prefer steam blocking because steam being warm makes the fibers relax and take shape, which, in my opinion, gives a better finish to the piece than the wet method gives.
Pros and Cons of Wet Blocking
For organizing wet blocking, I consider it to be a pretty soft option for acrylic yarn. Still, when I think about it, I weigh the positives and negatives that are credible from considering the most pertinent authorities on the scene. And this is. There are some significant asset increases, And this is. The use of this method helps obtain a reasonable definition of stitches that are knitted in natural fibers. However, this benefit does not owe very well to acrylics because they are not very porous, making it reversible. In theory, moisture is unlikely to rule the day because acrylic’s technology is fundamentally non-porous, and A and C allow minor girth deformation under moisture influence.
Pros:
- It can temporarily enhance the stitch definition for non-acrylic, absorbent fibers.
- It helps set projects in place without altering fiber tension frequently.
Cons:
- Acrylic fibers exhibit minimal reshaping in water due to low absorptivity.
- The process can lead to uneven blocking results, requiring substantial reshaping post-drying.
- Technical parameters advise a 10-minute soak time and a mild detergent at around 30°C (86°F) to prevent fiber impairment.
In conclusion, while wet blocking may offer marginal improvements for acrylic, the method lacks effectiveness compared to steam blocking. Acrylic’s synthetic properties necessitate controlled heat for optimal outcomes, emphasizing steam blocking as the superior technique for shaping and refining acrylic projects.
Common Mistakes When Blocking Acrylic Yarn

- Excessive Heat Exposure:
- Applying too much heat can melt or damage the fibers. Always use a steam setting suitable for delicate fabrics and maintain a distance between the steam source and the project.
- Direct Contact with Iron or Steamer:
- Allowing direct contact can harm the yarn’s integrity. To prevent melting, keep the steam iron or steamer a safe distance above the fabric.
- Insufficient Pinning:
- Failing to use enough T-pins results in uneven tension, leading to misshapen or asymmetrical pieces. Ensure adequate pinning to maintain consistent dimensions.
- Inadequate Cooling Time:
- Removing pins before the project fully cools can cause the shape to revert. Allow ample time for the piece to set correctly in its pinned arrangement for lasting block effects.
- Oversteaming:
- Too much steam can saturate the fibers, making them overly flexible and difficult to manage. Use steam sparingly and only enough to relax the fibers.
By being aware of and avoiding these common missteps, the blocking process for acrylic yarn can be conducted more efficiently, yielding a refined and visually appealing final product.
Why Some Knitters Say Can’t Block
Some knitters argue that blocking acrylic yarn is unnecessary or ineffective primarily due to its synthetic nature. Acrylic fibers lack the moisture absorption and elasticity natural fibers possess, leading to less significant changes when exposed to traditional blocking methods, such as wet blocking. Therefore, when addressing the question of “Can’t Block,” it’s crucial to consider the technical parameters involved in the blocking process:
- Fiber Composition:
- Acrylic is a synthetic fiber with low water absorbency, making wet blocking less impactful.
- Heat Sensitivity:
- Appropriate steam settings are crucial. Use a steam iron on the “wool” or “warm” setting, ensuring a safe distance to prevent fiber damage.
- Pinning Strategy:
- Proper tension is achieved using enough T-pins, particularly at critical points like corners and the midpoint of edges.
- Necessary Cooling Time:
- Allow the piece to cool entirely before unpinning to ensure the yarn retains the desired shape.
By understanding these specific technical parameters, knitters can more effectively manage expectations and results when attempting to block acrylic yarn. Despite these challenges, steam blocking remains the most reliable method for achieving a polished and precise finish with acrylic fibers.
Pin Placement Tips
Ensuring precise pin placement is crucial for the effective blocking of acrylic yarn. To achieve optimal results, consider the following tips collated :
- Strategic Pinning:
- Secure your piece with T-pins or rust-proof quilting pins. Pins should be placed approximately 1-2 inches apart to maintain even tension across the fabric.
- Target Key Areas:
- Focus on the garment’s corners, edges, and center points. Begin pinning at the corners, then move to the center, ensuring the fabric is evenly stretched.
- Consistent Tension:
- Maintain consistent pull while pinning. Use a measuring tape to ensure symmetry and uniformity in pin placement, which helps prevent distortion upon drying.
- Adjust as Necessary:
- Be prepared to adjust pins as the piece dries. This ensures that as the fabric relaxes, it conforms to the desired dimensions without compromising shape.
When pinning, consider technical parameters for your specific project. Effective steam blocking hinges on using pins adequately positioned to achieve a refined finish, with attention to tension and symmetry. By adhering to these guidelines, you can maximize the potential of your acrylic projects and achieve a polished appearance.
How to Avoid Kill Acrylic During Blocking
I utilize a specific strategy that enables me to apply steam while taking good care of acrylic so as not to “kill” the fabric during the blocking process. First, I set my steam iron to a low or wool setting, which is crucial to avoid burning any fibers. The safe distance, approximately 1 to 2 inches away from the fabric and directed towards the material, allows steam to help relax the fibers without burning them. My firm policy is to clarify that steam should not be overused, as excessive steam can cause saturation.
In addition, I use a reasonable number of T Pins pinned on the piece in areas like corners and edges to anchor it in position and avoid any unwanted stretching. I am a bit slow here; I do not unpin until the entire project has cooled off, so the blocked shape is held fast. With these technical features, including correct temperatures, correct positioning of pins, and cooling time, I do not end up ruining my acrylic works while maintaining a good finish.
References
Frequently Asked Questions (FAQ)
Q: What is the best method of blocking acrylic yarn?
A: Steam blocking is often considered the best method of blocking acrylic yarn. It involves using steam to set the shape of the crochet or knit pieces without applying direct heat, which helps avoid “killing” the acrylic fibers.
Q: Can I use a washer and dryer to block acrylic yarn?
A: While some people use the washer and dryer method, it’s not recommended for blocking acrylic yarn. The heat from the dryer can “kill” the yarn, flattening its texture. It’s safer to use steam-blocking or spray-blocking techniques.
Q: Do crochet projects made with acrylic need blocking?
A: Crochet projects made with acrylic yarn can benefit from blocking. Blocking helps even out stitches, sets the shape, and enhances the overall appearance of the completed project.
Q: How do I use a spray bottle to block acrylic yarn?
A: Fill a spray bottle with water and lightly mist your knit or crochet project. Lay it out on a blocking board or ironing board, pin your pieces into the desired shape, and allow it to dry completely.
Q: Should I block before seaming my crochet or knit pieces?
A: It’s generally a good idea to block before seaming. Blocking helps ensure the pieces are the correct size and shape, making it easier to stitch them together accurately.
Q: How long do you need to steam block acrylic yarn?
A: The time needed for steam blocking varies depending on the project size. Typically, a few seconds to a minute of steam exposure is sufficient for each section. Always keep the steam source at a safe distance to prevent damage.
Q: What is the risk of using a hair dryer to block acrylic yarn?
A: A hairdryer can apply too much direct heat, potentially “killing” the acrylic yarn. To maintain the fibers’ integrity, it’s better to use steam or spray-blocking methods.
Q: Why might a yarn label suggest blocking?
A: A yarn label might suggest blocking to enhance the finished look of the garment or project. Blocking can help even out stitches, set the shape, and make the project look more polished.
Q: Is there a difference between blocking a knit sweater and a crochet sweater?
A: The basic blocking principles apply to knit and crochet sweaters. However, the density and stitch patterns may require slight adjustments in the blocking method, such as the amount of steam or water used.
Q: What are blocking pins used for in steam blocking?
A: Blocking pins secure your project to a blocking board or surface while it dries. During the blocking process, they help maintain the desired shape and size of the crochet or knit piece.