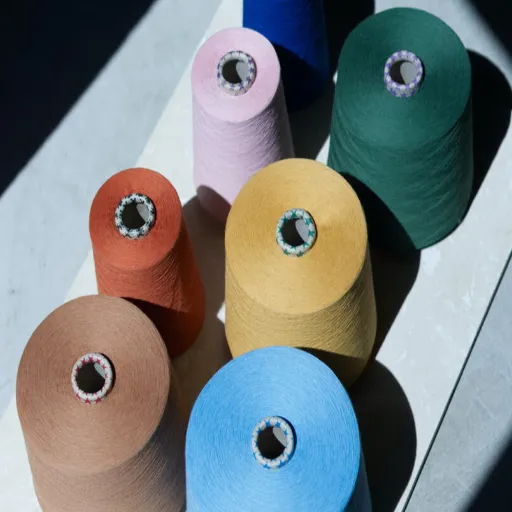
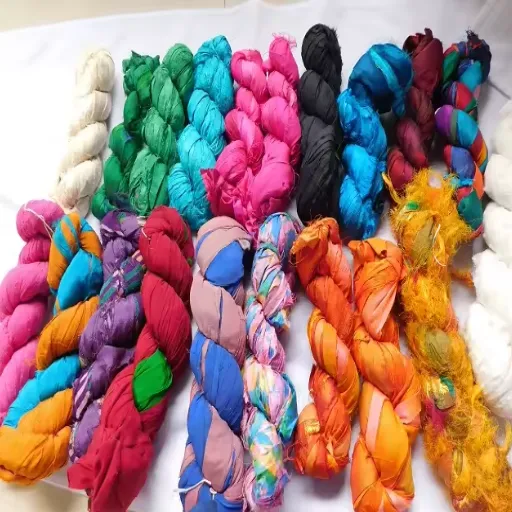

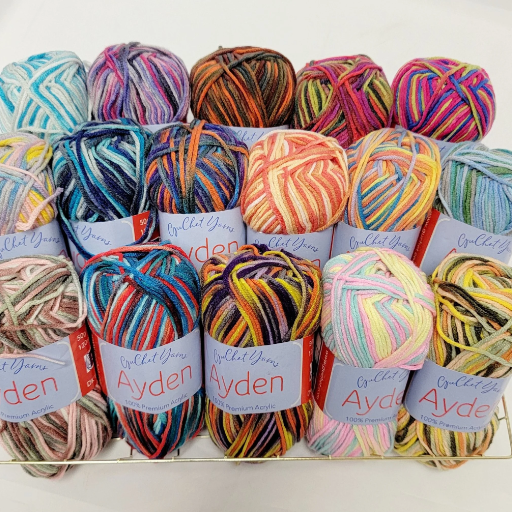


Blocking is the method of arranging work so that it remains in a desired shape. An elegant finish is far more than just a good aesthetic; it provides an overall cohesive look to your crochet or knitting projects. Natural fibers respond well to wet blocking methods but acrylic yarn usually needs additional heat to get the same polished results. Blocking of acrylic yarn is also an equally well studied field with a great scope in science. This guide is designed to cover every little detail related to blocking acrylic yarn starting with the basic science behind it to the junior high level tools needed, and various step-by-step instructions of each blocking technique. Regardless of your skill level, from novice to advanced, this guide will enable you to effectively block acrylic yarn with specific accentuation on shape, draping, and that overall dynamic look.
How Do You Block Acrylic Yarn?

The process of blocking an acrylic yarn project is known as killing or steam blocking because synthetic fibers do not respond the same way as natural fibers. For this method, it is important to have a steam iron or garment steamer, blocking mats, and pins that do not rust. Place the project on the mat, the way you want it shaped, and pin it into position. While using the steam iron, keep the fabric an inch away at the top, and steam it to relax the acrylic fibers and set the intended shape. After the steam passes, allow the project to cool to room temperature, and when it’s fully dry, it will retain its loftiness and enhanced structure. Avoid the use of excess steam, as it may irreversibly harm the fibers.
Understanding the Blocking Method for Acrylic
Blocking, a critical step in the construction of acrylic projects, enhances an item’s overall finish, shape, and aesthetic appeal. The capabilities of blocking acrylic fibers are foremost setting the project into its intended dimensions, which greatly augments the project’s form and style. Additionally, it smooths out uneven stitches and brings intricate patterns such as lacework into sharp definition. Unlike wool and other natural fibers, however, acrylic has very little elasticity, which precludes it from responding favorably to traditional wet blocking techniques. Steam blocking is the more preferred method because synthetic fibers respond better to heat than water, allowing them to be softened and altered with heat in a way that gives the project a permanent set. The caveat is that excessive exposure to steam can severely damage acrylic fibers by burning and irrevocably flattening or melting them. Meticulous care during the steaming step will guarantee success.
Essential Tools Needed to Block Acrylic Yarn
1. Steamer or Iron with Steam Setting: Critical for applying controlled heat, moisture and steam to soft and set the project’s acrylic fibers. Ensure it comes with a thermoregulator to prevent overheating.
2. Blocking Mats: Provides a planar work surface that is also heat resistant to pin or mold your project during the blocking process. Interlocking mats are especially useful for larger or irregularly shaped projects.
3. Rust-Proof Pins or T-Pins: Used in holding the edges of your project to block them into the desired shape ensuring uniformity and consistent dimensions.
4. Protective Cloth (Optional): A pressing cloth or thin cotton towel can be used to cover the area of direct contact from the iron or steamer the project to lower the chances of damage or melting.
5. Measuring Tape or Ruler: Helps verify and achieve precise shaping especially for projects that require meticulous measurements.
This set of tools balances efficiency and safety, ensuring optimal blocking and professional finishing on your acrylic yarn projects.
Step-by-Step Guide to Steam Block Acrylic Yarn
- Get Ready with Your Tools: Ensure that your workstation is appropriate for the task at hand. Prepare a flat surface that is free of obstruction. Your work area mat and any blocking towels to shield your work surface while also providing a foundation for pinning.
- Get the Acrylic Yarn Project Ready: Get your work surface ready. Start with your project and place it onto the surface you prepared. Smoothen it al the to eliminate any folds, so that it sits flat, and shape it to the final outcome picture.
- Secure the Project : Ensure that the project is held firmly in place before applying any further work to it. Use rust proof T-pins and place them strategically around the edges of the frame to keep the project pinned. Ensure that you do not put too much or too litte fabric involving the project.
- Garment Steamer or Iron: Ensure that you fill the steamer with distilled water. If you are using a garment iron, the steam setting should be okay. Even when setting the iron, make sure the steam temperature is kept at the lowest possible.
- Gradually Using Steam: You should not hold the steamer directly over the fabric for shape purposes as stated above. Smooth movements of the hand should be used, ensuring that steam is applied evenly over the surface and avoiding unneeded contact. Further layers of protection or shielding may be cover with a pressing cloth.
- Let the Project Cool – After steaming, allow the project to cool and dry while still pinned in order to achieve the desired shape. This will ensure that the fibers are locked in place.
- Remove Pins and Inspect – Take out the pins gently without causing any damage, and look through the project for any potential problems that they might have. If there are issues, then sections of the project can be redone by being re-shaped as required.
This method guarantees that your acrylic yarn project has the precision needed for shaping and will remain durable lasting results.
Can You Steam Block Acrylic Yarn?

Block steaming acrylic yarn is indeed possible, but care must be taken not to ruin the fibers. Because acrylic is a synthetic material as opposed to a natural one, the application of heat must be handled with utmost care, so set the steam iron to a low temperature. In addition, the iron should never touch the yarn being worked on; it is best to hold it a few centimeters above the surface and allow the steam to come out freely to reshape the relaxed yarn fibers. “Killing” as it is often called, can profoundly alter the texture as well as the shape of the yarn; therefore, it is advisable to do a test run with a small swatch before executing the entire design.
Why Acrylic Yarn Might Need Blocking
To achieve a more polished look and refined structure on a project, acrylic yarn might require blocking. Blocking helps achieve symmetry in stitches, sculpt the piece, and ensure the piece retains its intended shape due to acrylic not having elasticity. This method is particularly helpful for more advanced projects that are lacework or stockinette and include stitches that curl or twist. Blocking acrylic can also improve the silhouette and overall presentation of the piece, rendering it neater and more professional. However, due to the synthetic materials, adequate measures such as steaming from a distance to avoid direct heat should be taken to prevent damage or unwanted textures.
The Risks and Benefits of Steam Blocking
Steam blocking yields prominent advantages, especially on the acrylic and other synthetic fibers. The finished projects’ material will not be permanently changed. The use of steam on the fibers will simplify the final touches by allowing more defined stitches and clearer edges, which are vital for professional quality products in intricate designs.
Nonetheless, steam blocking comes with multiple potential risks that must be managed. High temperature or careless treatment can damage synthetic fibers beyond repair through processes like melting, warping, or uneven texturing. Moreover, the fabric could be over-stretched if too much pressure is applied during the procedure, causing it to assume a shape that goes beyond its design. In distance from the iron or steamer, consistent application of a pressing cloth or hovering method helps mitigate the risks by evenly distributing steam, which is also at a safe distance from the fabric. Using these controlled techniques will ensure that the advantages of steam blocking are maximized while reducing potential harm.
How to Use a Steam Iron Effectively on Acrylic
1. Prepare the Workspace – Set up the ironing board or flat surface with proper ventilation. Utilizing a pressing cloth made from cotton works best to shield the iron from direct contact with the acrylic material.
2. Set the Iron to the Correct Temperature – Emphasize that the steam iron must be on low or synthetic settings, as overheating is never an option. Acrylic fibers are sensitive to heat, and excessive temperatures will warp or encase them in a molten state.
3. Test on a Small Area – Explain that the ironing method should be first tried on a smaller section that does not lie within the boundaries of the area of focus. This helps ensure that no damage is risked.
4. Hover the Iron – It is more ideal to keep a slight gap between the heated soleplate and the acrylic. Freezing the steam’s direct contact with the surface can significantly decrease the risk of distortion or damage.
5. Apply Steam Evenly – The smooth and controlled motions made with the iron should effectively distribute the steam uniformly across the surface. Doing this assists in the preservation of the fabric’s original shape.
6. Allow the Material to Cool – Once the steaming process is complete, avoid disturbing the item to maintain the desired form resulting from the cooling process. Doing this will strengthen the fibers without permitting any further reshaping.
You can prevent damage to acrylic materials while taking advantage of their smoothing and shaping attributes by using steam, and following the precise steps provided.
What Are the Different Blocking Methods for Acrylic Yarn?

Acrylic yarn can be blocked either by wet blocking or steam blocking.
1. Steam Blocking – In this method, steam is utilized to loosen and contour the shape of acrylic fibers. Smoothing and precise shaping can be achieved by holding a steam iron a few inches above the fabric, so hot steam, not direct contact, relaxes the strands. Precise steam blocking is especially useful where detail accuracy is paramount.
2. Wet Blocking – This style entails immersing the acrylic piece in moderately cool water, followed by gently squeezing out extra water and pinning it to the desired shape. Because of the synthetic nature of wet blocking, it is infrequently heard of in the context of acrylics, however it can be useful in setting the structure of light weight projects.
Each method has its advantages. It all depends on the desired result and the project in question. Mechanics of acrylic yarn dictate that steam blocking is preferred due to its performance superiority and time efficiency.
A Closer Look at Wet Block vs. Spray Blocking
Both wet blocking and spray blocking have their unique techniques and applications tailored to specific yarn projects and fibers. The wet blocking technique entails placing the item to be worked on wholly submerged in water, then gently squeezing the water out while shaping the piece to the correct size as it dries. This approach is especially helpful with natural fibers like wool because soaking enhances the fibers’ pliability and guarantees uniformity in the end product. It is best for items that need a drastic change in shape or those that need to be refined and polished.
Conversely, spray blocking is less aggressive and works better with items made using synthetic fibers like acrylic yarn. In this method, instead of soaking the item, the fabric is water misted until damp followed by meticulous pinning and shaping. This technique is a more efficient option than wet blocking and is appropriate for items that need small changes or gentle adjustments to maintain the original texture and form.
The type of fiber, size of the project, and the finish required determines what method of blocking will work best. Wet blocking relaxes the fibers deeply and provides precision while spray blocking is gentler but faster.
When to Use Blocking Wires and Blocking Boards
Blocking wires and blocking boards are some of the tools needed to attain a professional finish for a knitting or crocheting project. For items with sharp edges or consistent curves like lace shawls, scarves, or doilies, blocking wires work wonders. They ensure there are no clean edges and there is no distortion during the blocking process. Blocking boards are most useful for projects that require consistent measurement and uniform tension, as they are well padded. Their grid patterns provide clear boundaries for shaping and securing pieces uniformly with other blocks for garments or multi-panel designs. Most of these tools work best in combination for precision and polish.
Why Do Acrylic Projects Need Blocking?

Blocking is necessary in achieving the correct shape, size, and polished finish for acrylic projects. While steam setting the imitation fibers, the stitches can be placed permanently shaped to an exact position when the steam or heat is applied. Blocking smooths the stitches, sets edges, and ensures all components are in unison. This is vital in complex patterns, as well as assembly of multiple individual pieces. Blocking also allows professional and polished precision for uniformity that is a vital part of completing crochet acrylic projects.
Impact of Blocking on the Finished Piece
Blocking helps in increasing the functionality and overall aesthetics of a project. Achieving a professional polish involves aligning the edges of a garment or textile, setting it to the desired dimensions, and opening up the stitch pattern. All these factors provide structural firmness, preventing curling or misshaping over time. For lacework or intricate designs, blocking accentuates details, making patterns as the name suggests very striking and sharp. The process makes it easier to rectify pieces that are not aligned or achieve uniformity and become meddlesome for multi-component projects. In conclusion, blocking gives a high increases the durability and functionality of a work piece while taking simplistic design elegance. A testament to high quality craftsmanship.
Improving the Appearance of Crochet and Knit Items
Improper or insufficient blocking tailored to projects will compromise the neatness of crocheted or knitted items. Foam boards and blocking mats come equipped with gridlines to aid in shaping a precise flat surface. Rustproof pins or blocking wires guarantee tension and precision order during the blocking phase, while for soaking, a spray bottle or basin will suffice for wet blocking. Controlled application of steam or heat requires a garment or steam iron. Wet and steam blocking are ideal for natural materials like wool, while sluggish acrylic fibers need gentle steams to soothe stitches.
To ensure polished end results, proper maintenance and storage play an equally important role. To prevent moisture build up and distorting shape, pieces should be stored in shape permitting breathable containers. Following fiber sensitive washing guidelines ensures vibrancy and texture while maintaining integrity over time. With these methods, enduring high-quality finishes on crocheted and knitted items is attainable.
Is There a Best Way to Block Acrylic?

The method of blocking acrylic depends on the outcome and requirements of the specific project. Steam blocking is the most effective method for acrylic fibers as applying steam enables the heat to relax the fibers without completely melting or distorting them. To achieve the best results, do not let the iron come in direct contact with the material, preferably using a steam iron set at a safe distance or a garment steamer. First pin the piece onto a blocking mat in the desired position, then steam. Once the piece is steamed, allow it to cool completely to set the fibers. Although Acrylic Wet blocking is uncommon, it does exist. However, due to the synthetic nature of the fibers, it’s generally considered less effective.
Comparing Methods: Steam, Wet Block, and Spray Blocking
In evaluating the effectiveness of these blocking methods, each has its distinct pros and cons based on the material type and the target outcome.
- Steam an item’s water vapor blocking: This is the most effective method for synthetic polymers and acrylics due to the steam’s ability to slightly heat and reconfigure the fibers to give them a set position. They will resist returning to an unbound position. This method provides a durable precise shape and strong crisp edges while removing stubborn curls. Overheating or direct contact will cause irreversible damage which is why care must be taken.
- Wet Blocking: This method involves soaking a piece in water, reshaping it, and allowing it to air-dry. Optimal for constructive hydro-static pressure installations, wet blocking is best suited for natural fibers like wool. It is not as effective for intricate lacework because acrylic does not absorb water but is a great choice for stretchable fibers. The material lacks the elasticity needed to hold significant reshaping which limits acrylics.
- Spray Blocking: This technique can be utilized for non-elastic fabrics as well. It is the least invasive and simplest technique, ideal for light adjustments. Spray blocking is done by lightly misting the fabric in question and pinning it into shape. This approach can work for small changes but does not offer the same type of permanence steam and wet blocking provide.
With steam blocking being most effective for synthetic fibers and wet blocking performing better on natural materials, it is evident that the blocking method used depends on the material’s properties and the project’s requirements.
References
Frequently Asked Questions (FAQ)
Q: How does using a hair dryer affect the blocking process?
A: Using a hair dryer can be an effective way to speed up the drying process after blocking, but it’s important to be cautious as high heat can kill the acrylic, causing it to melt or lose its shape.
Q: Should I block my baby blanket made with acrylic yarn?
A: Yes, blocking your baby blanket made with acrylic yarn is a great idea. It helps to even out the stitches and can enhance the overall appearance of the blanket. Just ensure to follow the appropriate blocking method.
Q: What happens if I use a washer and dryer for blocking?
A: Using the washer and dryer method can be risky for blocking acrylic items. High heat can kill the acrylic fibers, causing them to melt or shrink, so it’s usually not recommended. Instead, opt for wet blocking or steam blocking.
Q: Can I block using single crochet stitches?
A: Yes, you can block projects made with single crochet stitches. The blocking process will help to even out the stitches and improve the overall look of your crochet work.
Q: Is it necessary to block projects made with acrylic yarn?
A: While it is not strictly necessary to block projects made with acrylic yarn, blocking can significantly improve the final appearance by smoothing out uneven stitches and helping the piece drape better.
Q: How do I know if I cannot block my acrylic item?
A: If the yarn label states that the item is not suitable for blocking or if the yarn is heavily textured or has a tendency to melt under heat, you may want to avoid blocking that specific acrylic item.
Q: What should I do with the ends before blocking?
A: It’s best to weave in any loose ends before blocking your project. This ensures that the ends are secured and won’t unravel during the blocking process.
Q: What is the forum community saying about the best way to block acrylic yarn?
A: Many members of the forum community recommend wet blocking as the safest and most effective method for acrylic yarn. They also share tips on using steam and suggest avoiding high heat to prevent killing the acrylic fibers.