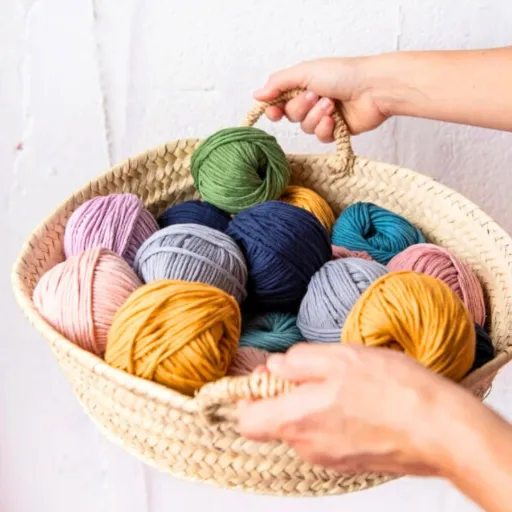


Blocking is an important finishing method that adds value to crocheted or knitted pieces. It is true that blocking is mostly applied to natural fibers such as wool or cotton, but due to the synthetic nature of acrylic yarn, a different technique is warranted. This guide’s focus is to provide an elaborate procedure customized to guarantee success with blocking acrylic yarn. In this article, I will discuss the available tools and materials, some common methods such as steam blocking, and best practices aimed at safeguarding the integrity of your creations. From a detailed lace shawl to a sturdy blanket, achieving the precise contours through blocking will bring unmatched professionalism to your acrylic yarn projects. Keep reading to discover the reasoning that supports the procedure along with helpful suggestions to get your optimal finish.
What is blocking and why should I block acrylic yarn?

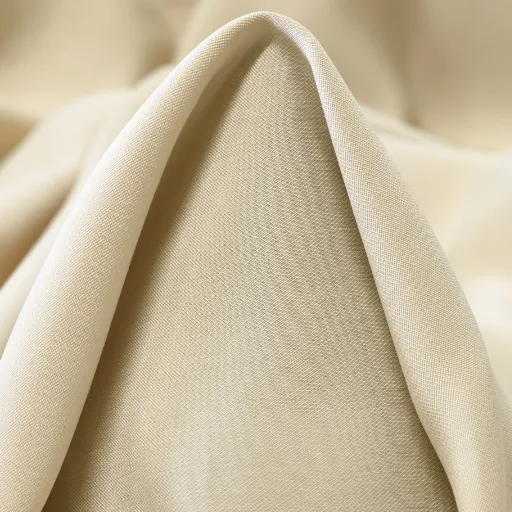
Blocking is regarded as the final step in the finishing process of shaping, smoothing, and setting the dimensions of a knitted or crocheted piece. It encompasses stretching and fixing the item into its appropriate shape while aligning the fibers through heat or moisture. In the case of acrylic yarn, blocking is highly important since it aids in relaxing the stitches, reducing curl at the edges, and improving the overall fall. While traditional wet blocking proves to be less effective with acrylic, steam blocking does much better on synthetic materials since they can be shaped and set into the desired position for a neat, finished appearance.
Understanding the basics of blocking
Different blocking techniques are suitable depending on the fiber used in your project. For wools and cottons, their natural fibers make wet blocking very effective because the material can soak up water and hold its shape when drying. Submerge the item in warm water, lift it and squeeze out the excess water, and pin it onto a blocking mat into the intended shape. Steam blocking works best for synthetic fibers like acrylic. Do not touch the project directly with the steam iron or steamer as they will melt or damage the piece, instead, hover over the project to relax the fibers. Properly finishing your work will ensure a professional look, while also maintaining definition, structural integrity, and enhancing the overall appeal. To guarantee the best results, always check the yarn manufacturer’s instructions for the recommended blocking technique to follow.
Benefits of blocking acrylic yarn projects
Blocking acrylic yarn projects helps improve the quality and durability of the finished items in a number of ways. Firstly, it makes sure there is uniform stitch definition which allows intricate patterns and textures to be more easily recognized. Secondly, blocking helps polish and straighten edges which improves the overall appearance of items like garments, blankets and other decorative items. Moreover, steam blocking improves the movement of the acrylic fibers which helps improve the softness and drape of the item while still maintaining its structural strength. By correcting small inconsistencies with tension, it standardizes the overall size and shape of the project ensuring better function or fit. In summary, blocking acrylic yarn helps achieve the intended outcome in a refined, stronger, and more appealing manner by making it more aesthetically pleasing.
Common misconceptions about blocking acrylic
One misconception is that blocking an acrylic yarn is not needed because the material is synthetic. Even if the acrylic does not respond to wet blocking like natural fibers do, steam blocking is very effective in relaxing fibers and setting the shape of the project. Another false idea is that the application of heat while blocking will always damage acrylic yarn. In fact, when done with the proper tools like a steam iron or garment steamer at a safe distance, the process will not melt or deform the material. Lastly, some people think blocking acrylic projects do not affect the final look or structure. In reality, blocking aids in aligning stitches, fixing minor tension issues, and improving the overall appearance and functionality of the piece.
Can you steam block acrylic yarn?

Indeed you can steam block acrylic yarn, but precaution and proper technique must be applied. With the use of a steam iron or a garment steamer, using a safe distance, ensure that the heat does not make contact with the yarn. In this way stitching alignment is improved along with the structure and appearance of the project. Always test on a small swatch first to ensure the desired result.
The steam blocking process for acrylic yarn
- Prepare Your Workspace
Die completed task onto a heat-resistant surface while preserving the desired shape. Use rust-resistant pins for the edges and corners along the sides and ensure that proper alignment is kept all throughout the sew seams.
- Set Up the Steaming Device
A garment steamer or steam iron can be used. Set the steam iron to the lowest setting. Regardless of the method used the steam iron must be held 1-2 inches above the project to inhibit contact.
- Apply Steam Gradually
The steamer or steam iron can be held at a distance of 1-2 inches, and then moved from side to side so steam can reach different areas of the manner. But do not apply too much as can result in the weakening of the steam.
- Allow to Cool and Dry
After steam setting the project, let the piece cool down without moving it. This guarantees that the yarn retains the new configuration set during the steaming process. Ensure that the piece is completely dry before unpinning, as this will aid in providing the desired measurements.
- Test on Swatches First
Always execute the steam blocking technique on a spare swatch of the same yarn first. This helps in assessing its potential impact on the primary project while ensuring that its compatibility with the fibers will not result in irreparable damage.
Following these guidelines allows safe blocking of the acrylic yarn, leading to discernable refinement in stitch detail, lending a more polished aesthetic characteristic of expert craftsmanship.
Tools needed for steam blocking
When steam blocking acrylic yarn, the following tools will ensure the process is done optimally:
- Steam Iron or Steaming Device
Using a steam iron with adjustable settings works well to produce steam; alternatively, a handheld garment steamer yields uniform results.
- Blocking Mats
Thick, heat-resistant foam mats offer a stable and secure surface for pinning the project during blocking.
- T-Pins or Rust-Free Pins
Sturdy, non-corrosive pins hold the yarn in place while ensuring the project retains the desired shape and is contour casted.
- Measuring Tape or Ruler
A measuring tape and other symmetry achieve tools work towards precise perimetric dimensions giving the object uniformity.
- Pressing Cloth (Optional)
A lightweight steam and heat resistant cloth may be placed above the steam and under the yarn protecting the more delicate fibers from excessive heat.
Each tool ensures safety and success of the steam blocking process while avoiding yarns alterations and damage.
Precautions when steam blocking acrylic
When steam blocking acrylic, care must be taken to not harm the fibers. The steam source from a straightening iron or steam generator must not touch the material directly, as the heated tip may cause irreversible damage to the acrylic fibers or melt them. The distance must always be several inches away and not directly above the steam source. If light pressure is being applied, it is best to use a pressing cloth or towel as a protective barrier to help diffuse the heat and lower the chances of damage. Furthermore, avoid applying too much steam or exposing acrylic material to heat for longer periods of time, as it tends to lose its shape and structure. Make sure first to test the process on a piece of acrylic to see how the fibers respond, especially in inconspicuous spots. By taking these actions, one can maintain the durability and aesthetics of the material.
How do I wet block acrylic yarn projects?

To wet block acrylic yarn projects, start by filling a basin with lukewarm water and adding a small amount of mild soap, detergent, or fabric softener if desired. Soak the entire project without any movement which may cause bubbling or tangling. Let it sit for 15 to 30 minutes then gently pour out the water, pressing the towel onto the fabric to soak up some moisture—avoid wringing and twisting the item. Place the garment on a blocking mat, clean area, or flat surface, capsules and shape it to the correct sizing, using rust-proof pins if necessary. Leave the piece in a well-ventilated area away from the sun or heaters to completely air dry. This technique guarantees that the shape will be kept without compromising the fibers.
Step-by-step guide to wet blocking acrylic
- Prepare the Washing Area
Soak a clean sink or basin with lukewarm water. Add a splash of mild detergent, or for softer fabric, add no rinse wool wash if cleaning the fabric is necessary. Cautiously remember not to surpass 30 degrees celsius, or 86 degrees fahrenheit.
- Submerge the Acrylic Piece
You may place the item into the water and let it sit for 15-30 minutes. This is ideal to ensure the fibers remain unstressed but absorb moisture evenly. Refrain from agitating the item as it may cause excessive movement that could lead to distortion.
- Drain Water and Press Out Excess
Gentle guide the object above the surface of the water, holding its weight so that it does not sag. Flush the basin, then either compress the cloth between your palms, or position it amongst towels to eliminate extra moisture. Do not contort or twist the fabric as this will change its configuration.
- Shape and Secure
Next, the blocking mat should be set up where the fabric could be laid flat together with an ironed clean towel, which can both serve as a clean surface. After that, the piece can be pinned into place carefully, avoiding complete overstretching. Instead of using ultimate force, it is advised for these pieces to be blocked with pins. It is also valid to say that greater precision can be achieved by using blocking wires for straighter edges.
- Dry Thoroughly
For comprehensive drying, the blocked project should be placed in a shaded area with good ventilation to avoid sources of heat like radiators that can damage the fibers. Contrary to common belief, placing the acrylic fibers under the sun can lead to improper retaining of the new shape which is why the shade is preferred.
By carefully following the step described above, one will be able to use the layout in ensuring acrylic items have smooth and well-defined edges without losing the ability to be structural strengthened in order to enhance the overall appearance along with functionality of the derived project.
When to choose wet blocking over steam blocking
Wet blocking is the ideal choice when dealing with delicate or natural fibers such as wool and alpaca because it offers consistent shape and better tension equilibrium. This technique is particularly beneficial for openwork designs such as lace, where accurate shaping is critical to emphasize the intricate features. It is also the best option for projects that incorporate considerable resizing as the soaking method relieves tension in the fibers, rendering them more pliable. Moreover, unlike fabrics that are prone to shrinking or deforming, wet blocking is best suited for items that are able to endure long exposure to water.
Drying techniques after wet blocking
Ensuring the appropriate drying method is applied after wet blocking is important to maintain the shape and structural integrity of the project. First, gently squeeze the water from the item without twisting or wringing the fabric as this can distort fibers. Subsequently, roll the item in a fresh, absorbent towel and press firmly to extract additional moisture. For bigger projects, it may be necessary to repeat this step with a second towel. After sufficient water has been removed, lay the garment on a blocking mat pat with a clean towel or mesh liner, arrange the garment into position with pins or blocking wires, and shape the garment to the desired blocking shape. Avoid placing the garment in direct sunlight as this can lead to over-drying which fades the colors of the material. A fan can be used to expedite the drying depending on the fabric, however, the dryer should only be used if the garment allows as it can weaken certain fibers. Maintaiing accurate drying techniques ensures the garment maintains the block dimensions and structurul integrity.
What are the best blocking methods for different acrylic crochet projects?

When blocking projects made with synthetic fibers like acrylic, the absence of shape retention unlike wool requires different approaches. The optimal technique is steam blocking. While the project is pinned, place the iron or garment steamer an inch away and gently apply steam. It is important not to press the iron directly against the material to avoid melting and/or distortion. For projects that need minimal alteration, wet blocking is an option, but this technique is less effective on acrylic materials. Test applying acrylic blocks on a swatch sample to ensure it is responding correctly before using these steps. The techniques suggested aid in maintaining the piece’s structure and ensuring its durability.
Blocking methods for acrylic sweaters
Due to the characteristics of the fibers, steam blocking is considered the most effective method for blocking acrylic sweaters. First, the sweater must be placed on a blocking board and pinned to the exact dimensions needed. Then, with a steam iron or garment steamer set to yield steam, hold the device about one inch above the surface and allow steam to come out. Focus on not applying any pressing directly as that may destroy the fibers or melt them. Make certain to focus on steam distribution and setting shape while relaxing the fibers on the entire piece. Wet blocking may also be employed, although it is less effective with acrylics compared to steam blocking. Ensure that a test with a swatch is done first in order to confirm the sweater will keep its fit and structure.
Techniques for blocking acrylic lace and delicate items
To maintain the intricate designs and delicate structure of acrylic lace pieces, they must be blocked using precision techniques. The initial step is to pin the lace onto a blocking mat using rustproof pins and gently shape it to the desired dimensions. Avoid distortion in more intricate areas using fine pins or blocking wires. Steam blocking is done by holding a steam iron or garment steamer about an inch above the fabric and ensuring steam is dispersed evenly. There should not be any direct contact on the fabric as it would crush or dissolve delicate fibers. The shape is maintained for the lace once the piece cools and dries completely. It is critical to do a swatch test before attempting to block the lace in order to avoid any adverse reactions.
Blocking acrylic blankets and large projects
Blocking large pieces such as blankets is different than blocking intricate pieces such as lace and requires a slight adjustment due to the material properties and size of the item. Unlike natural fibers, acrylics do not respond to wet blocking. More effective techniques would include steam blocking or “killing” the acrylic.
To block a large acrylic item, consider laying it out flat on a clean blocking mat or a large, flat surface that can accommodate the entire piece. The shape of the piece can be maintained by securing the edges with steam pins, making sure the piece is steam set to the appropriate dimensions. With regard to the steam application, a garment steamer or steam iron should be used as the tip of the device should be around one inch from the surface of the item the entire time. Ensure that the fabric gets penetrated by steam evenly so that there is no over-steaming leading to shrinking fibers. The garment should be allowed to cool fully before removing the pins, ensuring that cooling is done in a static position.
Due to the scale of large projects, blocking has to be split up into several sections in order to maintain results consistency. It is always best to test on a 1 inch cover swatch first in order to determine whether heat and steam are the best options for the material in mind. That is the ideal way of protecting the acrylic fibers without disturbing the material’s integrity, ensuring that precision does not spell disaster for the design.
How long does it take to block acrylic yarn?

The amount of time spent blocking acrylic yarn, both cooling and active, depends on the size and complexity of the project. For small items such as swatches and accessories, it generally takes around 30-60 minutes. For larger or more intricate items, it can take several hours, especially if the project needs to be sectioned off for block treatment. The fibers tend to have a predetermined cooling cycle due to their rigid structure, but that cooling cycle must be meticulously set in order for the acrylic to maintain the intended form and texture.
Factors affecting blocking time
- Fiber Thickness and Density
Blocking time for acrylic yarn is mostly defined by its thickness and density. Denser and thicker yarns take longer to heat and require additional time to form into the desired shape. Conversely, lighter yarns block more quickly due to having less mass.
- Project Size and Complexity
Intricate blankets and laceworks tend to require more time for blocking due to their surface area and detailed patterns. Slicing the project into sections for more uniform treatment may save time, but ultimately can delay the entire process.
- Environmental Conditions
The environment impacts both cooling and drying times. Setting temperature and room moisture can slow the cycle for the tendency fibers to stiffen, further extending the time needed to set the shape.
- Blocking Method Utilized
Techniques like wet blocking and steam blocking have varying degrees of effectiveness and time requirements. As an illustration, steam blocking usually takes less time but needs gentle techniques to prevent harm to the fibers. Wet blocking, however, requires complete drying, which can stretch the time needed by several hours.
- The Desired Outcome
The amount of reshaping and stretch required affects the time devoted to blocking. Projects that require a high degree of manipulation are bound to take longer to complete.
Drying times for different blocking methods
Blocking drying time varies according to the method employed and surrounding conditions. Wet blocking usually takes around 24 to 48 hours since the item needs to air dry completely to ensure the fibers have set in the desired form. The steam block is more expedient as it dries almost immediately after the steam dissipates with some residual moisture (albeit slower in high humidity environments, taking 1-2 hours). Spray blocking is moderately fast with the fabric taking 6 to 12 hours to completely dry depending on the amount of water used and the thickness of the fabric. Regardless of the method used, proper airflow through fans and dehumidifiers can aid in significantly expediting the drying process.
Can I use a hair dryer or clothes dryer to block acrylic yarn?

It is generally inadvisable to block acrylic yarn using a hairdryer or clothes dryer since the heat used could pose a risk to acrylic fibers. Soften the yarn beyond repair if left uncontrolled and cause unwanted deformations. If heat blocking is the only option, ensure lowest possible heat is set. Alternatively, employing an even steam blocking technique is safer when dealing with acrylic yarns.
Using a hair dryer for quick blocking
Considering the versatility of a hairdryer, it can serve the purpose of quick blocking. However, due care must be observed to ensure that the risk of heat damage posed to acrylic yarn is completely eliminated. To optimize yarn hair dryer blocking, it is important to begin with the device set at the lowest heat option and held at least six inches away. If used at close range, overheating of the yarn can result, creating a very real risk of damage to the fibers, which can subsequently be prevented by changing the motion of the hand dryer to continuous. For ultimate effect, a damp cloth, positioned above the yarn, may serve the purpose of aiding the distribution of added heat, ultimately leading to gentler heating of the material. While this technique may be convenient, it is critical to note that it should only be employed when other methods like wet steaming yarn posing a significantly greater aide to the optimal outcome are impossible to use.
Pros and cons of using a clothes dryer for acrylic projects
Pros
- Time Efficiency: For blocking or reshaping projects involving acrylic, a clothes dryer is arguably the most convenient option since it can drastically reduce the time needed to dry and set the item.
- Uniform Heat Distribution: Accomplishing uniform results across the project is much easier with modern clothes dryers due to their even heat distribution features.
- Ease of Use: Set up for these devices is almost non-existent. Simple pressing of a button for ‘low heat’ or ‘air fluff’ will get the job done.
Cons
- Risk of Fiber Damage: Even on low settings, fibers of acrylics can be severely damaged due to the softening or distorting effects of the dryer’s heat. The risk increases with prolonged exposure or excessive temperature.
- Lack of Control: Shape precision is a contour that varies with rigid techniques such as steam or wet blocking. A dryer lacks the hands-on touch which leads to precise contours thus results in soft-sculpted shapes.
- Potential for Uneven Results: Uniform tension is not always guaranteed. Without ‘active’ supervision, projects face the risk of being unevenly tensioned or deformed, especially if folded or bunched.
The use of a clothes dryer as a blocking method is highly sensitive. To achieve ideal results, utilize the lowest heat setting possible while closely monitoring the process. It can also prove useful to add a thin barrier such as a towel to protect the item from excess heat.
References
Frequently Asked Questions (FAQ)
Q: How do I use the spray blocking method for acrylic yarn?
A: To spray block acrylic yarn, pin your project to shape on a flat surface, then use a spray bottle to lightly mist the item with water. Allow it to dry completely before removing the pins. This method is gentle and suitable for most acrylic projects.
Q: Am I able to steam block acrylic yarn?
A: Yes, steam blocking acrylic yarn is permissible but caution is required. Hold steam-equipped iron or steamer around 2 inches above the fabric and do not touch, as steam will relax the yarn fibers. Equally, overheating the acrylic would result in being “killed” which is harmful.
Q: What is the washer and dryer method of blocking acrylic yarn?
A: The washer and dryer method involves machine washing your acrylic project on a gentle cycle, then tumble drying on low heat. This can help soften the yarn and even out stitches. It’s a good option for items that will be frequently washed, like blankets or washcloths.
Q: How long do I need to steam when blocking acrylic yarn?
A: While steam blocking acrylic yarn, it is best to hover steam over each section for 30 to 60 seconds. Do not touch the yarn with the iron or steamer directly and don’t exceed the minimum as this may “kill” the acrylic yarn.
Q: What supplies do I need to block my acrylic crochet project?
A: To block your acrylic crochet project, you will require blocking pins, a flat surface (such as an ironing board or blocking mats), a spray bottle if you are spray blocking, a steamer or an iron if you are steam blocking, and of course, a tape measure to check if the dimensions are accurate.
Q: What does the term killing acrylic mean and why is it a technique I should avoid while blocking?
A: Killing acrylic pertains to the process where the yarn is subjected to such high heat that its fibers partially melt. It tends to render fabric soft and shiny, which diminishes the knit or crochet’s bounce. While some crafters do purposely kill acrylic for some design purposes, it is mostly advisable to avoid it when blocking the work.
Q: Is it possible to block a single crochet project using acrylic yarn?
A: Certainly! You can block a single crochet project made from acrylic yarn. While single crochet has hands down a more structured look, blocking does do wonders for evening out stitches and refining the form of the work as a whole.
Q: To what frequency may I need to block my projects made from acrylic yarn?
A: Unlike natural fiber, projects done in acrylic yarn do not change their shape even after the first round of block and tend to retain their original shape. There may not be a need for further re-blocking unless the item starts losing its shape with use. For frequently washed items such as garments and blankets, moderate light blocking can be applied after every wash using the washer and dryer.