


Knowing how to properly thread a sewing machine is crucial in attaining neat and uniform stitches. This guide covers how to thread a Brother sewing machine and should serve both novices and experts alike. From tool preparation, threading the needle, to winding the bobbin, this article is designed to offer clear and thorough step-by-step procedures. By the end of this guide, readers should be able to properly thread their Brother sewing machine to guarantee that the machine works smoothly and yields wonderful outcomes for any sewing challenge.
What is the Correct Way to Thread a Brother Sewing Machine?

To thread a Brother sewing machine correctly, follow these steps:
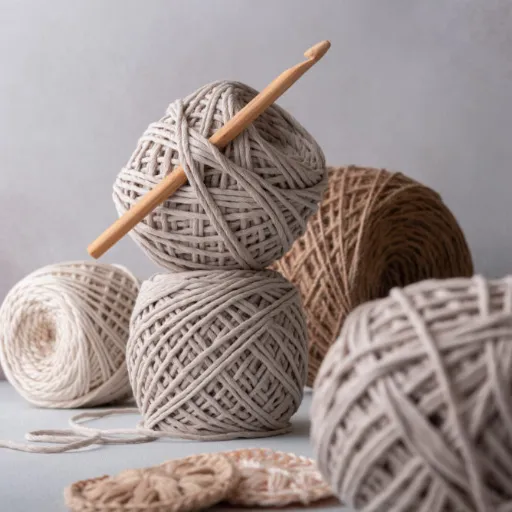
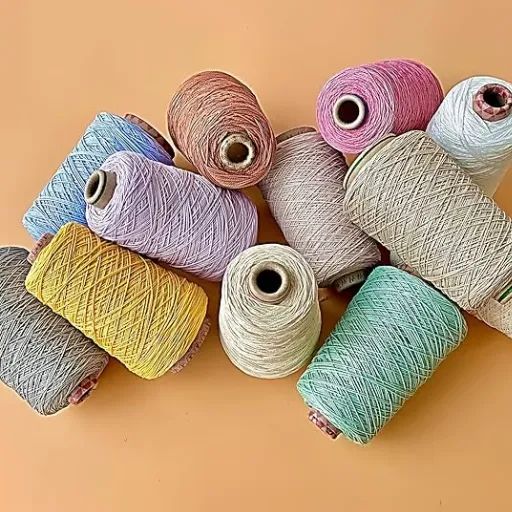
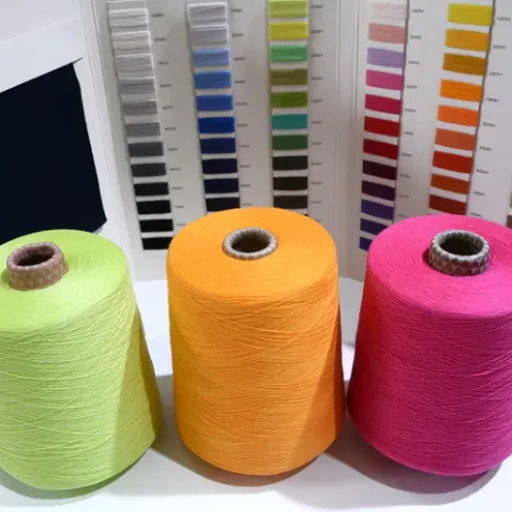
- Prepare the Machine: Turn off the power and ensure the presser foot is raised. Place a spool of thread on the spool pin and secure it with a spool cap.
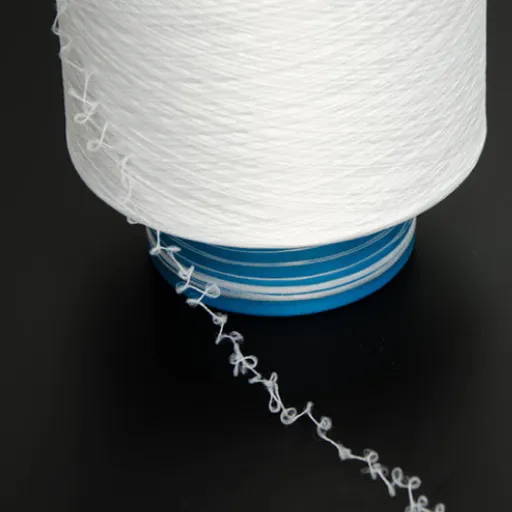
- Thread the Upper Thread: Pull the thread from the spool and guide it through the thread guide, tension discs, and take-up lever as specified in the machine’s manual. Follow the threading path indicated on the machine.
- Thread the Needle: Lower the needle threader, if available, or thread the needle manually from front to back. Pull a few inches of thread through the eye of the needle.
- Wind and Load the Bobbin: Place an empty bobbin on the winder and wind thread onto it. Insert the filled bobbin into the bobbin case and pull the bobbin thread through the slot, following the machine’s instructions.
- Draw Up the Bobbin Thread: Hold the upper thread taut while turning the handwheel to lower and raise the needle, catching the bobbin thread. Pull both threads to the back of the presser foot.
These detailed steps ensure proper threading for efficient sewing performance.
How to Thread the Upper Section?
Threading the upper section of a sewing machine involves several precise steps to ensure optimal functionality. First, place the spool of thread on the spool pin and secure it with the appropriate spool cap. Pull the thread from the spool and guide it through the thread guide at the top of the machine. Next, pass the thread through the tension discs, ensuring it is correctly seated to maintain proper tension. Continue threading by looping it through the take-up lever, which moves up and down as the machine operates. Finally, guide the thread down through any additional thread guides and pass it through the eye of the needle from front to back. Always refer to your sewing machine’s specific threading diagram for accuracy. Proper threading is essential for smooth and even stitching.
How to Use the Needle Threader?
Using the needle threader on a sewing machine simplifies the process of threading the needle. Start by ensuring the needle is in its highest position, which can be achieved by manually turning the handwheel or pressing the needle-up button, if available. Lower the needle threader lever gently until the small hook passes through the eye of the needle. Then, loop the thread under the threader hook and pull it across so it rests in the groove. Slowly release the needle threader lever, allowing the small hook to pull the thread through the needle’s eye, creating a loop. Finally, pull the loop gently by hand to fully thread the needle. Proper usage of the needle threader reduces strain on the eyes and enhances efficiency during sewing. Always consult your machine’s manual for exact steps tailored to your model.
What are the Steps to Thread the Bobbin?
Threading the bobbin involves systematic steps to ensure proper functionality during sewing. Start by placing the spool of thread on the spool pin and securing it with the spool cap if necessary. Pull the thread across and guide it through the bobbin winding thread guide or tension disc, as instructed in your sewing machine’s manual. Insert the thread end through one of the small holes in the bobbin and place the bobbin onto the bobbin winder spindle. Push the spindle to the right to engage the bobbin winding mechanism. Hold the thread tail gently and begin winding by pressing the foot pedal or activating the start button. Once an even amount of thread is wound and the bobbin is full, the machine will stop automatically or you can manually stop the process. Trim the thread tail, remove the bobbin, and ensure it is properly seated in the bobbin case for use. Always refer to the specific threading instructions of your sewing machine for optimal results.
What are the Key Moments in the Threading Process?

- Positioning the Spool of Thread: Securely placing the thread spool on the spool pin and using the spool cap if required ensures proper tension and stability during threading.
- Thread Placement through Guides: Properly guiding the thread through the bobbin winding thread guide or tension disc is essential to maintain even tension.
- Winding the Bobbin: Engaging the bobbin winding mechanism and achieving uniform winding is critical to prevent thread tangling or uneven stitching.
- Placing the Bobbin in the Case: Correctly seating the bobbin in the bobbin case ensures seamless function and proper stitch formation.
- Following Manual Instructions: Always adhering to the specific threading and setup instructions provided in the machine’s manual guarantees accuracy and optimal machine performance.
How to Properly Thread the Upper Thread?
Threading the upper thread requires precision to ensure the sewing machine operates without issues. Follow these steps for proper threading:
- Raise the Presser Foot: Lifting the presser foot ensures that the tension discs are open, allowing the thread to glide through smoothly without being pinched.
- Turn the Handwheel: Rotate the handwheel towards you to raise the needle to its highest position, which optimizes access to the machine’s threading system.
- Place the Thread on the Spool Pin: Secure the thread spool on the spool pin and attach the cap to prevent the spool from slipping during threading.
- Guide the Thread Through the Thread Path: Pull the thread through the thread guide, ensuring it passes through each dedicated path, including the tension discs and the take-up lever, in the sequence stated in your machine’s manual.
- Thread the Needle: Finally, pass the thread through the needle’s eye from front to back. Use a needle threader if available for easier threading.
Always consult your sewing machine’s manual for model-specific instructions, as threading steps may vary slightly depending on the make and model of your machine. Proper threading prevents skipped stitches, thread breakage, and uneven tension during sewing.
How to Avoid Tangled Thread?
To avoid tangled thread while sewing, follow these practices:
- Thread Correctly: Ensure the machine is threaded accurately, following the manufacturer’s guide, and double-check that the thread passes through all the guides, tension discs, and the take-up lever in the correct order.
- Use Quality Thread: Poor-quality or heavily worn thread is more prone to fraying and tangling. Opt for high-quality thread suited for your fabric type.
- Adjust the Tension Settings: Improper tension can cause knots and tangles. Experiment with the tension dial to match the thread, needle, and fabric combination.
- Clean the Machine Regularly: Dust, lint, or thread remnants in the bobbin case or tension discs can lead to thread jams. Clean your sewing machine periodically to maintain smooth operation.
- Wind the Bobbin Properly: Unevenly wound bobbins can cause snagging and tangling. Ensure the bobbin is wound evenly and seated securely in the bobbin case.
- Use Matching Top and Bobbin Threads: Using threads with different thicknesses or material types can lead to imbalance and tangles during stitching.
- Sew at an Appropriate Speed: Avoid sewing too fast, as this can cause the thread to whip and tangle. Maintain a steady, consistent sewing pace.
By implementing these preventative measures, you can significantly reduce the chances of thread tangling and ensure a smoother sewing experience.
Steps to Use the Built-in Needle Threader on a Brother Sewing Machine

Using the built-in needle threader can simplify the threading process and save time. Follow these concise steps:
- Raise the Needle: Turn the handwheel towards you to raise the needle to its highest position. Ensure the presser foot is also raised.
- Lower the Threader: Pull the needle threader lever gently down until the hook passes through the needle’s eye.
- Position the Thread: Place the thread into the hook on the needle threader, ensuring it rests snugly in the guide.
- Thread the Needle: Release the threader lever slowly while holding the thread lightly. This action will pull the thread through the needle’s eye, forming a loop.
- Pull Through: Gently pull the loop completely through the needle to finish threading.
By following these steps, you can efficiently thread your needle and prepare your sewing machine for use.
How to Lower the Needle Threader?
To lower the needle threader on a Brother sewing machine, locate the needle threader lever on the left side of the machine near the needle assembly. Gently press or pull the lever straight down, ensuring it moves smoothly without forcing it. The hook of the threader will pass through the eye of the needle during this process. Always ensure the needle is fully raised using the handwheel before lowering the needle threader to prevent damage to the mechanism. Correct positioning and delicate handling are essential for optimal operation of the needle threader tool.
How to Thread Through the Eye of the Needle?
Threading through the eye of the needle can be accomplished by following these steps:
- Prepare the Thread: Cut the thread at an angle using sharp scissors to create a clean tip, reducing fraying for easier insertion. If necessary, dampen the end slightly to hold the fibers together. Alternatively, you can use a thread conditioner for smoother handling.
- Position the Thread and Needle: Hold the needle with the eye facing upward and maintain a steady grip. Ensure sufficient lighting to clearly see the needle eye and position the thread tip close to it.
- Guide the Thread: Carefully push the thread through the needle eye using precision. If the thread proves difficult to insert, employ tools such as a needle threader by looping the thread on its hook, pulling it through the eye.
- Secure the Thread: Once the thread is through, pull it about 2 to 3 inches past the eye to ensure it remains secure during use. Double-check for proper alignment to prevent tangles while sewing.
By meticulously following these steps, you can streamline the threading process, reducing frustration and ensuring your sewing tasks proceed efficiently.
What to Do if the Thread May Become Tangled?
Thread tangling is a common issue that can disrupt sewing tasks and lead to frustration. To address and prevent this problem, follow these tips:
- Use the Correct Thread and Needle Combination: Ensure compatibility between the thread type and needle size. Mismatched combinations can cause uneven tension, leading to tangles.
- Adjust Thread Tension Settings: Verify that the thread tension on your sewing machine is set appropriately for the fabric and thread being used. Incorrect tension can result in knots and loops.
- Prevent Thread Twisting: When hand sewing, allow the thread to dangle periodically to release any twists that may accumulate during stitching.
- Keep the Thread Path Clear: Check the sewing machine’s threading path frequently to ensure there are no obstructions, such as lint or improperly seated components.
- Re-thread Carefully: If tangling occurs, remove the thread completely and re-thread the machine or needle carefully, following the manufacturer’s guide.
By implementing these strategies, you can minimize the risk of thread tangles and maintain smooth, uninterrupted sewing sessions. Regular maintenance of your sewing tools and adherence to proper techniques will further enhance efficiency and reliability.
Where Can I Find Step-by-Step Instructions for My Brother Sewing Machine?

The manual which comes with the sewing machine contains detailed instructions for your Brother sewing machine. In case the manual is missing, go to the official website for Brother and check their support page, as most of the manuals and guides are available for download. Moreover, a host of video tutorials as well as FAQs covering various models and features are available on the Brother site. You can also reach out to their support department for more information.
How to Check the Manuals for Guidance?
To find the manuals for Brother sewing machines, first, visit Brother’s support page. Provide the machine’s model number to search for the corresponding manual that can be downloaded. You may also view the “Downloads & Manuals” page which lists all the available information by category. There are separate step-by-step guides and troubleshooting provided on YouTube and other sewing forums which often embed links to the official manuals. If you need further assistance, Brother’s customer service will help by directing you to the necessary resources or dealing with any model-specific issues.
Where to Check Other FAQs?
Should you need any further frequently asked questions information, the Brother website is a great starting point because it has a section for FAQs organized by product model and category. Also, Sewing Machine Tech and SewMamaSew provide answers to many common questions users have, such as how to troubleshoot or maintain different models. For more support, PatternReview and other forums have thread discussions where users share solutions for many Brother sewing machine problems. All of these ensure that getting the right and useful information is at your fingertips.
How to Need Further Assistance?
Should you need further help with your Brother sewing machine, there are various credible sources online. The Brother Support Center, available on their official website, offers online support which includes FAQs, model-specific manuals and guides, as well as videos for other features. In addition, Sewing Machine Tech provides common technical problems with step-by-step solutions and maintenance instructions. Lastly, SewMamaSew focuses on communications and community questions where experts share their insights and users share their experiences across numerous sewing topics. These platforms enable you to receive precise, effective solutions tailored to the respective models.
How to Thread a Bobbin and Start Sewing?

To thread a bobbin and start sewing, follow these steps:
- Winding the Bobbin: Begin by placing the empty bobbin onto the bobbin winder spindle. Secure the thread spool on the spool pin and guide the thread through the bobbin winding path as specified in your machine’s manual. Press the bobbin winding lever or engage the mechanism to start winding. Once the bobbin is full, trim the thread and remove the bobbin.
- Installing the Bobbin: Open the bobbin compartment of your sewing machine. Insert the wound bobbin into the bobbin case, ensuring it is correctly oriented. Pull the thread through the bobbin case slit and tension spring as directed.
- Threading the Upper Thread: Place the thread spool on the spool pin and guide the thread through the machine’s thread guides, tension discs, and needle following the threading diagram. Proper upper threading ensures smooth stitching.
- Drawing Up the Bobbin Thread: Turn the handwheel to lower and then raise the needle. This motion pulls the bobbin thread up through the needle plate. Pull both the upper and bobbin threads to the back of the machine.
- Start Sewing: Position your fabric under the presser foot. Lower the presser foot and begin sewing, ensuring both threads are secure to prevent tangling. Utilize test stitching to confirm proper tension and seam quality.
Accurate threading is essential for consistent stitching and avoiding common sewing issues. Always refer to your machine’s user manual for model-specific guidance.
What is the Correct Way to Thread the Bobbin?
Threading the bobbin accurately is a critical step for proper sewing machine operation. Follow these steps for the best results:
- Winding the Bobbin: Place the thread spool on the spool pin and guide the thread through the thread guide and tension disc designed for bobbin winding. Wrap the thread a few times around the empty bobbin and place the bobbin on the bobbin winder spindle. Push the spindle to engage the winding mechanism, then press the foot pedal or start the machine to wind the bobbin evenly.
- Installing the Bobbin: Insert the wound bobbin into the bobbin case or drop it into the designated bobbin compartment, depending on your machine model. Ensure the thread unwinds in the specified direction, typically counterclockwise for most machines. Follow the threading path through the bobbin case slit or guides as indicated in your user manual.
- Adjusting the Bobbin Thread: Pull the thread to ensure it moves freely with slight tension. Confirm that the bobbin case is properly positioned and securely latched into place.
Always consult your sewing machine’s manual for model-specific instructions, as mechanisms may vary. Correct bobbin threading prevents problems such as skipped stitches, thread bunching, or uneven tension, ensuring smooth sewing performance.
How to Guide the Thread onto the Bobbin?
Begin by bringing out a spool of thread and placing it on the spool pin. If needed, secure the spool using a spool cap. To guide the thread, pull it through the thread guide which is normally located beside the spool pin. From there, pull it through the tension disc made for bobbin winding. Depending on what type your machine is, you will either place the thread around the bobbin’s side or put it inside the small hole on the bobbin’s side. Place the bobbin on the bobbin winder spindle before pushing it to the engaged position. Finally, start the machine while holding the thread tail loosely at first. As you do this, ensure that the bobbin has thread wound around it evenly. To get complete instructions, it is best to consult the sewing machine manual as there are manuals that differ from model to model. Proper placement of the thread minimizes winding problems while making sure that there is consistent tension.
What are the Steps to Start Sewing?
- Gather Supplies – To begin sewing, I first assemble essential tools such as fabric, thread, needles, scissors, measuring tape, pins, and a sewing machine if applicable. Selecting the right materials for my project ensures smooth progress.
- Choose a Pattern – I decide on a sewing project and pick an appropriate pattern, whether it’s a template or a simple design. Following clear, step-by-step instructions is critical for a successful outcome.
- Prepare the Fabric – Before cutting, I wash and iron the fabric to prevent shrinkage later. Next, I lay it flat and pin the pattern in place, marking any necessary guidelines.
- Cut and Pin – Using sharp scissors or a rotary cutter, I carefully cut along the lines of the pattern. I then pin or clip the fabric pieces together as outlined in the design.
- Set Up the Machine – If using a sewing machine, I make sure it’s threaded correctly and adjust settings such as tension or stitch type according to the fabric.
- Begin Sewing – I start with simple stitches, following the pattern’s instructions. When sewing, maintaining consistent seam allowances and reinforcing seams ensures durability.
- Final Touches – Once sewing is complete, I finish raw edges with techniques such as serging or pinking to prevent fraying. Lastly, I press the seams for a polished result.
References
Frequently Asked Questions (FAQ)
Q: What is the first step to thread a Brother sewing machine?
A: The first step to thread a Brother sewing machine is to raise the presser foot lever and ensure the needle is in its highest position. This allows you to easily pass the thread around the necessary guides.
Q: How do I properly place the spool of thread on the Brother sewing machine?
A: Place the spool of thread on the spool pin, ensuring it is secured with a spool cap. This prevents the spool from moving around while you are threading the machine.
Q: How do I thread the needle on a Brother sewing machine?
A: To thread the needle, pass the thread from the spool through the thread guide, thread take-up lever, and needle bar thread guide by holding the thread in your left hand. Then, thread the needle from front to back.
Q: What is the function of the thread take-up lever?
A: The thread take-up lever is crucial in maintaining thread tension and ensuring that the thread moves smoothly during sewing. It helps to pull the thread from the spool and feed it to the needle.
Q: How can I ensure that the bobbin thread is correctly threaded?
A: To ensure the bobbin thread is correctly threaded, place the bobbin in the bobbin case, and draw the thread through the slot. Then, pass the thread behind the needle bar thread guide and pull the thread until it is taut.
Q: What should I do if it is difficult to thread the needle?
A: If it is difficult to thread the needle, ensure the needle is in its highest position and the presser foot is raised. You can also use a needle threader to assist in pulling the thread through the eye of the needle.
Q: How do I adjust the tension when threading a Brother sewing machine?
A: Adjust the tension by turning the tension dial located on the side of the machine. Test on a scrap piece of fabric to ensure that the thread and needle are working together without causing puckering or loose stitches.
Q: What are some common issues when threading a Brother sewing machine?
A: Common issues include thread tangling, incorrect threading through the guides, and improper placement of the spool of thread. Ensuring each step is followed precisely can help prevent these problems.
Q: Can I find a transcript or video to help with threading a Brother sewing machine?
A: Yes, many Brother sewing machines come with instructional DVDs or online video tutorials. You can also find transcripts and guides on the Brother website or other sewing forums for additional help.
Q: What are some tips for beginners to thread a sewing machine correctly?
A: Beginners should take their time, follow the machine’s manual, and watch tutorial videos. It helps to practice threading the machine multiple times to become familiar with the process. Ensure you have good lighting to see the thread path.