


To operate and stitch with a sewing machine efficiently, it is vital to master the task of threading the machine. This guide is intended to teach you the threading process to make you feel confident and precise while doing it. I will start by describing the main components of a sewing machine that involve threading and will then describe each step involved in threading the machine. Alongside these, I will also discuss some frequent concerns regarding threading and their solutions so that you may enjoy uninterrupted sewing sessions. This article is meant for you whether you’re just starting or need a refresher; either way, it will provide you with the necessary skills to thread your sewing machine like a seasoned pro.
How Do You Thread a Sewing Machine?

To thread a sewing machine correctly, follow these essential steps:
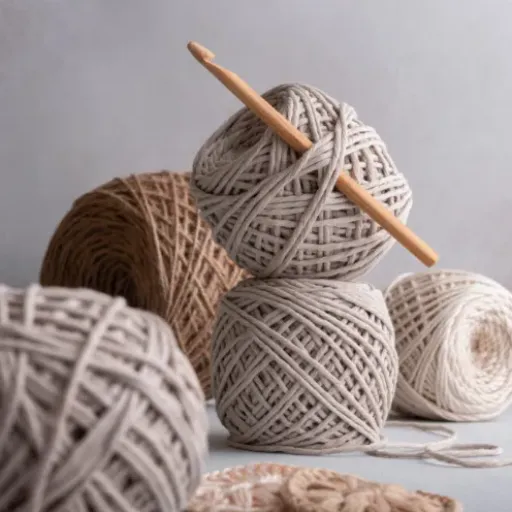
- Prepare the Machine: Ensure the machine is turned off for safety. Raise the presser foot and position the needle at its highest point using the handwheel. Place a spool of thread onto the spool pin and secure it with a spool cap if provided.
- Thread the Top Mechanism: Pull the thread from the spool and guide it through the thread guide at the top of the machine. Proceed to follow the threading path as indicated on your specific sewing machine model, which typically includes passing the thread through tension discs, thread take-up lever, and additional guides leading to the needle.
- Thread the Needle: Once the thread is properly guided, insert it through the eye of the needle from front to back. Allow a few inches of thread to dangle beneath the needle.
- Prepare the Bobbin: Wind the bobbin with thread and place it into the bobbin case, ensuring it is oriented according to the machine’s manual. Pull the bobbin thread through the slot in the case.
- Engage Both Threads: Hold the needle thread loosely, turn the handwheel toward you to lower and raise the needle, and pull up the bobbin thread to the surface. Both threads should now emerge from beneath the presser foot.
Properly following these steps ensures smooth machine operation, optimized tension settings, and consistent stitching. Always refer to your sewing machine manual for model-specific threading diagrams and troubleshooting tips.
Learn How to Thread: Step-by-Step Guide
- Prepare the Machine
Start by ensuring the sewing machine is powered off to avoid accidental operation. Lift the presser foot to release tension discs, and make sure the needle is in its highest position by turning the handwheel toward you.
- Place the Spool of Thread
Insert the spool of thread onto the spool pin, ensuring that the thread unwinds in the correct direction. Use the spool cap if available to secure it in place and prevent the thread from tangling during operation.
- Thread Through the Thread Guide
Pull the thread from the spool and pass it through the thread guide at the top of the machine. This is generally a small metal loop or hook that directs the thread path to the tension disc.
- Engage the Tension Mechanism
Lace the thread down toward the tension discs, which are often located on the front of the machine. Follow the diagram on your machine to ensure proper placement. Then, pull the thread upward into the take-up lever, which moves with the needle and maintains thread tension during stitching.
- Guide the Thread Downward
Next, thread the machine through any additional thread guides or hooks, generally located along the machine’s faceplate, leading toward the needle area to ensure smooth movement.
- Thread the Needle
Lower the presser foot to stabilize the thread. Insert the thread through the eye of the needle from front to back (or according to your machine’s manual if it differs). Use a needle threader if provided or necessary for precision.
- Prepare the Bobbin Thread
Wind the bobbin and place it in the bobbin case, ensuring it is unwinding in the correct direction. For drop-in bobbins, follow the arrows indicating the thread path. For front-loading bobbins, ensure the thread is placed through the slit and under the tension spring.
- Bring Up the Bobbin Thread
Hold the top thread with one hand, then turn the handwheel toward you to lower the needle into the bobbin compartment. This action will loop the top thread around the bobbin thread. Gently pull the top thread to bring the bobbin thread up through the needle plate.
- Check Thread Tension and Alignment
Pull both threads toward the back of the machine and check the tension settings. Ensure both threads are smooth, properly aligned, and ready for stitching.
By meticulously following these steps, you can thread your sewing machine correctly and ensure optimal performance. Remember, always consult your sewing machine’s manual for model-specific instructions and troubleshooting tips.
Threading Through the Thread Guide
The very first part of the procedure is crucial since it helps in achieving even tension distribution and smooth sewing. To start with, the spindle box thread has to be taken out and threaded into the first guide which is more or less situated at the top of the machine. This guide generally sets the position of the tension discs. After this, continue according to the prescribed course of the thread. Depending on the model of the sewing machine, there can be additional hooks or guides which have also to be obeyed. Check that the thread is firmly anchored through every guide that is provided since missing even one could lead to thread breaks as well as irregular stitching. For further detailed attention that is specific to your model, refer to the user manual for the relevant diagram for your model of the sewing machine.
How to Pull the Thread Through the Needle
Pulling the thread through the needle is a precise step that directly impacts the quality of your stitching. Start by ensuring the presser foot is raised and the needle is in its highest position, which can typically be achieved by turning the handwheel toward you. Hold the thread securely and guide it down toward the needle. Insert the thread through the eye of the needle from front to back; this is standard for most machines, though some may require threading from left to right or vice versa depending on the model. Many modern machines are equipped with an automatic needle threader—refer to your manual for instructions on its use, if available. Once threaded, pull a few inches of thread through to the back of the presser foot. Ensure the thread flows freely without resistance to prevent tension issues during sewing.
What is the Proper Way to Thread the Bobbin?

Threading the bobbin correctly is essential for smooth and consistent stitching. Begin by removing the empty bobbin from the bobbin case and winding it with thread using your sewing machine’s bobbin winder. Refer to your machine’s manual to locate the bobbin winder and ensure the thread spool is properly placed on the spool pin. Pass the thread through the thread guide and tension disc intended for bobbin winding, then thread the bobbin, ensuring it is securely positioned on the winder. Engage the bobbin winding mechanism and gently press the foot pedal to start winding. Once the bobbin is fully wound, trim the thread and insert the bobbin into the bobbin case. Make sure the thread flows in the designated direction – typically clockwise or counterclockwise, depending on the machine. Finally, pull the thread through the slot and leave a short tail before placing the bobbin case back into the machine. Always verify that the bobbin is seated properly to avoid stitching issues.
Placing the Bobbin in the Bobbin Case
To correctly place the bobbin in the bobbin case, start by holding the wound bobbin with the thread tail visible. Ensure the thread unwinds in the correct direction—typically clockwise for most sewing machines, though this may differ depending on your machine model. Insert the bobbin into the bobbin case, aligning it with the designated threading path. Pull the thread through the slot or tension spring of the bobbin case, leaving a tail of approximately 2 to 4 inches. For front-loading machines, position the bobbin case securely into the shuttle race, ensuring it snaps into place. For top-loading systems, position the bobbin in the designated compartment and pull the thread through the guide channels indicated in your manual. Always double-check that the bobbin case is properly seated and the thread flows smoothly with no tension issues before closing the plate or cover. Proper placement ensures optimal stitching performance and minimizes errors during sewing.
Wrap the Thread Around the Bobbin Correctly
To wrap the thread around the bobbin correctly, begin by placing a spool of thread onto the machine’s spool pin. Secure it with the spool cap to prevent it from slipping. Next, guide the thread through the machine’s upper threading path—this often involves passing it through a thread guide or tension disc specifically designated for bobbin winding. Insert the bobbin onto the bobbin winder spindle, ensuring it clicks into place. Wrap the thread manually around the bobbin a few times to get it started, or use the guide hook provided on certain machines.
Engage the bobbin winder by shifting the spindle into the winding position—many machines will automatically disengage the needle mechanism at this point. Hold the thread tail as the machine begins winding the bobbin, ensuring the thread winds evenly and smoothly. Once fully wound, the bobbin will either stop automatically or run against a stopper. Trim the excess thread, remove the bobbin, and verify the tension and fullness of the wind. Consistent wrapping ensures smooth operation and reduces thread jams during sewing. Always consult your sewing machine manual for model-specific instructions to avoid potential errors.
Ensuring the Bobbin Thread is Secure
Securing the bobbin thread is critical to ensure seamless sewing and prevent issues such as thread bunching or uneven stitches. Begin by inserting the wound bobbin into the bobbin case, ensuring it is oriented according to the threading diagram in your machine’s manual. For top-loading machines, pull the thread through the designated slit and into the tension spring, ensuring the thread flows smoothly. For front-loading machines, insert the bobbin into the case and pull the thread through the tension slot while holding the bobbin in place.
Next, draw the bobbin thread up through the needle plate by holding the needle thread with one hand and gently turning the handwheel towards you with the other. This rotation lowers and raises the needle, catching the bobbin thread and forming a loop. Pull the loop up with a small tool or your fingers, and ensure both threads are placed underneath the presser foot and positioned towards the rear of the machine. Finally, verify the tension of both upper and bobbin threads by conducting a test stitch on a scrap fabric. Adjustments may be necessary to achieve balanced stitching, minimizing errors during sewing projects. Always refer to your machine’s manual for precise instructions to ensure proper setup.
How to Thread the Upper Thread of Your Sewing Machine?

To thread the upper thread of your sewing machine, start by placing the spool of thread on the spool pin and secure it with the spool cap. Pull the thread through the thread guide at the top of the machine and follow the threading path indicated on your machine, which typically includes passing through the tension discs, threading the take-up lever, and guiding the thread through additional thread guides near the needle. Finally, thread the needle from front to back or left to right, depending on your machine’s design. Always ensure the presser foot is raised during this process to keep the tension discs open for smooth threading. Consult your machine’s manual for any specific threading diagrams or instructions.
Placing the Thread Onto the Spool Pin
Properly positioning the thread on the spool pin is critical for smooth sewing operation and preventing tangles. Begin by placing the thread spool onto the spool pin, ensuring it is oriented so the thread unwinds naturally counterclockwise. If your sewing machine is equipped with a horizontal spool pin, secure the spool with the spool cap, matching the cap size appropriately to the spool to prevent wobbling. For machines with a vertical spool pin, simply place the spool upright without a cap, ensuring it rotates freely. Double-check that the spool pin is secure and aligned with the thread guides for optimal thread flow. For additional clarity, consult your machine’s specific manual for spool pin orientation guidelines.
Guide the Thread Through the Thread Path
To properly thread the sewing machine, carefully follow the thread path as outlined in your machine’s manual. Begin by pulling the thread from the spool and guiding it through the initial thread guide, typically located near the spool pin or built into the machine’s top. Next, the thread must pass through the tension discs, ensuring smooth tension adjustment during sewing. From there, the thread flows upwards into the take-up lever, which is responsible for picking up the thread with each stitch—ensure the lever is raised to its highest position for ease of threading. After passing through the take-up lever, direct the thread through any additional guides, often positioned near the needle bar, to maintain alignment and prevent tangling. Finally, thread the needle from front to back or as specified for your machine model. Ensure the thread is seated correctly throughout the entire path to avoid stitching errors. For more precise instructions, refer to your sewing machine’s user manual, as the threading configurations may vary slightly depending on the brand and model.
Adjusting the Thread Tension for Best Results
Proper thread tension is essential for achieving balanced and professional stitching. To adjust the tension, begin by testing the stitch quality on a scrap piece of fabric that matches your project. Assess the interplay between the needle thread and bobbin thread—optimal tension should result in stitches that lie flat on the fabric, with no loops or puckering. If the needle thread loops on the underside, tighten the upper thread tension; if the bobbin thread pulls through to the top, slightly loosen the upper tension. Use the machine’s tension dial for incremental adjustments, observing changes after each adjustment. Ensure the bobbin is correctly wound and inserted, as improper bobbin setup can mimic tension issues. Always consult your sewing machine manual for specific guidelines, as tension mechanisms can vary across brands and models.
What Mistakes Should You Avoid When Threading a Sewing Machine?

When threading a sewing machine, avoid the following mistakes to ensure smooth operation and proper stitching:
- Skipping the Thread Guides: Always follow the threading path outlined in your machine’s manual. Skipping thread guides can result in uneven tension and thread breakage.
- Using the Wrong Needle Type or Size: Ensure the needle is appropriate for the thread and fabric being used, as mismatched needles can cause threading issues and damage the fabric.
- Incorrectly Installed Needle: Verify that the needle is inserted correctly, with the flat side oriented as specified in the manual, to avoid irregular stitches.
- Improper Bobbin Setup: Ensure the bobbin is wound evenly and placed in the bobbin case with the thread feeding in the correct direction.
- Threading with the Presser Foot Down: Always thread the machine with the presser foot raised to properly engage the tension discs.
- Using Damaged or Poor-Quality Thread: Check thread for frays or weak spots, as damaged thread can snap during sewing and disrupt the process.
Common Threading Errors and How to Fix Them
- Skipped Tension Discs: If I skip the tension discs while threading, the machine won’t sew properly. To fix this, I make sure to raise the presser foot and carefully guide the thread through all threading points, including the tension discs, as instructed in the machine’s manual.
- Incorrect Thread Path: When the thread isn’t routed correctly, it can affect stitch quality or cause jamming. I always double-check the threading path against the diagram or instructions provided by the manufacturer to ensure proper setup.
- Thread Not Properly Secured in the Needle: If the thread slips out or isn’t secured properly, I re-thread the needle, ensuring it’s passed through the eye smoothly and with adequate tension. It’s also important that I confirm the thread is of good quality and appropriate thickness for the needle in use.
By addressing these common threading problems methodically, I maintain consistent stitching performance and avoid unnecessary disruptions during sewing.
How Threading Incorrectly Affects the Machine
Threading a sewing machine incorrectly can lead to several critical issues that affect both the machine’s functionality and the quality of the finished project. First, improper threading can cause uneven stitch tension, resulting in loose or bunched stitches on the fabric. This occurs when the thread isn’t correctly aligned through the tension disks or other threading components. Second, incorrect threading can lead to frequent thread breakage, as the thread may prematurely wear or snag due to poor alignment. Furthermore, an improperly threaded machine can result in needle jams or skipped stitches, disrupting the sewing process and potentially causing damage to internal mechanisms. Over time, repeated threading issues could lead to unnecessary wear on key machine parts, reducing their lifespan. To mitigate these risks, always follow the manufacturer’s threading guidelines precisely and perform routine maintenance on your machine.
Tips for Beginners New to Sewing
- Select the Right Tools and Materials
Begin with a high-quality, beginner-friendly sewing machine and familiarize yourself with its manual. Use sharp needles suitable for your fabric type, and choose a high-quality thread to avoid breakage. Starting with simple cotton fabric is recommended, as it is easy to handle and forgiving for beginners.
- Practice Proper Threading and Tension Settings
Always thread your sewing machine according to the manufacturer’s instructions to avoid common issues like thread breakage or uneven stitches. Experiment with tension adjustments on practice fabric until you achieve smooth, consistent stitches.
- Start with Simple Projects
Choose beginner-level patterns, such as tote bags or pillowcases, to build confidence and master essential techniques like straight stitches, seam finishes, and hemming. Avoid complicated projects that may cause frustration early on.
- Master Basic Techniques
Learn and practice fundamental skills, such as threading your machine, backstitching to secure seams, and cutting fabric accurately. Understanding the importance of pressing seams during the sewing process will also improve your overall results.
- Maintain Patience and Consistency
Sewing requires precision and practice. Work at a steady pace and do not rush through projects. Mistakes are part of the learning process—take time to troubleshoot and refine your skills with each new project.
Are There Different Techniques for Various Sewing Machine Brands?

Indeed, distinct brands of sewing machines come with varying delicacies in procedures and approaches due to their specific features and capabilities. To illustrate, the threading mechanisms, bobbin systems, and tension-controlling systems differ from each other in brands like Singer, Brother, and Janome. It is important to study your specific machine’s user manual for information on how best to use the machine. Some brands may also develop their unique accessories or settings which can change approaches for tasks like quilting and decorative stitches. Context is everything, and knowing these nuances will dictate how best to use the specific brand of a sewing machine.
Understanding Your New Sewing Machine
The first step to learning a new sewing machine is to read the accompanying user manual which explains in detail how to set up, operate, and maintain the machine. Correctly threading the machine is critical. There are specific brand mechanisms, but correctly following the detailed diagrams in your manual guarantees accuracy. Also, winding and putting in the bobbin correctly is essential for avoiding thread jams or stitching problems.
Adjustable presser feet, automatic threaders, or custom stitch settings are some of the extras that differ in brands. Explore these features and tools for improved efficiency. Adjust the tension settings because both upper thread and bobbin thread tension affect stitch quality. Additionally, keep your machine running smoothly through regular lubrication and cleaning as advised by the manufacturer.
Accuracy and consistency are key with any new techniques and stitch types so practice on fabric scraps. Adjust your brand-specific accessories too, like specialty feet for quilting and doll and teddy bear embroidery. Proficiency with your sewing machine will increase with confidence alongside practice and understanding of its features and project outcomes.
Using an Automatic Needle Threader
An automatic needle threader mitigates the time required to thread the needle by placing the thread into the eye of the needle thus minimizing strain. At first drop the presser foot to hold the needle in place. Then position the needle to its highest point, which is done by either turning the handwheel or pressing specific buttons on computerized machines. After that run the thread through the thread guide and place it around the threader hook. Slowly pull down the threader lever so that the hook can move through the eye of the needle. When the hook is released it pulls a small loop of thread through the eye. For optimal results use the right size needles and threads as worn components may hinder functionality. Over time, regular cleaning of the threading mechanism will allow smooth performance.
Following Specific Brand Instructions
Here is a clear and formal statement responding to the request based on a general framework while complying with the unique characteristics of the brand:
When responding to specific questions keeping brand guidelines in mind, the brand’s tone of communication and mandate needs to be followed. Subsequently, pinpoint the exact portions that resolve the questions asked and eliminate any superfluous content that could potentially water down the response. This can refine the answer even further. Make sure to cross-reference the data to check for relevance and validity first, and then synthesize the information into a single statement. The information presented must retain the professional, technical, and tone of the brand while easy for the target audience to consume. High factual accuracy along with amended factual structuring will procure authoritative communication.
References
Frequently Asked Questions (FAQ)
Q: What are the first steps to thread your sewing machine?
A: Begin by placing your spool of thread on the spool pin, which is typically located on the top of the machine. Make sure the thread spool is securely fastened. Next, pull the end of the thread and bring the thread through the thread guide on the top of your machine.
Q: How do I thread the needle on a sewing machine?
A: Once you have guided the thread through the thread guides and tension discs, bring the thread down to the needle area. Hold the thread and thread the needle by inserting the thread through the eye of the needle from front to back. Ensure that the thread is almost even on both sides before you start sewing.
Q: What is the correct way to wind the thread on the bobbin?
A: To wind the thread on the bobbin, place your thread on the spool pin and bring the thread around the thread guide. Then, put the bobbin on the bobbin winder and wind the thread around the bobbin a few times manually. Secure the thread and engage the bobbin winder to fill the bobbin.
Q: How do I insert the bobbin into the sewing machine?
A: Open the bobbin case and place the wound bobbin inside, ensuring the thread from the bobbin follows the direction indicated in the machine’s manual. Pull several inches of thread out and guide it through the slot, then close the bobbin case.
Q: What should I do if the thread from the spool keeps tangling?
A: If the thread from the spool is tangling, check the tension on the thread and ensure that the thread is correctly placed through all the guides. Re-thread your sewing machine if necessary, and make sure the spool of thread is not catching on any rough edges.
Q: How can I adjust the tension on the thread?
A: The tension can usually be adjusted using a dial on the right side of the machine. If the top thread or bottom thread is too tight or too loose, adjust the tension dial gradually while doing test stitches on a scrap piece of fabric until the stitching is balanced.
Q: Why is it important to thread the machine correctly?
A: Threading the machine correctly is crucial to ensure smooth and even stitching. Incorrect threading can lead to issues such as skipped stitches, thread breakage, and tangled threads, which can disrupt your sewing project.
Q: What should I do if I encounter problems while threading the machine?
A: If you encounter problems, watch a sewing machine video tutorial for visual guidance, or refer to your machine’s manual for specific instructions. Double-check that each step of the threading process is followed correctly and that the thread is properly aligned.
Q: How do I start sewing after threading the machine?
A: After threading the machine, pull the thread back through the eye of the needle and the end of the bobbin thread to the back of the machine. Place your fabric under the presser foot, lower it, and begin sewing by slowly pressing down on the foot pedal.