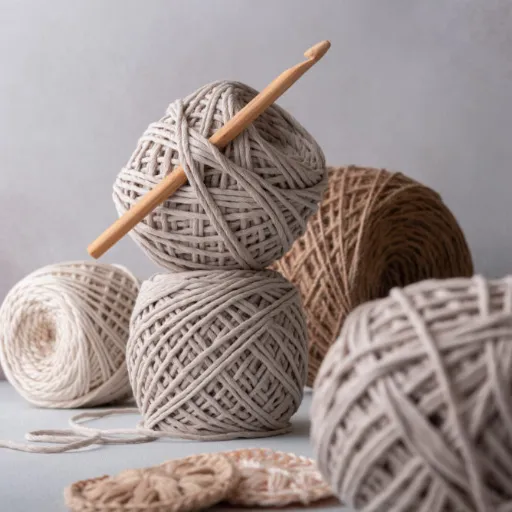


Crocheting is an ancient form of art which nurtures imagination as well as results in an exquisitely crafted piece of art. For starters, completing the first row can be quite exhilarating, and moving onto the second row is usually a daunting step. Understanding how to start the second row is crucial for achieving evenly spaced stitches and maintaining the integrity of your project. This manual will guide you through the primary steps necessary to progress in your crochet project. From warm and fuzzy scarves to lightweight and airy blankets, you will have the mastery to take on this important step with both confidence and calm. Look forward to step-by-step directions, useful recommendations, and mistakes that one should not make while proceeding with the crochet project.
Understanding the Foundation Chain in Crochet

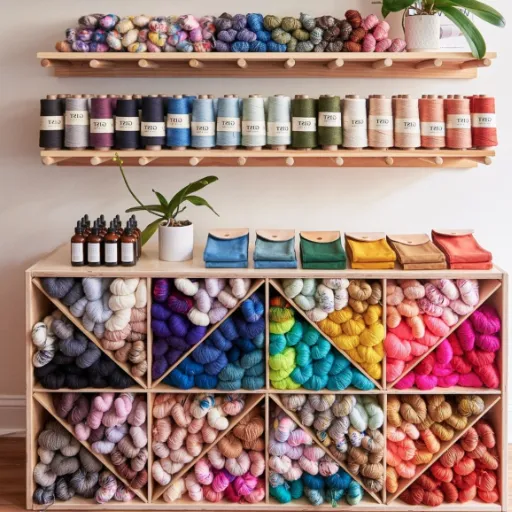
Like the initial layer of a multi-tiered structure, the foundation chain is the starting point for most crochet projects as it serves as the base for which stitches will be built. Create a foundation chain by making a slip knot on the crochet hook, followed by yarning over to pull through the current loop on a hook multiple times. Maintaining the tension during the procedure is critical so as to ensure the chain does not differ in consistency. This foundation is crucial for the consistency of the shape and size of the project. Make sure you cross-verify each of your stitches with the required count in the instructions so as to meet the specifics of the project.
What is a Foundation Chain?
A foundation chain is the first row of chain stitches at the start of a crochet project. It is the base that all other stitches have to be built upon. For crocheters, it is an important step as the quality of the foundation chain will determine the result of the entire project. The number of stitches a foundation crochet chain has will determine the width and length depending on the orientation of the project. Modern crochet styles focus on even tension and proper positioning of the hands throughout the chain making process to avoid irregularities like tight or loose stitches. Moreover, other methods such as foundation single crochet are increasingly famous for their ability to seamlessly combine the foundation chain with the first row of stitches for more ease, elasticity, and efficiency on some patterns.
How Many Chains to Make for Your First Row?
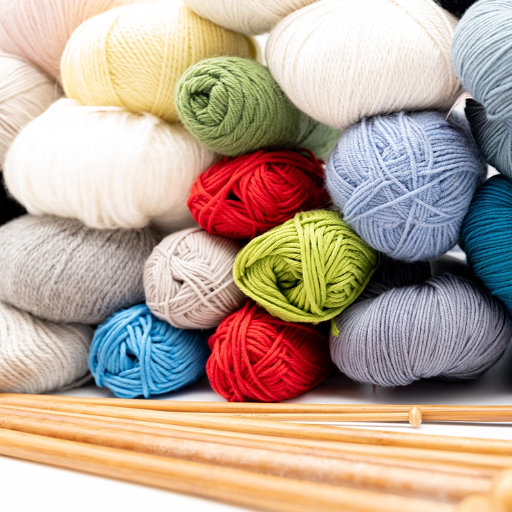
Crochet projects typically start with a specific number of chains which depend on the width, type of stitch, and overall intention of the project. Different stitches call for different turning chains—single crochet requires one and double crochet three. If you want to get the most precise starting number of chains, patterns usually outline all necessary details such as the count of stitches and starting chains. When crafting something unique, the first step is to decide the width you need alongside the gauge which is normally calculated as stitches and rows per inch. For instance, say your gauge is four stitches per inch, crafting a 12-inch wide project will require a minimum of 48 chains to ensure that the project meets the stated dimensions. Achieving the correct overall size and maintaining precision in the finished piece requires proper tension along with consistent estimating of turning chains. Make sure to create a small swatch to verify the gauge before starting the full project.
Importance of a Strong Foundation for Your Crochet Project
A firm groundwork in crochet ensures the integrity and final quality of the structural work in question. Selecting the right foundation chain or starting technique affects the stitches’ bounce, flow, and even positioning. For example, foundation single crochet (FSC) is more flexible than a traditional chain base, which makes it preferable for garments and other stretchable projects. Furthermore, seam and yarn properties, such as its fiber constituents and weight, enable different customizations and greater optimization of the project. Research emphasizes that proper tension in the construct and accurate first measurements helps avoid problems such as excessive warping or undesired edging in the end product. Attention to these steps will allow crocheters to obtain professional and refined results consistently.
Getting Started: Turning Your Work for the Second Row

To start completing the second row, Before you start, remember to complete the last stitch of the forework row, ensuring that the tension is uniform. Then, create a chain according to your pattern; generally speaking, it should correspond to the height of the next row (e.g., chain one for single, chain two for half double, and chain three for double). After chaining, Turn your work 180 degrees to reveal the back side of the stitches from the first row, You need to get to the position where you need to work in order not to twist your stitches, so now you’re positioned correctly to work along the new row.
When to Turn Your Work in Crochet
Turning work in crochet is an important technique that indicates the movement from one row to the next ensuring that the project progresses in an accurate manner and in accordance with the pattern requirements. This is done for each row that has been completed. When and how these turns are done depend on the type of stitch which is being executed on the crochet piece as well as the shape of the crochet piece as a whole. For simple shapes such as scarves and blankets, turning is needed in order to achieve the desired shape and dimensions. On the other hand, shapes like circular motifs or spirals do not require turning since they are worked in rounds. Following the patterns instructions about turning your work is crucial to avoid potential misalignment or structural flaws with the completed project.
How to Insert Your Hook for the First Stitch
In regards to ensuring smooth uniformity in your work, the first stitch hook insertion is a foundational technique. It is important to start off with holding the hook firmly in your favored hand. At the same time, ensure that the yarn and starting loop is gripped in the opposite hand straightforwardly so as to maintain focus. Use the hook to carefully insert to the starting point; this can either be the first chain or a loop that your pattern indicates. Please note that for precision projects like amigurumi or lacework, the hook must be placed over the right strand—standardly under both top loops unless stated otherwise. This is done to ensure the yarn is secured and offers a stable ground to work on without starting gaps. So much attention to detail permits relatively effortless cohesion of neat accurate placements of stitches during execution, which improves the quality of the finished project.
Understanding the Turning Chain
Its role in most crochet projects is that of an architectural feature that permits the height of the new row or round to be altered. The number of chains that turning as a chain requires is dependent on the stitch of the subsequent row. Commonly, one chain for single crochet, two for half double and three for double crochet. Important to add is that the turning chain may or may not in fact count as a stitch, depending on steps of the sequence as described by the designer. When it is counted, more often than not, it is regarded as the first stitch of a row. If turning is not counted, then the first “true” stitch is upon the base of turning the chain. There is no doubt that in forming the edge, state instructions have to be followed. This aspect of design is determined by stitch construction of the turn chain while giving the resulting piece balanced patterns along its borders.
Making the Second Row: Basic Crochet Stitches

For basic crochet stitches to form the second row, confirm first that the turning chain has been executed as stated in the pattern. It is time to place the crochet hook into the stitch of the row that comes before: normally, at the upper side of the first stitch (unless stated otherwise). Yarn over, pull a loop, and do the required step of the said pattern as a single crochet, a half double crochet, or any other stitch that was specified. Continue that way for the rest of the row and strive to maintain even tension so that the results are uniform.
How to Make a Single Crochet Stitch
Begin to create single crochet stitch by putting the crochet hook in the described stitch of the preceding row. The proper placement of the hook is vital.for height consistency so ensure that the hook goes under both stitches’ loops unless your pattern states otherwise. Yarn over (YO) the working yarn by running it back to front on the hook. With respect to placement, the yarn should be pulled through the stitch generating two loops on the hook. With respect to placement, the action can be done to put forty-two themselves over the subsequent loop on the hook. For that action, one single crochet stitch is completed. Keeping that much concentration requires lot leash for tangled thread and this might with sophisticated and reproducing arms, devices of the feet, devices of the repeats for repeatedly placing arms patterned things.
Double Crochet vs. Single Crochet: What’s the Difference?
The double crochet and single crochet differ mainly in the height and intricacy of each stitch. A single crochet is a stitch shorter in height which leads to a dense and tighter fabric. While double crochet is a taller stitch that has a more open and airy texture. This difference stems from the extra steps of double crochet. A single crochet stitch uses a single yarn over post hook insertion and a double crochet involves an initial yarn over pre hook insertion, pulling through two loops twice during the operation afterwards.
Because of the greater the height of the double crochet, a project utilizing this technique tend to work up faster as compared to single crochet, for more surface area is covered in less time. But single crochet is suited for projects that need strong structural integrity and durability such as bags, amigurumi or any other item that is expected to keep its shape. Double crochet performs best on blankets, scarves, or garments that need softer and more flexible fabric. Knowing the properties of these stitches gives crocheters the option to choose the method best suited for the purpose and look of their project.
Tips for Crocheting the Second Row Smoothly

- Start with Consistent Tension
To avoid row and congestion problems, make sure to have even tension in your stitches as inconsistent tension can cause distortion in the work.
- Locate the Turning Chain Correctly
Check if the turning chain is included as a stitch in your pattern. If it is included, execute the next stitch in the correct space to keep the appropriate stitch number.
- Check Your Stitch Count
Check your stitches from time to time to avoid adding or skipping which make change in the symmetry of the work which can be problematic.
- Place a Stitch Marker if Needed
Place the stitch marker in either the start or end of your row to simplify tracking your last or first stitch.
- Keep Edges Neat
Be cautious when working into the edge stitches. The finishing details of the piece will be greatly enhanced if the edges are crisp and well defined.
How to Avoid Common Mistakes
1. Understanding Gauge
Not following the required gauge of a pattern is a common mistake that may result in accomplishing the final piece with incorrect dimensions. Such discrepancies are most likely due to not creating a gauge swatch first using the suggested wool yarn and the hook or needle size. If any issue arises, correct your tension first and then your tool size.
2. Maintaining Consistent Tension
Lack of uniform tension remains on of the most prominent causes for uneven stitches, further distorting the structure of your work. Maintain a consistent approach as you knit in and out with your yarn to ensure a smooth execution.
3. Reading Patterns Properly
Omission and misinterpretation of steps is often common in intricate designs. Ensure you double-check every instruction and symbol before commencing. Pay extra attention to sections that include repeats and take time to comprehend the provided abbreviations as well as charts in the pattern.
4. Counting Stitches Regularly
To curb any form of unintentional increases or decreases in the stitch count, make it a priority to track the number of stitches on every row or round during progress checks. These targeted progress checks put your work in a favorable situation where symmetry can be easily maintained.
5. Choosing the Right Materials
Deviating from the suggested yarn weight, fiber, or even tools may lead to a different outcome. If you do decide to ignore these parameters, be ready for precise alterations beyond measure. It is advisable to stick to the pattern guidelines especially when it comes to yarn and tools selection.
Using a Stitch Marker for Precision
If you’re looking to keeping everything organized in your crochet/knitting project, then socks markers will be a great help. Sock markers are tiny aids, which are extremely useful in remembering places such as the start of a new row, place for a stitch increase of decrease, starting/end point for repeating patterns, and so on. When placing stitch markers at regular intervals while working, one is less likely to skip any steps in the pattern.
Locked stitch markers, split-ring markers, and clip-based markers make up modern-day stitch markers. All of which have been designed to fulfill different needs. When working on complicated patterns, it can also help with solving any potential problems ahead by marking visually what still needs to be worked on. Great care needs to be taken while placing sock markers, as well as ensuring the surrounding stitches won’t get overstretched, as this could have major impacts on your project. As your work advances, regularly re-evaluating your stitch markers’ positions needs to be done to make sure they fit correctly within the frame of the pattern.
Advanced Techniques: Transitioning Between Rows

To prevent inaccuracies in the transitions of rows, every new row must be aligned to the established order. Therefore, marking the first and last stitches on every row is important as they act as a reference point. It is also advisable not to lose track of the stitch count, hence, using a counter or counting manually is recommended. While transitioning, ensure that the tension is governed consistently otherwise it could lead to distortion. In the case of complex patterns, reviewing the pattern diagram after every other row helps identify errors while preserving structural integrity.
How to Finish a Row Properly
Maintaining the last stitch’s accuracy is critical if you want the row to line up with the rest of the work. Hold the tension as you secure the last stitch to avoid any slack that could affect the next row. If the pattern calls for a turning chain, make it as directed since it will often serve as the first stitch of the next row. It must have the same height of the stitch type it represents, whether it is a single crochet or double crochet. In knitting, check that every stitch is correctly worked onto the needle so there are no misses, drops, or stitches added by chance. Lastly, make sure the stitch and rows are correctly counted and balanced on all sides. Finishing a row gives a clean edge to the work while concurrently lowering the level of difficulty in starting work on the next row.
Starting the Next Row: Best Practices
Your crochet and knitting projects require that you set a new line with precision and technique. Ensure that you have made the correct turn, since the orientation of the fabric whole is very important in pattern works. For crochet, ensure turning chain is in the right place, often it has the height of the stitches for that row, e.g., for double crochet it is a chain three. Knitters should be especially mindful of row change tension because wrong tension will disrupt the pattern of the fabric.
Make it a habit to check some of the resources that apply to your pattern from time to time to affirm that stitch techniques are exactly right. For colored work, or complicated textural work, note your row progress with markers or with written notes to prevent mistakes that further compounds got deeper rows. These methods lead to uniformity, increased durability, and eye-pleasing aesthetics to the fabric. Do not proceed further to check if your yarn and tools are compatible because they determine the finish and the structural integrity of the project.
Reference Sources
-
Koi Fish as an Inspiration for Wall Decoration Artwork: This paper briefly mentions crochet as a knitting technique using a hooked needle, but it doesn’t delve into specific crochet methods or techniques.
-
Geometrical Analysis of Warp Knit Auxetic Fabrics: Discusses fabrics made using a crochet knitting machine, focusing on technical aspects of fabric production rather than hand-crochet techniques.
-
The Skits, Sketches, and Stories of MotherScholars: Mentions a crocheted item (a pussy hat) as part of a personal narrative, without any technical or instructional content.
Frequently Asked Questions (FAQs)
Q: How do I start the second row of crochet as a beginner?
A: To start the second row in crochet, you first need to create a chain stitch that is equal to the height of the stitch you are using. For instance, if you are using half double crochet, you will typically chain two to begin the second row.
Q: What is the foundation row in crochet?
A: The foundation row is the first row you create in your crochet project. It sets up the base for all subsequent rows and is crucial for understanding crochet basics.
Q: How do I insert the hook to start a second row?
A: To insert the hook for the second row, you will typically insert it into the top of the last stitch of the previous row, making sure to pull up a loop and continue with your chosen stitch.
Q: What does the end of the row mean in a crochet tutorial?
A: The end of a row refers to the completion of all stitches in that row. At this point, you typically finish with a slip stitch or a designated stitch to transition into the next row.
Q: How do I use the second chain from the hook when starting the second row?
A: When starting the second row, you will yarn over the hook and insert it into the second chain from the hook, pulling through to create your first stitch of the new row.
Q: What is a half-double crochet stitch?
A: A half-double crochet stitch is a basic crochet stitch that is taller than a single crochet but shorter than a double crochet. It is commonly used in crochet patterns and is essential for beginners to learn.
Q: How does the second row depend on the previous row?
A: The second row in crochet builds directly on the previous row, meaning the number of stitches and the type of stitches used in the previous row will dictate how you start the second row.
Q: What do I do if I have loops on your hook at the end of a row?
A: If you have loops on your hook at the end of a row, you need to ensure that you complete the last stitch of that row before starting the new row. Each stitch must be finished to maintain the correct pattern.