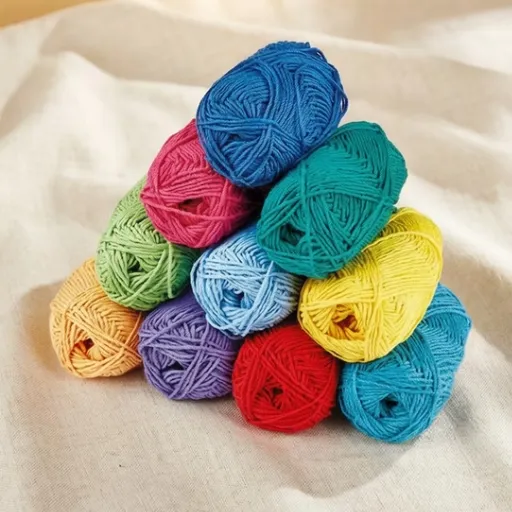
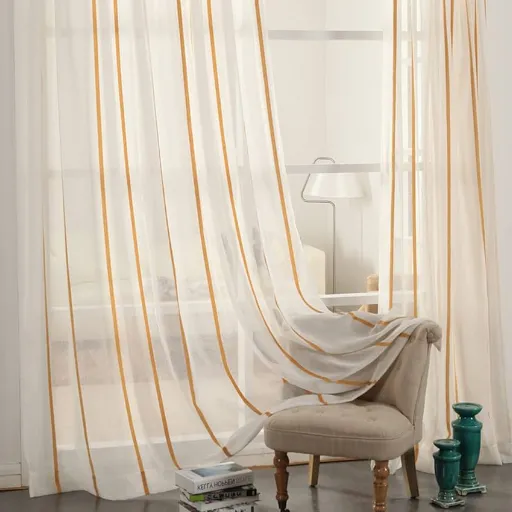


From warm blankets, and intricate pieces of clothing to beautiful artistic designs – the craft of crocheting is full of rewarding features. For those beginning to learn, mastering the basics becomes daunting, especially when trying to go beyond the first row of stitches. Worry not as this guide will ease the process by giving a straightforward paced solution. We will delve into one of the most basic yet crucial skills in crochet; the second row, in this case. With the intent of instilling confidence in your technique while also steering clear from obstacles, this article will provide simple step-by-step instructions to build upon. Being able to maintain turning tension, correct stitch placement, and your work will allow for a flawless transition between rows. This piece will serve as an introduction for both those looking to refine their skills, and those new to crochet, allowing them to expand their abilities.
What is the Importance of the Foundation Chain in Crochet?

The foundation chain serves as the base upon which all crochet projects are built. It is critical for establishing the initial structure and determining the width and stability of the piece. A properly executed foundation chain ensures even tension, consistent stitch sizing, and prevents warping or curling of the final project. Additionally, it provides a guideline for placing the first row of stitches, which is essential for maintaining the integrity and symmetry of the design. Without a reliable foundation chain, the entire project may lack durability and aesthetic appeal.
How to Create a Strong Foundation Chain for Your Project
To create a strong foundation chain, it is essential to start with a slip knot on the hook and ensure an optimal balance of tension. Begin chaining by wrapping the yarn around the hook and pulling it through the loop, repeating this process until the desired number of chains is achieved. Pay close attention to uniform tension; chains too tight may cause difficulty in working the initial row of stitches, while chains too loose can result in an uneven and unstable edge. Use a hook size appropriate for the yarn type to maintain consistent stitch size and structure. For projects requiring flexibility, such as garments, consider using foundation stitches as an alternative since they incorporate both the chain and the first row simultaneously, offering improved elasticity. A strong foundation chain not only enhances the functionality of the project but also ensures a professional and polished finish.
Common Mistakes When Making a Foundation Chain
- Uneven Tension
Maintaining consistent tension while chaining is crucial. Irregular tension can lead to chains that are either too tight, making the initial row difficult to work, or too loose, resulting in a misshaped and unstable edge. Practice and adjusting hand positioning can help achieve even tension.
- Incorrect Hook Size
Using the wrong hook size for your chosen yarn can negatively affect the foundation chain. A hook that is too small may create tight, rigid chains, while a larger hook could produce loose, floppy chains. Consult the yarn label for recommended hook sizes and perform a gauge swatch if necessary.
- Overlooking Chain Count Accuracy
Miscounting chains in the foundation can disrupt the project, especially for patterns with specific stitch counts or repeats. Double-check the required number of chains after completing the row to avoid errors and reworking.
- Not Accounting for Stretch Needs
For projects requiring elasticity, such as garments, failing to accommodate stretch can result in a foundation chain that is too rigid. Opting for foundation stitches as an alternative can address this issue by integrating flexibility directly into the starting edge.
Avoiding these common mistakes can significantly enhance both the appearance and functionality of your project, ensuring a stable and professional result.
How the Foundation Chain Supports Your Second Row
The Foundation Chain is a crochet project’s first step and it is extremely important. This chain influences how easy it will be to work on the project’s stitches. The base needs to have precision and appropriate tension for the ease-of-work appearance ratio to be good. A properly crafted foundation ensures the ideal spacing in the second row, allowing for pattern transitions and adjustments seamlessly. By managing the right measure of stretch and pull upon the Foundation stage, gaps, puckering or excessive tightness are easily avoidable in the stitches that follow. This base not only gives shape to the most beautiful crochet work, but increases the strength and functionality of the project.
How to Turn Your Work to Start the Second Row

To turn your work and begin the second row, simply rotate the crochet piece horizontally so that the hook is on the right side (for right-handed crocheters) or the left side (for left-handed crocheters). Chain the required number of stitches for the turning chain, as specified in your pattern, since this chain sets the height for the next row. Ensure the stitches remain even and maintain consistent tension during the turning process to avoid distorting the edges of your project. Proper turning technique is crucial to create a clean, symmetrical edge and ensure the structural integrity of your crochet work.
Steps to Turn Your Work Effectively
- Complete the Current Row
Before turning your work, make sure the stitches of the current row are completed according to the pattern. This ensures the foundation for the next row is secure and even.
- Rotate Your Crochet Piece
For right-handed crocheters, turn the work clockwise, and for left-handed crocheters, turn it counterclockwise. This rotation positions the hook and working yarn in the correct orientation for the new row.
- Chain the Required Turning Stitches
Refer to your pattern to determine the number of turning chains needed. This chain typically corresponds to the height of the stitches in the next row (e.g., chain 1 for single crochet, chain 2 for half double crochet, and so on).
- Maintain Tension and Alignment
While turning and chaining, ensure consistent tension. This helps avoid loose loops or overly tight edges, which can distort the shape of the project.
- Start the New Row
Insert your hook into the first stitch of the new row as directed by your pattern. Check for alignment with the previous row to ensure straight edges and a professional finish.
By following these steps methodically, you can maintain the consistency, durability, and aesthetics of your crochet piece, regardless of its complexity.
What to Do if Your Turning Chain is Too Tight
If your turning chain is too tight, it can cause your edges to pull and distort the overall shape of your project. Here are some strategies to resolve this issue:
- Adjust Your Tension
Pay attention to how tightly you hold the working yarn. Relax your grip slightly when creating the turning chain to allow for a looser, more flexible result.
- Use a Larger Hook for the Turning Chain
Switching to a hook size slightly larger for the turning chain only can help create a looser chain without altering the rest of your stitching.
- Add an Extra Chain
Occasionally, adding one additional chain to your turning chain may help prevent the edges from puckering—but only if it suits your project pattern.
- Practice Consistency
Spend time practicing your turning chains to develop a consistent technique, ensuring uniform tension across your work.
- Reevaluate Your Pattern
Some patterns may recommend alternative turning chain methods, such as starting the row with a stitch instead of chaining. Consider adapting these techniques to suit your project.
By applying these methods, you can ensure smoother edges and preserve the structural integrity of your crochet project.
How to Avoid Twisting When You Turn Your Work
To prevent twisting while turning my work, I make sure to always keep my fabric and hook in the same position throughout the entire process. I first inspect my row’s stitches to see if they have any twisting, which would make them not lay flat. In terms of how I turn the work, I always flip it either clockwise or counterclockwise, so it remains the same every time I do it, which helps to not create tension problems. I also verify that my yarn is not feeding too fast, as this will make it prone to tangling, which leads to twisting. Following these steps allows me to achieve even, tidy rows without wasting too much time dealing with unnecessary mistakes.
How to Crochet the Second Row with Different Stitches

When crocheting the second row with different stitches, begin by identifying the type of stitches required for that row—such as single crochet, double crochet, or half-double crochet. Start by chaining the appropriate number of stitches to establish the height needed for the selected stitch. Insert your hook into the correct loop of the previous row, ensuring consistency with the pattern, and execute the stitch as directed. Be mindful of maintaining even tension throughout to avoid uneven rows. Repeat this process across the row, making certain to count your stitches diligently to stay aligned with the pattern and prevent errors.
Starting the Second Row with a Single Crochet Stitch
To start the second row with a single crochet stitch, begin by chaining one stitch at the end of the first row. This chain serves as the turning chain and provides the proper height for the single crochet stitch. Turn your work to access the opposite side, ensuring you do so evenly and without twisting the row. Insert your hook into the first stitch of the previous row, under both loops, unless the pattern specifies otherwise. Yarn over, pull through the stitch to create a loop, yarn over again, and pull through both loops on the hook to complete the single crochet. Continue this process across the row, keeping your tension consistent and counting each stitch to maintain alignment with the pattern. Finish the row by placing a single crochet in the last stitch to ensure a clean edge.
Steps for a Double Crochet Stitch in the Second Row
To begin the second row with a double crochet stitch, chain two or three stitches at the end of the first row, depending on the pattern’s instructions. This chain acts as the turning chain and establishes the height required for the double crochet. Turn your work carefully to avoid twisting the row. Yarn over once before inserting your hook into the designated stitch of the previous row—typically the second or third stitch, as specified by the pattern. Insert the hook under both loops of the stitch. Yarn over again and pull through the stitch, creating three loops on your hook. Yarn over once more and pull through the first two loops on the hook, leaving two loops remaining. Yarn over a final time and draw through the last two loops to complete the double crochet stitch. Repeat this process across the row, ensuring consistency in tension and accuracy in stitch placement. Conclude the row by working a double crochet stitch into the last stitch to maintain an even, straight edge.
How to Use the Half Double Crochet in Your Second Row
Before proceeding with the second row, check the pattern that you are trying to follow. This step indicates if you will be performing one or two chains to begin. Your turning chain position serves as a placeholder for the actual work you are going to do. You need to start working on your project, with trying to maintain the positions of your stitches. This portion needs a little bit of attention so you do not end up unsuccessfully trying to turn your work while twisting your stitches. According to the patterns, use a chain stitch or the first stitch when you are starting to work on your rows. Make sure that the rest of the work that you have already completed remains undisturbed. Aim for a precise take with the rest of the work that you are completing, as this is known to greatly aid outcomes, precision, and accuracy. One at a time, loop yarn over and pull the stitch with a hook. While using a single half double crochet stitch, use a crochet hook with a slight hand so that all three stitches can be grabbed without extra effort. Look at how all of the threads have been exclusively pulled apart with only one action being provided by you. Upon completing the action, draw a chain with your thumb simultaneously, causing your thumb to go up in the air. In this area, keep even tension at all times, or otherwise, the complete fabric that you are aiming for may not ever be achieved. Place the center of the Multi Point Sculpture in the place where the last pull can be conducted. This is your means of achieving straight edges along your arrow, which serves as your endpoint.
How Does the Second Row Affect Your Overall Crochet Project?

The second row sets the base for the rest of your crochet work. It helps stitch tension and alignment stay constant, which is crucial for eradicating uneven edges as well as getting the fabric into the desired shape. Mistakes made in this row tend to spread throughout the project, making it necessary to perform every stitch exactingly. Besides, this row enables accurate placement of the starting chain within the fabric which enhances the overall strength and visual appeal of the design.
The Role of the Second Row in Shaping Your Crochet Blanket
The second row contributes significantly in setting the structure and style detail of your crochet blanket. It consolidates the adjustment from the starting chain by getting the heave and position right, which is paramount to giving smooth edges. The row’s incorrect height can result in dip or bulge, which causes the sides to be warped, affecting the symmetry and sturdiness of the blanket. Moreover, the second row pattern base also allows changes for increases and decreases and other special stitches which have defining characteristics. Hence, this row contributes to the achievement of the entire project without compromising quality.
How to Maintain Consistency Across Rows
To achieve a perfectly polished crochet blanket, it is necessary to keep all rows in sync. To achieve this, start by managing your stitch tension. Inconsistent tension can result in distortions or irregularities in the fabric. Use a properly sized crochet hook for your yarn and maintain consistent hand motion to achieve desired results. Use counted stitches at the end of every row to ensure no increase or decrease would disrupt the balance of the crochet blanket. As a guide and to help avoid missing critical stitches, markers can be used for crucial locations such as the first or last stitch. Ensure that your surroundings are comfortable as well as well lit to maintain focus, which will help reduce the chances of making mistakes as you work on the blanket. Following these practices will yield a crochet blanket with smooth edges, aligned rows, and a uniform appearance.
What to Do if the Second Row Appears Uneven
In case the second row of your crochet work looks lopsided, it is best to check your preceding row’s tension first because too much or too little tension is a recipe for uneven stitches. Loosening your grip on the yarn and maintaining a rhythmic pace is vital. Furthermore, review your stitch count for both the first and second rows; too many or too few stitches will certainly yield variations. If need be, critical points such as the row’s ends may be temporarily marked with them for later reference to ensure uniformity. Furthermore, confirm that you are following the pattern instructions and that your stitches are indeed what you claim them to be; if they are not, the alignment of the row can easily be disrupted. Should these actions not remedy the problem, try undoing the second row and crocheting it again with less tension and slower movements. Comparing the rows after completing each segment will allow you to solve as many errors as possible as soon as they happen. Sticking to these steps should prevent unsightliness while maintaining seamless precision throughout your project.
How Many Chains to Make for the Second Row?

The number of chains required for the second row depends on the specific stitch pattern you are working on. Typically, the height of the stitch determines the count of turning chains. For example, single crochet (sc) usually requires 1 chain, half-double crochet (hdc) requires 2 chains, double crochet (dc) needs 3 chains, and so on. Always refer to your pattern instructions, as some designs may specify variations. Ensuring accurate turning chains is crucial to maintaining proper row alignment and avoiding gaps along the edges.
Understanding the Relationship Between Chains and Stitches
The relationship between chains and stitches lies in their foundational role in creating the structure of crochet fabric. Chains form the basis of the starting row, while the tension and number of chains directly affect the fabric’s size and shape. The turning chain, specifically, acts as a substitute for the first stitch in the following row and provides the necessary height depending on the type of stitch used. For instance, a single crochet uses fewer turning chains compared to a double or treble crochet due to the differing heights of these stitches.
When determining how many chains to create or how they correspond to stitches, always follow your pattern’s instructions to accurately transition between rows. Common stitch heights have standard chain counts, as outlined above, but variations in technique and design may alter these guidelines. By understanding the technical requirements of each stitch, you can ensure your work maintains uniformity and precision.
How the Number of Chains Depends on Your Crochet Pattern
The number of chains needed for any crochet pattern is determined by countless associated factors such as the stitch type, project scope, and any prescribed instructions compiled within the specific pattern description. For more informative patterns which include more detailed motifs or designs, the chain foundation count often covers the repeat size of the design so that the result and the scope intended for the work’s structural design are in harmony. For example, if your pattern has a repeat stitch of six, then the total number of the foundation chains should be a multiple of six with some extra edge chains, or turning chains if required.
Patterns decide the turning chain height based on the stitch that follows in the next row. Chain one is often enough for single crochet, while double crochet usually demands chain three. It is very important to interpret the pattern symbols and notes because they provide instructions on how to use the correct chain counts, which would guarantee that you have the right proportions and alignment.
While editing or even drafting a pattern of your own, do not forget to employ the gauge swatch to check the chain counts against the targeted dimensions through the gauge swatch. Mind that some modifications will probably be needed because of a difference in yarn type, hook size, or personal tension. Abiding by these rules is the best guarantee that the crochet project will be both accurate visually and structurally flawless.
Adjusting the Chain Stitch for Different Crochet Projects
The chain stitch is a foundational technique in crochet, used to establish the baseline for most projects. To adjust the chain stitch for varying projects, consider the following:
- Purpose of the Project: Assess the requirements of the pattern being followed. For instance, chain lengths differ based on whether you’re creating a scarf, blanket, or intricate lacework. Always reference your pattern specifications for the correct number of chains required.
- Yarn and Hook Size: Thicker yarns and larger hooks result in bulkier stitches, which directly impact chain length. If substituting materials, conduct a gauge swatch to ensure your chain aligns with the desired size and tension of your project.
- Tension Consistency: Maintaining even tension is critical when chaining. Loose chains may create uneven edges, while tight chains can distort the structure of your work. Practice consistent tension to match the pattern’s gauge.
- Custom Adjustments: For projects without precise dimensions, such as freestyle designs, measure the chain length against the desired finished size. Add or subtract chains as needed until the baseline meets the project requirements.
By combining proper gauge measurement, material compatibility, and intentional adjustments, the chain stitch can be adapted effectively to suit any crochet project.
References
Frequently Asked Questions (FAQ)
Q: What is the most important step for a beginner when learning to start a second row in crochet?
A: For beginners, understanding how to transition from the first row to the second row in crochet is crucial. This involves mastering the turning chain and knowing where to place the first stitch to ensure even, straight edges in your project.
Q: How do I make sure I start a new row correctly in crochet?
A: To start a new row, first determine the correct turning chain for the stitch you are using. For example, a single crochet requires one turning chain. Insert the crochet hook into the first stitch of the previous row, yarn over, and pull through to begin the next row.
Q: Can you explain the process of counting stitches when beginning the second row in crochet?
A: Counting stitches is essential to maintaining the desired width of your crochet project. As you start the second row, ensure you count each stitch across the row, including the first and last stitch, to keep your work consistent.
Q: What are some tips for identifying the first stitch in the second row when working in rows?
A: The first stitch in the second row is typically worked into the first stitch of the previous row, not the turning chain. This helps create a clean edge. Use a stitch marker to help identify the first and last stitch if needed.
Q: How does the type of stitch affect starting the second row in crochet?
A: The type of stitch used in your project (single, half-double, or treble crochet) affects the turning chain and where you place your first stitch. For example, a half-double crochet requires two turning chains, while a treble crochet stitch needs three. Adjust accordingly to maintain the pattern.
Q: What is a common mistake beginners make when starting the second row?
A: A common mistake is missing the last stitch of the row or incorrectly identifying the first stitch, which can lead to uneven edges. Pay close attention to the beginning and end of the row to ensure each row of stitches is complete.
Q: Are there any crochet tutorials or resources that can help beginners learn how to start a second row?
A: Yes, there are many crochet tutorials available online, including detailed video tutorials on platforms like YouTube. These resources often provide a transcript and visual guidance to help beginners understand the process step by step.
Q: How can I ensure even tension when starting the second row in crochet?
A: To maintain even tension, keep a steady and consistent grip on the yarn and crochet hook. Practice maintaining an even tension across the row, and ensure that each stitch loops through the two loops on the hook properly.
Q: What should I do if I notice my rows are uneven after starting the second row?
A: If your rows are uneven, double-check your stitch count and ensure you are starting each row with the correct turning chain. Take your time to adjust any mistakes by unraveling and reworking the row if necessary.