


Different items like shawls and blankets can be made by learning the very useful skill of crocheting. Crocheting is an age-old craft which is very rewarding and serves as a great pastime. The first row is the most important since it provides the basis for understanding the purpose and providing effort in the work. If this is well managed, the next row or second row would be even easier. The row of stitches on top of the work focused on the second row are quite basic to the second row itself. While this website is trying to accommodate learners regardless of age by making this article as enjoyable as possible, the goal is to make the process as detailed yet simple. The vivid imagery paired with the simple and precise language breaks down the process so that it is efficient and delightful. It serves as an ideal starting point as well as a finishing touch, and so I believe this article serves as a foundation for most techniques. In both cases, providing solid grounding is crucial to fostering the creativity that follows.
How do I prepare to crochet the second row?

With the foundation row evenly distributed, you may check to see if there is any tension in the row. This part is very helpful because it will help you with stitching. Mark the turning chain that goes with the stitch you mean to work so that the row’s height and shape is preserved. Considering you are all set for your next rounds of stitches, ensure the yarn and hook are in the desired position to facilitate active stitching.
What materials do I need for crocheting the second row?
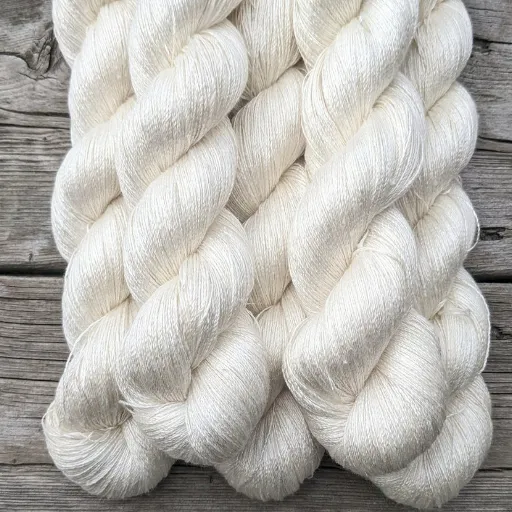
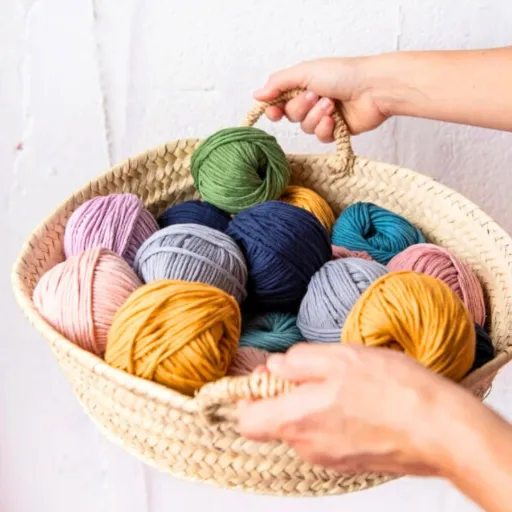
I recommend that you put together some of the vital materials to crochet the second row. First, it is advisable to have the same yarn from the foundation row; this will ensure that the texture and color meet required standards. Your crochet hook will also be necessary; preferably, it is of the same size as the recommended one for the yarn so that the stitches can be done at the correct level of tension. Scissors are useful for cutting off some stray threads while a yarn needle makes it easy to tack in the threads later on. In addition, it is important to have a tape measure in case there is a need to check the size of your work, so that it can be done promptly. These aids make crocheting simple and precise.
How do I complete the first row before starting the second?
Before you can start on the second row of your project, the first row must absolutely be completed. First, make sure all of the stitches have been made across the chain foundation you set up. After finishing the last stitch of this part of your work, turn your work over so that the other side is facing you. If your pattern states so, add your turning chain, which is one or two chains for single and half double crochet respectively or three chains for double crochet. The aim of this is to get your work high enough to start on the next row. This toe off is the ideal position for starting the second row without any hassle.
What is a turning chain and why is it important?
Of note is that a turning chain serves as one of the most basic parts of crochet as it forms the last stitch of a row in order to aid in the crochet of the following row. Personally, I believe that the correct turning chain in question adds height to the stitch to complete it within the row, thus allowing mismatches in the edges and within the portions in the crochet to be avoided. While the modification may themselves be too minute to see, eliminating or not using it properly can change the final measurements of your piece to some extent, changing the flow of your pattern. Though simple at first glance, this single technique is very crucial because it determines how successful your work will be.
What are the basic steps to crochet the second row?

In order to crochet the second row, turn over the work, and make the necessary turning chain. For single crochet, chain 1; for half-double crochet, chain 2; and for double crochet, 3. Yarn over and make the stitch required by the pattern by placing the hook into the assigned stitch at the beginning of the row. Continue crocheting through the row, making sure to crochet a stitch into each of the loops that sit on top of the stitches underneath. Ensure there is consistent tension throughout the stitches being worked; also make sure to count the stitches to confirm there are even rows and balanced work.
How do I turn my work to start the second row?
Prior to beginning the second row of my work, I always ensure to complete the turning chain, as this serves as the first stitch on the new row. The number of chains differs based on the stitch type, such as ch 1 for single crochet and ch 2 for half double crochet, etc. When I am finished with the chain, I turn the piece to the opposite side. I am now in a position where I will be able to work on the next row. My position of the turning chain is correct so I can keep my rows neat and even with the edge.
Where do I insert my hook to begin the second row?
Unless stated in your pattern, it is common practice to insert the hook into the first stitch of the last row to start the second row. For standard stitches like single or double crochet, this first stitch falls beneath the turning chain. Be sure to work under both legs of the stitch to create a tidy, well-defined finish.
How do I make the first stitch of the second row?
To create the starting stitch on Row 2, I begin the process by inserting my hook into the first stitch of the previous row. To ensure sitting of the new stitch’s basis, I remember to go under both loops which provide additional stability. If there happens to be a turning chain, then I need to pay keen attention to and the sketch because, in some cases, the turning chain acts as the first stitch. These steps are essential in ensuring that the rows are even and don’t misalign with the professional finishing lines.
What are common stitches used in the second row of crochet?

The most basic stitches used most often in the next row of crochet work are single crochet (sc) stitches, half double crochet (hdc), double crochet (dc), or even slip stitches (sl st) that can be used for shaping. The type of stitch to use on a selected row varies depending on the pattern to be crocheted since every individual stitch has its own beauty and greatly influences the final texture and form of the work.
How do I make a single crochet stitch in the second row?
To neatly carry out a single crochet stitch (sc) in the second row, I ensure that the stitch has been properly done by performing a particular well defined step. This is what I do:
- Insert the Hook: Firstly, I place the hook into the first stitch of the previous row. This is one of the tops of a single crochet stitch below, looking like a little ‘v’ shape.
- Yarn Over (YO): Afterwards I do yarn over, which is returning from the back and bringing the yarn from spring to the front of the hook. This means that a loop can be pulled through in the next step.
- Pull Through: Afterwards, I slowly pull the yarn through the stitch. Now at this moment, I have two loops on the hook.
- Yarn Over Again: I yarn over again which creates another loop on the hook.
- Pull Through Both Loops: The very last step is pulling the yarn through both loops of the hook where I was earlier. That finishes a single crochet stitch and now I have a single loop left on the hook and am prepped to do the next stitch.
It is important to keep an even amount of tightness throughout and ensure that the hook is placed below both loops at the top of the stitch, unless instructed otherwise, when making single crochet stitches on row two or higher. This results in a neat appearance and even texture throughout the piece. Adhering to these principles will allow you to create a firm, uniform foundation for any crochet project.
What’s the technique for a double crochet stitch in the second row?
To begin the second row, I need to complete a double crochet stitch which consists of chaining three stitches. As these three stitches are considered the first double crochet, they need to be included. After that, I yarn over and hook into the next row’s next stitch under both loops. I then yarn over and pull through the stitch while leaving three loops on my hook. After that, I can yarn over and pull through the first two loops on my hook and now, I have two loops on my hook. Finally, I yarn over and pull through the last two loops on my hook. If this procedure is completed in a quick fashion, a uniform, even tension will be achieved throughout the work.
How do I create a half double crochet stitch in the second row?
In order to make the half double crochet stitch on a second row, begin by chaining one at the end of the first row and turning your work. Yarn over, insert hook into the top of the first stitch of the previous row, ensuring that you hook under both loops of the stitch. Yarn over and pull through the stitch so you are left with three loops on your hook. Yarn over again and pull through all three loops. Continue making crochet stitches across the row, making sure to keep consistent tension that will provide for the same size stitches.
How can I ensure my second row of crochet is even and neat?

When practicing crochet, check for gripping and slippage of the yarn as you proceed. fatigue, and pulling elevation at which point it will remain as a circle. To enhance the process, I advise that you always make use of a circular knitting needle when working on the crochet, for that will enable you to round off the crochet in a tight way. When making a slip stitch on the last letter of your crochet, keep in mind that your hand should be slightly jerked. After adjusting it just right, I twist the crochet to the edge and with the needle I jerk it straight to the edge at the bottom while crocheting. Therefore, you will be able to make a perfect crochet edge.
What are some tips for maintaining consistent tension in the second row?
It is important that every stitch beneath the foundation row up until the very first row of the second row matches the uniformity requirement. This will allow for even tension on the following rows. When knitting, ensure that your hold on the yarn is within acceptable limits. Too loose, and too tight, both result in undesirable outcomes. Since consistency in tension is crucial, place some stitch markers to assist in spacing. Additionally, holding a constant flow with little motion while stitching can help with accuracy.
How do I count stitches to keep the second row the same length as the first?
It would be best if you kept count of the stitches on the first row. Make sure to document how many stitches you have made as you complete the row. After that, check if your second row lines up with the first. I recommend placing a marker after every ten or twenty stitches. This aids in tracking how many stitches have been completed and guarantees that one adds the required number of stitches. This is what enables me to be precise in every project that I undertake.
What are common mistakes to avoid when crocheting the second row?

Let’s use the context of sewing to paint a scenario. If beyond any other fabric, stitching without properly completing steps while taking a break would completely ruin any and all chances for the end product being reasonably coherent. This would consequentially lead to stitches being completely unsaked and out of shape, leading to the entire fabric piece having an abomination of a design. The systematic prerequisite approach in place for the entire realm of stitching serves a pivotal role to cater for the myriad of potential “problems” on focus cuts. One such problem that stands out the most, if not perfectly pitched, is starting on the next line. Besides, stirring stitch two in the second line is another problem in itself. Not to be overlooked is the placement of the hook as a frustrating mistake to make that dictates all steps that follow for the entire piece depend on how well that baby step was executed. Furthermore, if the size of the design being worked on is vast, ensuring to get the initial focus on that row without controlling the latter while tackling the former is bound to switch how the design looks. If the work being put into the stitching is extreme care, at least attention to frame stands right out there.
How do I prevent my work from getting tighter or looser in the second row?
Remember to avoid working too tight or loose in row 2; try to maintain an even pull on the yarn as well as on your grip. As you do this, try to keep your hands as loose as possible so you do not pull the yarn too tightly as well as to maintain a steady rhythm for stitch uniformity. You may find it useful to assess your row from time to time and make any modifications needed to achieve uniformity. Above all, practice aids perfection; eventually, you will become accustomed to feeling the necessary tension.
What should I do if I accidentally skip a stitch in the second row?
Everyone makes mistakes, and missing a stitch in the second row is a common one, something that has happened to me multiple times. The easiest method to correct the missed stitch is to carefully unravel the knitted work to the point of the mistake and remedy the missed stitch and rework the stitch. This should ensure that the desired pattern will be consistent throughout the piece. An alternative would be to try and pick up the stitch and incorporate it into the fabric. This method is not advisable because it changes the look of the fabric as well as the tension. Everything boils down to one conclusion: correcting mistakes when they are smaller later on translates to lesser hassles.
How do I finish the second row and prepare for the third?

For the second row, make sure you follow the established guidelines and make all the stitches with even tension. Verify that there are no mistakes at the end. For the third row, rotate your work to the indicated position of the scheme and make sure the yarn is in the correct place to make the next stitch. Keeping track of different scopes of work will ensure that the work and outcome will flow seamlessly.
What is the proper way to end the second row of crochet?
In my opinion, the second row of crochet should be completed using a stitch that is accurate and meets the stipulations of the pattern. I like to reconfirm my stitches at the end of the row so that I do not run into complications in the latter stages of my work. After completing the last stitch in the row, I slightly pull my yarn in order to set the tension before I shift my work for the next round. This practice has helped me achieve the maximum precision as well as clear cuts in the edges of every project that I undertake.
How do I transition from the second row to the third row?
To traverse from the second row to the third row, I ensure that the stitches are secured and are not at risk of becoming undone. Afterwards, I carefully turned my work. Whether that involves chain stitching a specific number of times or pulling a chain to elevate for the next row, I take pleasure in completing the steps within the pattern. I also think that systematically turning the work after a controlled tension has been maintained on the yarn serves to prevent twisting or gaping at the edges. This practice certainly helps in completing a perfect transition between the rows that gives the project a neater finish.
Reference
- How to Crochet: For Absolute Beginners – A detailed written guide covering basic crochet techniques.
- How to Crochet for Beginners: A Complete Guide – A comprehensive step-by-step tutorial for beginners.
- How to Single Crochet and Start a New Row (YouTube) – A video tutorial demonstrating single crochet and starting a new row.
Frequently Asked Questions (FAQs)
Q: What is a foundation chain and why is it important for the second row in crochet?
A: A foundation chain is the initial row of chain stitches that forms the base of your crochet project. It’s crucial for the second row because it provides the structure for your stitches. The number of chains in your foundation chain will determine the width of your project and affect how you start your second row.
Q: How do I start the second row when working in rows?
A: To start the second row when working in rows, first turn your work. Then, depending on the stitch you’re using, you’ll need to chain a certain number of stitches to create the correct height. For example, for single crochet, chain 1; for half-double crochet, chain 2; and for double crochet, chain 3. This chain counts as your first stitch in the new row.
Q: How do I insert my hook for the second row in crochet?
A: After turning your work and making your turning chain, insert your hook into the second stitch from the hook (or the appropriate stitch based on your pattern). Make sure you’re working into the top of the stitches from the previous row, not the spaces between them.
Q: Are there any basic crochet stitches that are particularly good for beginners learning the second row?
A: Yes, single crochet and double crochet are excellent basic crochet stitches for beginners learning to work the second row. These stitches are relatively simple and form a stable fabric, making it easier to see and count your stitches as you work.
Q: How many chains should I make at the beginning of the row when starting the second row?
A: The number of chains to make at the beginning of the row depends on the type of stitch you’re using. Here’s a general guide: – Single crochet: Chain 1 – Half-double crochet: Chain 2 – Double crochet: Chain 3 – Treble crochet: Chain 4 Always check your pattern for specific instructions, as some designers may have different preferences.
Q: What is a crochet gauge swatch and why is it important when learning to crochet in rows?
A: A crochet gauge swatch is a small sample piece you create to check if your stitches match the size specified in a pattern. It’s important when learning to crochet in rows because it helps you ensure your tension is correct and your project will turn out the right size. Practice making swatches to improve your consistency in creating rows.
Q: How do I know if I’m doing the second row correctly in my crochet project?
A: To check if you’re doing the second row correctly, count your stitches to make sure you have the same number as in your foundation chain (unless the pattern specifies otherwise). Also, ensure your work lies flat and the edges are straight. If you’re following a pattern, compare your work to any provided pictures or diagrams.
Q: What are some common mistakes beginners make when working on the second row of a crochet project?
A: Common mistakes include: – Forgetting to turn the work before starting the second row – Miscounting stitches, leading to increases or decreases – Inserting the hook into the wrong part of the stitch from the previous row – Forgetting to make the turning chain at the beginning of the row – Using the wrong type of stitch for the pattern Be patient and take your time to avoid these errors.
Q: Are there any helpful crochet tutorials or resources for mastering the second row?
A: Yes, there are many helpful resources for mastering the second row in crochet. Look for step-by-step photo or video tutorials on websites like YouTube, Craftsy, or crochet blogs. Many of these offer slow-motion demonstrations and close-up views to help you understand the technique. Additionally, crochet books for beginners often have detailed explanations and diagrams.
Q: How can I improve my technique for working the second row and subsequent rows in crochet?
A: To improve your technique: – Practice regularly with different yarns and hook sizes – Pay attention to your tension and try to keep it consistent – Count your stitches frequently – Use stitch markers to keep track of your progress – Learn to “read” your crochet by recognizing what each stitch looks like – Challenge yourself with different stitch patterns as you become more comfortable Remember, mastering crochet takes time and patience, so don’t get discouraged if it doesn’t look perfect right away.