


Starting to crochet can feel difficult, but with a little help it can become both calming and fun. Learning to do the second row and other foundational steps will boost your confidence and helps in honing skills. This tutorial, which aims to guide you in crocheting the second row, will provide you with step-by-step instructions so that the transition from the foundation chain to a full-fledged pattern is seamless. Getting this technique will help you confidently take on other complex projects. This guide works wonders for complete novices and experienced enthusiasts, supporting them through every step of the journey in crochet.
What is the Process to Crochet the Second Row?

To crochet the second row, follow these steps:
1. Turn Your Work: Once you complete the foundation chain or the first row, turn your work to get ready for the subsequent row.
2. Chain One (or More): For every chosen pattern, set out by chaining to the required number ( for example chain 1 for single crochet or 2 for half double crochet). Note that this also serves as a turning chain.
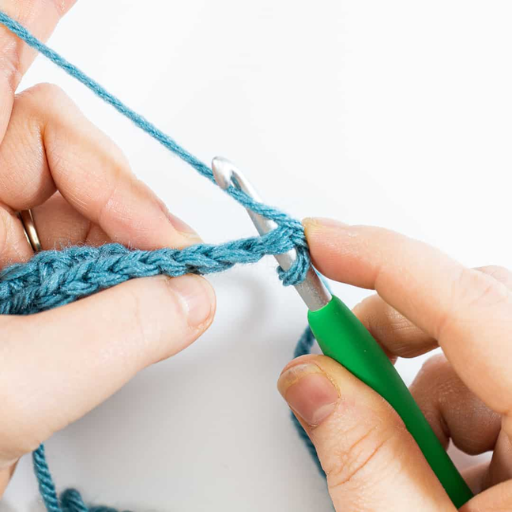
3. Hook Into Stitch: For this step, your hook goes into the alternative stitch from the previous row. In most cases, it would be the top of the stitch underneath, but always verify with the pattern for any special details.
4. Yarn Over and Pull through: The step ‘yarn over’ should be done on your hook and proceed to pull it through the stitch. After this, follow according to how the type of crochet stitch you are using, whether single, double or any other two or more crochet.
5. Maintain an Even Working Tension: Work your stitches evenly across the row like you did for other stitches in the row while maintaining the even stitch tension.
6. Finish the Row: To maintain an even edge, every last stitch is often made into the turning chain of the previous row.
Following these steps regularly can ensure that you achieve an even and consistent second row which serves as a reliable base for more complex designs.
Understanding the Basics of Crochet
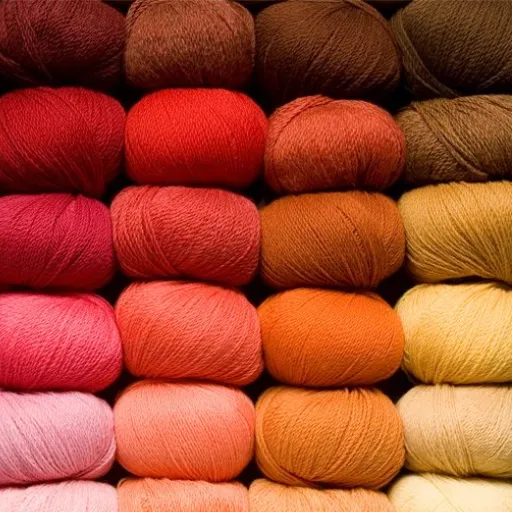
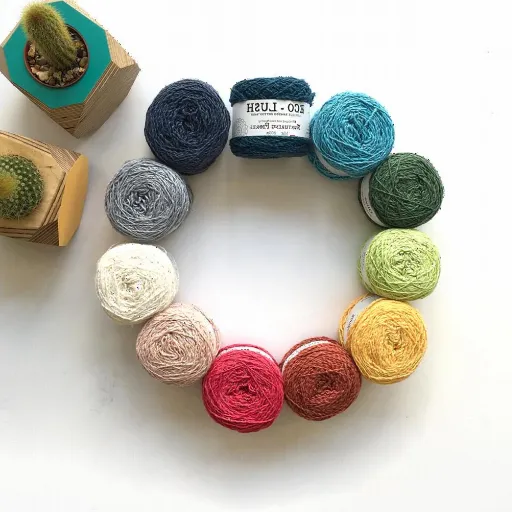
Yarn selection is paramount in delivering the requisite texture, sturdiness, and aesthetic appeal of the crochet work. Yarns are grouped by ‘weights’ from lace – the lightest – to jumbo – the heaviest, which always affects the size of the hook needed. For instance, fingering and sport weight yarn generally use 2-3 mm hooks, while bulkier yarns require 6 mm or larger hooks to avoid tension and stitching problems.
Think about the yarn for the type of project. Lacework and other delicate patterns require detail and precision, so smaller hooks paired with finer yarns are more suitable. For projects like blankets and scarves that require faster completion, larger hooks combined with bulky yarns offer a softer texture. Don’t forget to check the yarn label as some manufacturers provide recommended hook sizes which optimize results.
Comprehending the relationship between the yarn weight, hook size, and type of stitch used allows for improvement in the crochet experience, yielding both functional and visually pleasing results.
What is a Turning Chain?
The turning chain is one of the most essential parts of crochet that facilitates changing rows of stitches. It is normally done for the first new row and serves as a gap to prepare for the height of the next stitches. The number of chains in a turning chain vary according to the stitch used. For instance, a single crochet uses one chain of turning while a double crochet uses three. This ensures the rows are consistently the same height, as well as avoiding distortions and irregular edges. The turned edges adds to the composure of the crochet piece and helps in preserving row by row harmony. There is a great emphasis on performing the turning chain properly as it determines balance and the overall firmness of the crochet design.
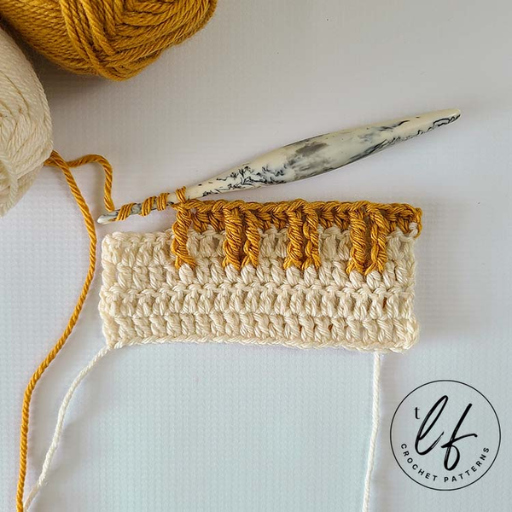
How to Insert Your Hook for the Second Row
Accomplishing the second row starts with the right placement of the hook to ensure uniformity and accuracy. To begin, the top loops of the specified stitch in the preceding row need to be identified. Each stitch contains two loops: the front loop which is nearest to you and the back loop farthest from you. Depending on the crochet pattern, you may be instructed to work through both loops (often referred to as “working in both loops”) simply to the front, or back only.
During standard stitching with both loops, framed to fracture from the front to the back, insert the hook under both loops for the specified stitch. This method, while more accurate, adds evenness to the texture and is most useful during foundational rows. If working through a single loop, attempt to slot the hook in only under the specified loop (front or back) in order to obtain the texture or design stated in the pattern. Achieving accuracy during hook placement and tension control at this point is crucial to ensure uniformity and the intended look of your crochet project. For the rest of the row, proceed to follow the stitch directions in clear sight of your control over the yarn.
What Stitches Can You Use in the Second Row?
Single Crochet Stitch for Beginners
The single crochet stitch is as easy as pie! It is a critical technique in crochet, so it can assist a beginner novice hone their craft. Single crochet stitch single crochet involves these instructions:
- Insert the Hook: Take your crochet hook, and place it into the next stitch of the foundation row. The hook should move underneath both parts of the loop as this helps to build a sturdier structure.
- Yarn Over: Ensure the yarn is wrapped around the hook in a back-to-front manner. This step is essential so that single crochet stitch will be formed accurately.
- Pull Through: Now the yarn can be pulled backwards and through the place where the hook was added. After this step, the hook should have two loops on it.
- Yarn Over Again: Get the yarn and hook it around it for the second time in readiness to close the stitch.
- Complete the Stitch: The yarn should be pulled from the hook’s two loops. A single crochet stitch is now complete.
Continue repeating these actions for every stitch in this row. For future rows, remember to always chain one at the start of a new row in order to prepare your work for the next level of stitching. Maintaining even tension is crucial when striving for polished results and even stitches. The single crochet stitch creates dense, strong crochet fabric which is perfect for warm blanket, dish cloth, and even some cold weather garment structure.
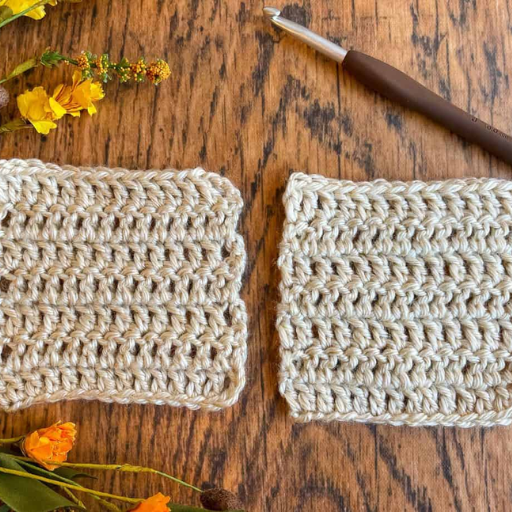
Using Half Double Crochet in the 2nd Row
Using the HDC stitch is common since the fabric created is both fully dense and slightly flexible as well. To make use of the ‘half double crochet’ in row two, start by chaining two at the row’s start. The chain here will serve as a turning point and as support for the needed height for row two. Now place your hook into the third chain from the hook, yarn over and pull through the loop. You should now have 3 loops on the hook. Yarn over and pull through all three loops at once.
Single crochet is usually associated with an increase in time taken during progression, but it is also known to produce stronger structural integrity. It serves best in places where there is moderate coverage and texture, like in scarves, baby blankets, and light warm clothes. Consistent tension results in visually uniform crafts, all done without changing the fundamental techniques and half double crochet stitches, which allow for beautifully intricate, detailed, usable goods.
How Do You Start the 2nd Row After the Foundation Chain?

To begin the second row following the foundation chain, take the following actions:
1. Set up your work so that you are prepared to start the new row on the opposite side.
2. Of the stitch you are working with, make the required number of turning chains.
3. With your hook, precisely to the first stitch or the required stitch of the previous row as dictated by the pattern, place your hook.
4. Work the chosen stitch as detailed to you while controlling tension for the entire row.
Following these instructions will allow you to shift from the foundation chain to the additional rows with no effort while providing an even tensioned fabric.
Making the First Stitch of the New Row
As far as placing the first stitch for a new row goes, knowing your pattern and the stitch type is important. For single crochet stitches, in general, one turning chain will do, which forms the base of the next row’s first stitch. When it comes to double crochet, two or three turning chains are used to correctly position them to the height of this taller stitch. Usually, for the first or second base stitch, you could insert the hook before or after the turning chain and adjustment of the pattern. Ensure that the yarn is looped over the hook properly (a step known as ‘yarn over’) and pulled through while considering the tension. If you understand the changes required across different stitches and rows, you will obtain a uniform and professional finish in your crochet work.
How to Turn Your Work for the Next Row
When you turn your work in order to start a new row, the technique you use is critical in maintaining the project’s structure and appearance. Finish the last stitch of your row completely. Then, make a turning chain based on the stitch you will work in the next row; for example, a single crochet will need a turning chain of one, a half double will need two, and a double will need three. Now, turn your work 180 degrees so it can correctly align with the next row. The working yarn must be held with the correct tension as well as the other end in the back of your hook while preparing to start the first stitch of the row. Following all these steps accurately is crucial to assure that there is no misalignment or excessive twisting which guarantees a crochet project that is polished.
Common Mistakes to Avoid When Crocheting the Second Row
1. Neglecting the Turning Chain: Without considering the turning chain as the first stitch, you can get uneven edges and misalignment of other project parts.
2. Misplaced Starting Stitch: Starting from the wrong stitch like the first one or working into the turning chain by mistake, can lead to mismatched stitch counts.
3. Wrong Emphasis on Tension: Inconsistently applying tension on the second row of work may result in loose or overly tight structural quality of the fabric.
4. Improper Stitch Calculation: Not checking your stitches in the second row may lead to unintended increments or decrements of width as you progress.
5. Yarn Work Twist: Improper arrangement of the yarn, or poor work positioning can lead to misalignment and pattern consistency.
If you avoid these mistakes, you will create an effortless workflow as well as tidy finishes on your crochet work. Monitoring your work regularly helps you avoid creating problems that might be harder to fix later.
How to Avoid Skipping Stitches
Skipping stitches in crochet can be one of the most frustrating problems you face. Aside from hindering the rhythmic sequence of your crocheted piece, skipping stitches can change the aesthetic appeal. To minimize this issue, make sure to count the stitches in a given row or round. Markers can also be used to remember important places like boundary stitches of rows, first blank spaces with subsequent row patterns, etc. Also, check how you are holding tension because too tight or loose loops will prevent recognizing stitches. Reference patterns and diagrams to your center so gaps builds tend to be avoided and finding references will minimize skipping gaps.
Recognizing and Fixing Mistakes in Your Row of Stitches
Like every problem, skipping gaps feels a lot easier to catch. Time spent identifying skipped stitches can go a long way when it comes to the pristine quality of your crochet work. Stitches being too far apart are gaps and if done wrongly stitches too close become burns therefore skipping stitches feels a lot easier. Arrange a set number of stitches within a column followed with a deliberate act to rotate each stitch within a stitch in order to detect twist burns. Determine burns in patterns and check them regularly, as scalding burns and stitches need to be controlled.
Once a mistake has been spotted, the corrective action required will depend on the type of error committed. Calmly unravel missed stitches to the point of the error with a hooked needle or knitting needle to stop further unintended loosening. Loosely or incorrectly aligned loops usually need the surrounding area to be reworked so that they fall into place properly. To unplanned designing, steps taken must be retraced on stitches for intended count to be regained either via addition or subtraction. Using stitch markers or counting stitches after each row as a prevention measure can reduce the frequency of such mistakes. These measures together with practice will greatly improve speed and accuracy of work done.
Where Can You Find Crochet Tutorials for the Second Row?
Skillful crocheters and beginners alike can find helpful resources for the second row on YouTube. Channels such as “Bella Coco” and “Hooked by Robin” offer detailed video tutorials. Moreover, written and video materials dedicated to the second-row stitches and techniques can be found on Yarnspirations and Lovecrafts. If you prefer more comprehensive and detailed guides on the basics, you can take courses on Craftsy or Skillshare. Both platforms offer more in-depth guides and foundational skills listed as courses.
Video Tutorials for Visual Learners
For those who learn best through observation, video tutorials offer a priceless asset by providing detailed step-by-step lessons which greatly enhance one’s understanding of different crochet techniques. The YouTube platform is well-stocked with numerous tutorial channels that feature organized, clear, easy-to-follow videos on the craft of crochet. Among these are “Bella Coco” and “Hooked by Robin,” known for their wonderful crochet lessons that cater to the seasoned crocheter and the crocheting newbie. In addition, these instructional videos often come with advice on how to solve several commonplace mistakes, thus making it a great value-for-money skill-building resource for people trying to perfect challenging patterns. With all these resources in one place, learners who wish to improve would have no reason to delay mastering vital crochet methods.
Recommended Online Resources for Beginners
If you are a beginner crocheter, picking the right online learning resources can set you on the right path. Consider visiting the AllFreeCrochet website, where you can access an enormous collection of patterns designed for beginners. It also provides step-by-step instructions for basic stitches and other foundational techniques. “Ravelry” is another must-have website for every crocheter. It is a rich crochet community that offers forums, pattern catalogs, and support resources for different levels of expertise. And, of course, YouTube is always a great resource, where “The Crochet Crowd” teaches basic to advanced lessons with tutorials and guides that one can follow in real-time. Using these resources ensures beginners receive the most current and relevant tips crafted precisely to improve skills, resulting in a more seamless and confidence-boosting learning experience.
Reference Sources
-
A Review of Human Factors Research on People Who Crochet
This paper reviews the physical, cognitive, and social effects of crochet on experienced and novice practitioners. -
The Evolution of Crochet: Tools, Techniques, and Artistic Trends
This study explores how crochet has evolved from a domestic craft to a modern art form, blending traditional techniques with innovation. -
Crochet Increases Attention Through Requiring Motor Skill
This research compares the effects of a single crochet session on skilled knitters versus a control group, focusing on attention and motor skills.
Frequently Asked Questions (FAQs)
Q: What is the first step to start the second row in crochet?
A: The first step to start the second row is to make the necessary chain stitches at the beginning of the row, typically chain two if you’re using a half-double crochet stitch (hdc).
Q: How do I complete a double crochet stitch in the second row?
A: To complete a double crochet stitch in the second row, yarn over, insert your hook into the first double crochet of the previous row, yarn over again, pull up a loop, yarn over and pull through the first two loops, then yarn over and pull through the last two loops.
Q: What does ‘crochet 2 together’ mean in a stitch tutorial?
A: ‘Crochet 2 together’ means to decrease the number of stitches by working two stitches into one, which is commonly used at the end of a row to shape your project.
Q: How do I ensure the second chain from the hook is correct?
A: To ensure the second chain from the hook is correct, make sure to count accurately from the hook and insert your hook into that chain when starting your first stitch of the second row.
Q: Can I use different types of stitch, like a triple crochet stitch, in the second row?
A: Yes, you can use different types of stitch in the second row, including the triple crochet stitch, but ensure to follow the correct pattern instructions for your project.
Q: What should I do if I reach the end of the row?
A: When you reach the end of the row, you should make sure to complete the last stitch as indicated in your pattern, and then turn your work to begin the next row.
Q: How can I make a single crochet in each chain effectively in the second row?
A: To make a single crochet in each chain effectively in the second row, insert your hook into each chain, yarn over, pull up a loop, yarn over again, and pull through both loops on the hook.
Q: What is the importance of the chain three at the beginning of the row?
A: The chain three at the beginning of the row acts as your first double crochet stitch, providing the necessary height for the following stitches in the row.