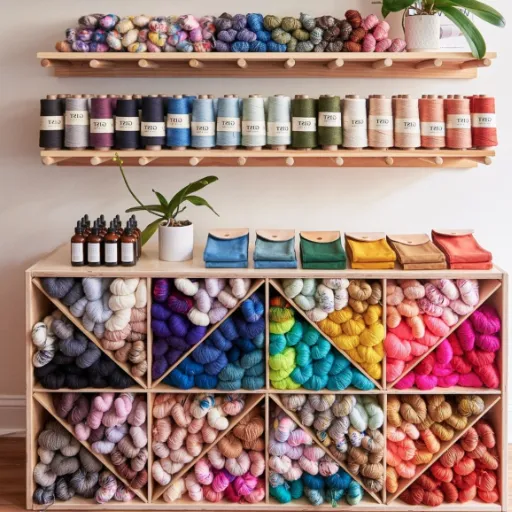
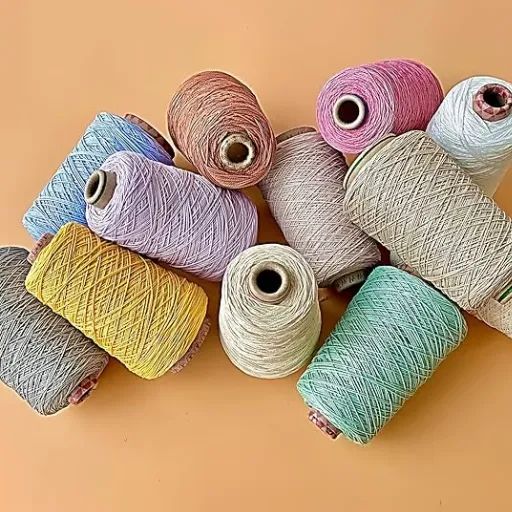


Crocheting is a craft that has existed for a long time – it’s a fusion of art and usefulness, allowing people to express themselves through colorful and complex patterns. For a novice, being able to master the second row of stitches is a major milestone in their crochet journey since it incorporates skills that are critical to more advanced projects. The purpose of this blog is to guide new crocheters through reasoning and logic so that they don’t just understand how to execute the stitches, but also the reasoning behind them. To move beyond the first-row mark, ventures into a new realm of possibilities in projects for crochet. With the right guidance, it is not only possible but it can be very simple and effective. This article seeks to assist those picking up a crochet hook for the first time, as well as those here with the aim of strengthening their basics. I believe this information helps to serve as a base for all future works of art that you create.
How do I start the second row in crochet?

For the second crochet row, start by turning your work so the back side of the stitches are facing towards you. Next, make a foundation chain to reach the needed height for your new row. This step is usually completed by chaining in accordance with the next stitch to be used, which could be one for single crochet, two for half double crochet, and three for double crochet. Lastly, take your hook and place it into the first stitch of the previous row, or, if necessary, adhere to the given instructions of any supplied pattern. Multiples of patterns work best. It is better to tighten the tension on your yarn than loosen it, so try to make your tension consistent to yield a polished look.
Understanding the turning chain
I have found that the turning chain helps in maintaining the correct height for a new row and in keeping the structure of the crocheted piece even and tidy. I have come to learn that when the turning chain is worked to a type of stitch, for instance, three chains for double crochet, the fabric does not slack and stays in place. It is paramount that you abide by the pattern especially in terms of tension and striding because these elements account for the accuracy and elegance of the final product.
Positioning your work for the second row
To position your work for row two, you will need to find the first point where you can begin. This should be the first stitch of the last row or the starting chain based on your pattern. Try to avoid any twisting of the project and lay it flat, taking care to maintain a steady level of tension as you insert your hook into the correct position. Everything you do in this step will set you up for the best chances of consistency and precision while working in future rows. This ensures your project retains its structure and visual appeal.
Inserting your hook into the first stitch
It is my firm belief that patience and precision go hand-in-hand, especially when inserting a hook into the first stitch, a step that immediately gets the yarn work underway. If I were to share one trait I have picked up over the years while doing this task, it is repeatedly starting in the incorrect position. Missing out on this small yet vital detail tends to throw off an entire row, needing to do all the work over…frustrating, right? For my sake, I have trained myself to always follow double checking the instructions and confirming where the hook is to be inserted; is it the first top loop of the previous stitch or the turning chain? Regardless, tension along with a steady hand here is all that is needed to achieve a clean finish. This makes all the difference.
What are the common mistakes when working the second row?

One of the mistakes people make concerning the second row is misunderstanding the insertion area for the hook. I’ve noticed that even some advanced crafters and beginners tend to miss stitches or work into the wrong loops, which results in uneven edges and disrupted patterns. Irregular tension is another common problem, either pulling too much or not enough will stretch the material. In addition to that, not noticing the turning chain can also lead to the wrong amount of stitches, which can be a pain for you later. To get around these problems, I suggest you take as much time as you need to count every stitch, check the correct loops, ensure adequate tension, and count loops in order to avoid these issues.
Counting stitches correctly
To count stitches accurately, be precise and consistent. First, locate your starting chain, and be sure to count each stitch individually as you work along a row or round. Use stitch markers to mark significant points, for instance, every 10 stitches, or track the commencement of rounds. To further increase accuracy, make it a habit to count stitches after each row, and in the beginning, you will check, and seem to be checking often, but mark it as a habit through time. Taking this approach guarantees less frustration and a polished, professional finished piece.
Maintaining consistent tension
Keeping a uniform tension level during your work with crochet is very important, and I have a few approaches that I find effective. For starters, I suggest that your yarn and hook grip should be constant with no changes at any point throughout the project. Try to hold the yarn the same way from the start to the finish of your project, and changing styles in the middle of the work may bother the tightness of your stitches.
Tension maintenance over an extended period of time can also cause issues, so you have to pay attention to how comfortable your workflow is. If you realize that you are starting to tense the fingers too much, take a rest, relax the arms, and then continue. Remember that there is no real comfort in stiffness so there will always be slow movements that do not feel pleasant.
Here are some specific parameters to watch out for:
- Yarn Feed – Be sure to keep everything untangled for optimal smooth feeding of the yarn. If the yarn gets stuck or is being pulled more than usual while you are working, this can affect the tension.
- Hook Size – Ensure that you are using the correct size hook for the project. A looser stitch means a bigger hook and a tighter one means a smaller hook.
- Pace – Make sure you keep the same style rhythm throughout the crochet process. If you try to do it too quickly or too slowly, it will lead to uneven stitches.
- Environment – If possible, try to work in a calm setting where you are not likely to get distracted. Stress or interruptions can lead to an inconsistent level of tension which may be the new normal for you.
At last, sustained practice has a deeper impact. Accomplishing perfectly equal stitches across all of your projects now comes organically, given that keeping the muscle tense is second nature after all the work put in. Staying grounded is key, as results sometimes take time and consistency goes a long way.
Avoiding twisted chains
While you’re working on your project, determine whether all chain stitches are facing the same direction. Always place your foundation chain on a surface to check for any twists before joining into a round. Doing this will guarantee a clean and professional looking project in the end. Omitting this step may lead to a lot of undesirable frustration.
How do different stitches affect the second row?

The initial stitch you make adds to the overall form and texture of the second row. From my observations, taller stitches such as double crochets, result in greater height, which creates additional space but may also feel less dense. On the other hand, shorter stitches like single crochets or slip stitches create a more compact foundation which allows the second row to be quite firm, but slightly harder to work with. I always encourage thinking about the overall feel and texture of your project, so you choose the right stitches.
Single crochet in the second row
For single crochet on the second row, simply turn your work around and chain one to establish height. Now, insert your hook into the first stitch of the row with both loops for the sturdy finish. Yarn over, pull through, then yarn over again and pull through all two loops on the hook to complete the stitch. Repeat this for every single stitch across the row for a balanced texture. With these steps, you’re constructing a strong base while keeping your project flexible.
Double crochet techniques for row two
When I’m starting row two using the double crochet, I like to begin by making three chains. This counts as the first double crochet of the row. Next, I turn my work around, grab the yarn and put the hook in the second stitch of the previous row. I will be going under both loops, so I grab the yarn and pull through, grabbing the other side of the yarn I previously went through, ensuring the double crochet process. The goal here is to keep an even tension and rhythm across the row in a relaxed flow to achieve a smooth and even texture. I repeat stitch by stitch to ensure that I have no gaps in my double crochet, ensuring that I finish with a professional touch.
Half double crochet in the second row
To do a half double crochet on row two, chain one at the end of the previous row and turn your work. After that, yarn over and insert the hook into the second stitch of the row, making sure you go under both loops. Yarn over again, pull up a loop, and you’ll now have three loops on your hook. Yarn over once more and pull through all three loops. This completes the stitch. Now, do this continuously across the row for an even, strong finish.
What’s the best way to join the second row in a project?

the most effective way to approach the second row of working on a project is to remain balanced in your tension and alignment. My first focus is always on the chain foundation so that it is uniform and ensuring that the stitches are not too tight or too loose. When getting into the second row, my advice is to use a chain stitch that is part of the pattern like a chain one for half double crochet stitches, which helps in forming a clean edge. This gives the row a solid base while placing a gentle touch on the piece along with upholding the piece’s structural integrity. Changing how tight the yarn is gripped along with how the hook is handled can also lead to better outcomes in row transitions.
Joining techniques for flat projects
As far as flat projects go, I always make sure my joining techniques are durable and finished with great detail. Here are a few of my top methods explained in great detail:
- Whip Stitch: This technique is one of my favorites, and I like to use it in many projects. It is easy to execute and it can provide a robust seam. I fold the edges of the fabric together and then sew using a tapestry needle, going through each corresponding stitch from the back to the front. Be sure that you do not pucker the fabric by practicing proper tension control.
- Slip Stitch Join: I use the slip stitch join when I want a clear outline that makes the project look good. It is with my crochet hook that I put it through both fabric layers then yarn over and pull all loops. This is ideal for putted projects like a scarf or blanket as it aids in reducing bulkiness.
- Mattress Stitch: For well-done seams that require great attention to the aesthetic aspects, I apply the mattress stitch. I align the edges and open the stitches on either side, weaving the yarn over and under the stitches of each side while pulling it tight. For clothing and decorative pieces, the stitch render an almost invisible join, making it ideal for the work.
- Single Crochet Join: As a last touch, I do the single crochet join which is a single crocheted seam. It is crafted by putting the pieces together and crocheting through both layers which produces a visible seam and adds texture to the project. It is best suited for projects in which the seam itself is part of the design.
Every technique has its own particular touch regarding the specifics of the assignment. Some of the factors I look at are the aim of the undertaking, the particular way that the project is supposed to look, and the level of structural integrity required. Taking these parameters into account makes me confident in the decision of the most appropriate joining method to obtain the best result.
Creating seamless joins in rounds
To make seamless joins in rounds, I have to consider both form and function to apply the best technique. The invisible join is the best for me as it provides no visible bridge between the rounds, making it look professional. This is done by fastening yarn with the stitch and pulling it through to the end of the round. This way the finish is hidden and looks perfect. For other projects that need quite some structural accuracy as well as beautiful looks, I tend to use the slip stitch join. It makes accuracy while not compromising on style. These, paired with good suspicion of the tension and consistency, make any results professional every time.
How can I troubleshoot issues in the second row?

For the problems found in row two, check the first row of the foundation very carefully to ensure that all the stitches are correct and uniform. Verify that the stitch count at the end of row two corresponds with the pattern provided. If the row feels lumpy, check your tension and ensure that you are placing the hook in the proper parts of the stitches. Also, check that you are following the pattern correctly and that the stitches are placed where they should and using the special techniques which may be required. Errors can still exist, so go ahead and frog row two and do it again more carefully with alignment and uniformity in mind.
Fixing uneven edges
As annoying as they are, uneven edges can be fixed. It is essential to be consistent and precise. Start by checking your tension since it is one of the most common problems. Remember that maintaining steady tension throughout your rows helps smooth the edges. Then check how you worked your edge stitches and if you accurately know what the first and last stitch of the row is. I’ll define it so you can better understand what I’m saying. Simply put, adding or removing stitches where edges are is quite common and it often results in “irregulars”. Another tip would be asking them to mark the edges with stitch markers until they are sure that they can identify the edges without help. You should also count the stitches at the end of every row because those minor changes will lead to easier solutions in the future on fixing edges.
Correcting stitch count errors
In order to correct stitch count errors, one must first determine where the mistake happened by counting your stitches row-by-row. If the problem was made on a recent row, undo the stitches to the point of the error and fix them properly. In case you would like to adjust your count without much impact in other areas, consider adding stitches on the next row instead of skipping them to keep the general motif in balance. Utilize a counter and other tools that can prevent you from making the same mistake over and over. Always remember to periodically check your work to keep everything neat and tidy.
Dealing with tight or loose stitches
the optimal solution is consistent relaxation and ensuring that the yarn flows easily prior to starting work. For instance, grip checks are paramount—If your stitches are too tight, it means you are holding your yarn/hook too tightly. On the other hand, loose stitches might mean you have to reduce slack in the yarn and keep consistent tension. Personally, I suggest refining that rhythm with swatches first in order to get the perfect balance, and don’t hesitate to change your hook size as well. Find your own comfortable rhythm and stick with it, this is what this process is all about.
What are some tips for perfecting the second row in crochet?

Crochet’s second row is one demanding discipline and maybe some free time in order to build that strong foundation. A few reminders would be to start with a good amount of tension to ensure that you do not miss or add on extra stitches. This would ensure that your hook is set on the proper loop to form a neat pattern. Try to add some uniformity by maintaining tension during the process as well. Always count stitches accurately before proceeding and rest assured the piece shall come out professionally perfect with some practice.
Using stitch markers effectively
The proper use of stitch markers makes crochet easier, and their use is something I highly recommend. As an example, I like to place a stitch marker at the beginning of each row and at different positions on long rows. This small step helps me monitor my stitch count, and eliminates potential problems that may arise from having skipped or added stitches. They also serve as a guide to where I need to make important pattern changes like increases or decreases, which reduces the time and effort needed to complete crochet work. To me, stitch markers are both helpful aids and a form of protection which allow me to concentrate on the crocheting process instead of continuously checking my work for errors.
Practicing tension control
All wonder is control of the tension, eye, awareness, and practice. To achieve even tension, remember to keep your hand firmly but comfortably gripping both the yarn and the hook. Move your hands to where it feels comfortable, and adjust the way the yarn flows through your fingers to a position that feels solid. Getting good at anything requires practice, so grab some little swatches and do the same pattern over and over to build your muscle memory. Also, watch how you sit and how tight you are; your body has a relationship with the tension or looseness of your stitches. Don’t be scared to take a break; keep your sanity. Tiredness leads to fatigue, so for your own good, keep an eye on when you start feeling tired. Feel free to try different combinations of yarn and hooks to find which one is more intuitive for you.
Following pattern instructions carefully
As with any crochet project, following the given instructions is very important. In my experience, reading the entire pattern before getting started helps avoid surprises later. Abbreviations and special stitches offer important information that can influence the result – so pay close attention. I always find it helpful to highlight, or underline, important parts, especially those detailing increases, decreases, or other complicated techniques. Try to not to do too much at once and appreciate the purpose and flow of the pattern. Other times when I run into something that is not clear, I will cross-reference the glossary or verify with other reliable sources. The amount of focus given here will make certain mistakes less likely to happen. At the same time, it will help gain confidence with progress.
Reference
- Mastering the Second Row: A Beginner’s Crochet Tutorial – A detailed guide on mastering the foundation chain and essential stitches for the second row.
- A Step by Step Guide: How to Start a Second Row in Crochet – Offers step-by-step instructions, including turning chains and stitch techniques.
- How to turn at the end of the 2nd row? (Newbie) – Crochet Help – A forum discussion with tips and advice for beginners on turning at the end of the second row.
Frequently Asked Questions (FAQs)
Q: Can I find a video tutorial for mastering the second row in crochet?
A: Yes, you can find many video tutorials on YouTube that show how to master the second row in crochet. These tutorials are often easy to follow and great for beginners who want to learn basic crochet techniques.
Q: What is the importance of the chain 1 (ch 1) at the beginning of the second row?
A: The chain 1 (ch 1) at the beginning of the second row is crucial as it creates the height needed for the first stitch. It helps maintain an even edge and is essential for most crochet patterns, especially when working with basic stitches like single crochet or half double crochet (hdc).
Q: How can I view a transcript of a crochet tutorial video?
A: Many YouTube crochet tutorials offer transcripts. To view the transcript, look for the “Show transcript” option below the video description. This can be helpful if you prefer reading instructions or want to review the content without rewatching the entire video.
Q: Are there any family-friendly crochet tutorials for beginners?
A: Yes, there are many family-friendly crochet tutorials available online. These tutorials often focus on easy, beginner-friendly projects like cozy blankets or simple baby items, making them perfect for crafting together with family members of all ages.
Q: How can I upload my own crochet tutorial video?
A: To upload your original content, create a YouTube account and click the “Upload” button. You can then add a description, set privacy settings, and share your video tutorial with the world on YouTube. Remember to include helpful information in the description to make your tutorial easy to find and follow.
Q: What’s the best way to learn crochet if I’m a visual learner?
A: If you’re a visual learner, video tutorials and photo-based guides are excellent resources. Many crocheters find it easier to follow along with a video tutorial rather than reading written instructions from the page of a book. Look for tutorials that offer close-up views of the stitches and techniques.
Q: Are there any mini crochet projects for beginners to practice the second row?
A: Yes, there are many mini crochet projects perfect for practicing the second row. Consider making small items like coasters, bookmarks, or 24-stitch squares. These projects are quick to complete and allow you to focus on mastering basic techniques without committing to a larger project.
Q: How can I connect with other beginner crocheters for support and tips?
A: There are many ways to connect with fellow beginner crocheters. You can join online crochet communities, follow crochet-focused social media accounts, or subscribe to crochet-related email newsletters. These platforms often share helpful tips, patterns, and allow you to interact with other friendly and happy crocheters who are also learning.