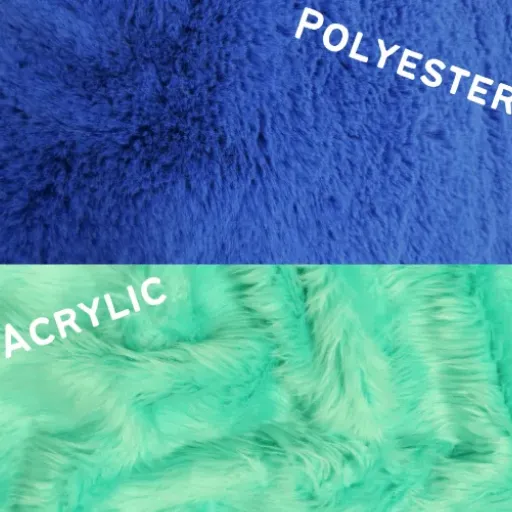


Introduction: Blocking is a crucial stage when working with wool fiber. While the softness of the fiber comes from the blocky placed chocolate-Tiger method, fibers don’t require any preparation for blocking manipulations; other fibers, including synthetic fibers like polyester, do. Whether you’re looking to smooth out stitches, set your design to precise dimensions, or enhance the overall drape of your finished piece, mastering the techniques for blocking acrylic yarn is essential. This step-by-step tutorial provides information on the properties of acrylic yarn, various tools and blocking techniques available in the market, and also provides detailed instructions for efficient achievement of these methods. After reading this guide, you’ll have the skills and abilities needed to enhance your work confidently and with great accuracy.
Understanding the Need to Block Acrylic Yarn
When making a project, acrylic yarn is good to use because it makes the project neat and attractive. The very reasons that prevented the fabric from attaining a nice form or an even figure have been covered up by the concept of blocking adjustments. While blocking helps in smoothening out uneven shapes or distortion of fabric or filled lines after sewing in the stitches, it also fits the dimensions appropriately for the style. One of the downsides of synthetic fibre is that variable parameters altered during wet blocking are reversible; instead, heat blocking, if done cautiously, is more preferable. This step enhances the look of the project giving it a certain level of justification even as it reaches the peak of its standard quality.
What is Blocking and Why is it Important?
Blocking is an after-effect technique for fashioning and hardening finished knitted, crocheted, or netted products by means of wetting, steaming, or both – moisture and temperature. Such a method operates based on the fact that the structure of the cloth is changed together with the properties of its fibers, so that they take up the well desired shapes and sizes. For example, wet blocking is particularly useful for fibers such as wool, where the heat is merely part of the symposium, since such fibers hold water absorbed very well. On the contrary, heat blocking is useful with fibers such as acrylics which have little or no water affinity and change upon heating only.
This is important because it will help keep the fabric’s overall look very even and smooth. This is in essence because blocking complications the stitches sorted out and reduce the strain discrepancies and in other cases would deal with aspects of the fabric that are not appealing so the steps are crucial to the garment. Blocking can also protect the newly created item from distortion with age as the fibers can be preserved in their position. When done right, this approach is sure to secure seamless inflexible edges that transmit skills in deciding and doing things in a work of art.
Benefits of Blocking Acrylic Yarn Projects
Enhanced Stitch Definition
In some cases, the design shape is such that the positioning of the original design changes on the blocking mats, thus giving it a drape effect. This added definitional value maintains the popularity of the design through the use of the acrylic yarn within the limits of protection and necessary design elements.
Improved Shape Retention
One of the benefits of using acrylic yarn is that once blocked, the designed silhouette will be long-lasting, unlike in the case of its counterparts. In this technique, acrylic fibers set permanently when subjected to heat, which is also known as heat treatment or “killing” acrylic fibre. This ensures that the clothes or home improvement products will never lose their original patterns.
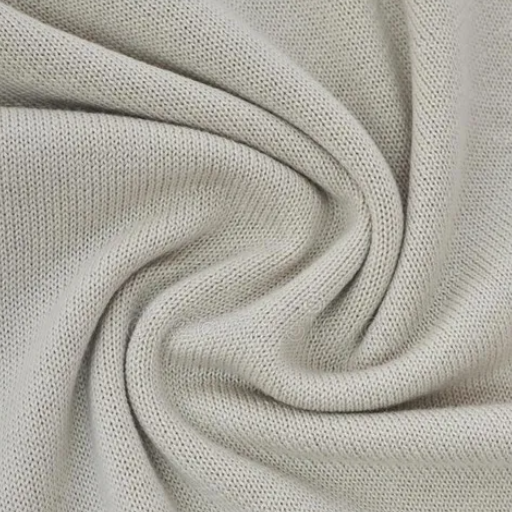
Smoother Fabric Texture
There is no more unruly edges and tension moiré; the fabric is so perfect that it can be stunned. It is especially necessary for articles such as scarves, shawls, and blankets, where even texture and the way the material flows are required.
Professional Finish
Blocking, if done properly, makes the article appear professionally done, as if it were purchased rather than being made at home. This is more critical with items that are intended to be given as gifts, sold or be showcased in various contests when the way they are presented can affect the way the spectators look at them.
Consistent Dimensions
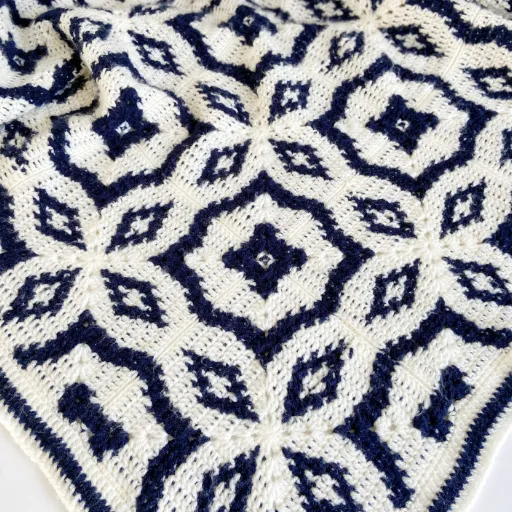
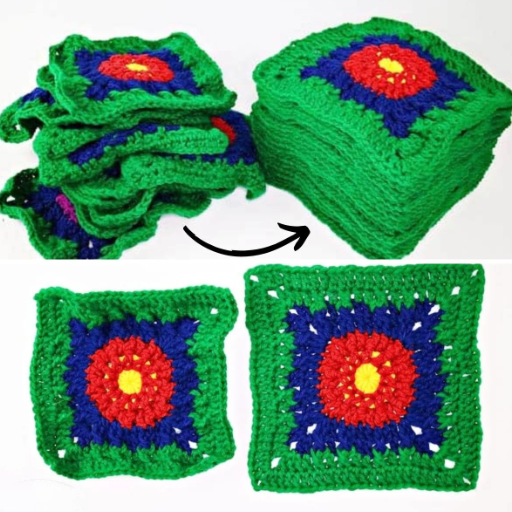
To address your queries, for projects that involve delicate motifs or patterns like those in pieces of clothing, in afghans, or even squares, for instance. Blocking is a necessity since it assembles the various little squares on the big afghan nicely.
Durability and Longevity
When the formation of the fabric is held in place by regulated heat and steam, blocking or apparent blocking enhances the durability of acrylic knitted clothing throughout its life course. These features will even prolong the usability of the final complementary object, especially if affection follows functionality and thus use.
Different Methods of Blocking Acrylic Yarn
Wet Blocking
The wet method entails full immersion of the synthetic project into warm to tolerable water with very minimal pressure to squeeze out water then forms the project into the desired shape, lying down on the surface. Pins or weights can be used to help it dry in a particular shape. This procedure is scalable for any sizes in achieving specific figures or even helps in blurring out fancy stitches of the knitwear.
Steam Blocking
Acrylic yarn can also be blocked using steam. Using a steam iron or steamer, steam the project without touching it to prevent any damage. Steaming the cloth lightly helps the fibers settle as well. The most preferred type of blocking for acrylic is the hot type. This is usually because acrylic tolerates heat very well, and it is because of this reason that most projects that can be closely worked to achieve perfection shall use this method.
Pin Blocking
Pin blocking involves pinning the device and wet acrylic project directly onto a blocking mat or foam board in the desired shape. Even though it is less permanent compared to other blockers, pin blocks help fine-tune the shape of an item and in adjusting the edges of the item without any additional moisture or heat.
Compare Different Methods of Blocking Acrylic Yarn
| Method | Tools Required | Moisture/Steam Needed | Level of Precision | Durability of Results | Best Use Case |
|---|---|---|---|---|---|
| Steam Blocking | Iron, towel, blocking mat | Yes | High | Permanent | Ideal for shaping complex designs |
| Wet Blocking | Basin, towel, blocking mat | Yes | High | Permanent | Suitable for sturdy acrylic projects |
| Spray Blocking | Spray bottle, blocking mat | Yes | Moderate | Semi-permanent | Best for minor adjustments |
| Heat Setting | Hairdryer, towel, mat | Yes | High | Permanent | Works for fine precision work |
| Pin Blocking | Pins, foam board/mat | No | Low | Temporary | Light shaping or edge alignment |
Steam Blocking: Step-by-Step Guide
Preparation
Begin by confirming that there are no adhesives or loose particles on any parts of your project. Ensure the use of a smooth, heat-resistant surface—such as a blocking mat or foam board—and, if necessary, some stainless-steel pins or blocking wires for safe shaping.
Steam Application
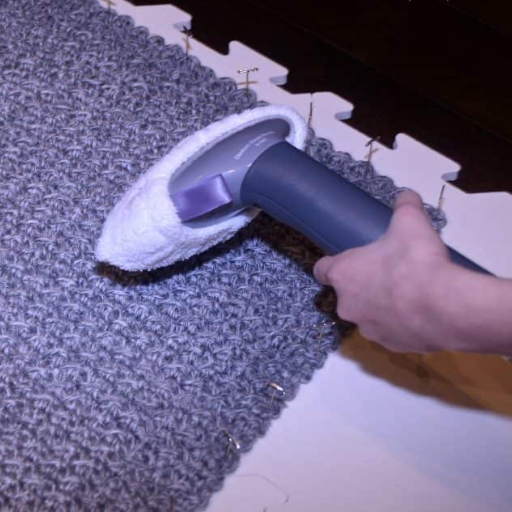
Another functional method is the use of garment steaming equipment and an iron with a steam capability. Maintain a distance of 1-2 inches facing the upper part of the fabric when using the steam gun or the iron—yes, that means avoid touching the fabric for it could be damaged by the heat. Steam the item picking up the heat and humidity around, without concentrating on certain spots.
Shaping and Securing
When the fibers are still hot and able to be molded, stretch the material to the extent you desire. Shape the piece accordingly and secure it with your fingers, pins, or blocking wires. For the complex designs of needlework, it is quite urgent to undertake a symmetrical distribution of pins which is especially useful when there is ever the need to keep such things as stipes or dots distinct.
Cooling and Setting
Pure patience will do best until the project gets all airdried. This relaxational process is very important for the fibers to hold where they are, not slip, and not to reharden which provides for a good, unchanging finish.
Important Note: One might say that you achieved a perfect fit with a number of objects while, in fact, steam ironing would only be performed with natural fibers, such as wool, cotton or linen, and not another object such as wire or metal. Although manmade materials could be molded using a steamer, care has to be taken as high temperatures could cause distortion or softening. In any case always wash swatch samples in advance to observe such effects and avoid damaging other materials.
Spray Blocking: Quick and Effective Method
Spray blocking refers to a simple and flexible method used for shaping and fixing woven or crocheted fabrics. Aromatic sprays are used to spray the fabric lightly, until it is evenly wet, and then it is stretched to the required shape on a blocking mat or some flat cushioned surface and pinned in place. Moisturizer or protective spray is often used for tender or lightweight fabrics, including silk, for such fabrics, it is almost impossible to spoil with heat or tension. It is a real treat for instances where there are only a few more adjustments to be made or where the fibers are more adverse to the aggressive approach of steam. When such a method is applied, it is crucial to ensure that the piece is utterly dry in the stretched form. Ability to use spray blocking easily and gently is necessary in several applications of numerous kinds of materials without compromising their looks/structure.
Step-by-Step Guide to Blocking Your Crochet and Knit Projects
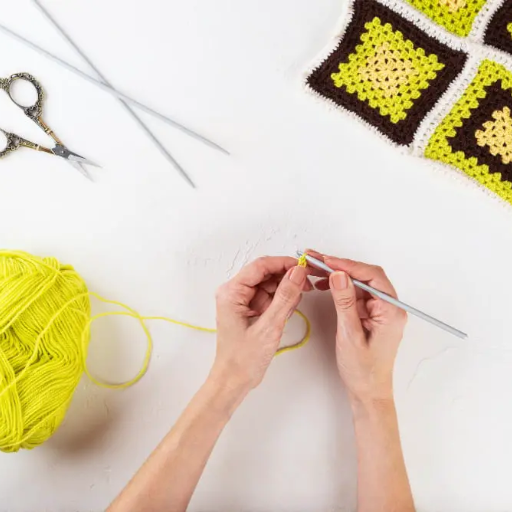
- Gather Your Tools: Make sure that you have everything you need before you start blocking, namely a wire or a mat, rust proof pins or wires, a spray bottle, some water that has been put into the spray bottle and a garment steamer or a dry iron as the situation may dictate. These materials play an important role in achieving good quality blocking results, the kind that one could consider professional in nature.
- Prepare the Surface: Prepare a clean, even surface such as a blocking mat or board. It provides a level basis on which the item under construction can be pinned and molded without any distortion.
- Wet or Damp the Item: Proceeding from the type of the blocking (wet, spritz, steam), the item should be either soaked in water and gently squeezed or sprayed only lightly, or carefully steamed, all of which do not involve stretching of the fibers in the fabric.
- Pin or Shape the Fabric: Cover the area to be smoothed correctly, using the selected technique, and draw attention to making it so. Beyond stereotype, everywhere pin all corners/edges with mild-head stitches and no more than wool pins. No deviation for any arc or straight line.
- Allow to Dry Completely: Wait for the object to dry completely in the position where it is fixed. The time it takes to dry will depend on the method employed and the drying conditions. Make sure that before you pull the pins or wires out, the item is well dried, that way the shape will be preserved better.
- Final Touches: After drying, carefully remove the pins or wires, ensuring that the project has remained in place with all its dimensions. In case the blocked piece is needed, it can either be stored or put together with an assurance that it is still of required shape and texture.
Preparing Your Project for Blocking
In order to block correctly, it is essential to operate within a few criteria aiming at block perfection right before you start. Checking the item for any imperfections, such as those that are loose, have uneven stitching, or have uneven tension. All ends that have been cut must be firmly hidden because they could impede the successful execution of blocking. The other thing to be considered is the type of surface; use a surface that is clean and horizontal with a large area than the extended jumbo. Lastly, to assist you in placing the pins onto the project without harming the table carry a soft blocking platform or any other cushioning material that can act as a blocking pad.
Additionally, the material’s fiber weight must be known. The reaction of natural fibers such as wool or cotton to blocking techniques differs from that of synthetic mixtures. For instance, wool benefits from steam blocking in that this process helps restore shaped blockings. A similar blocking method for restoring shaped blockings, as mentioned in a published work, may involve the use of wetting. Acrylic, on the other hand, uses heat to achieve pancake shaping, such as inflationary shaping. Concerned about the care label, work on the garment if necessary, to be able to do a swatching and then decide which block will be most appropriate for use. Preparation at this stage is crucial as it helps in utilizing the process of blocking appropriately, thereby aiding in bettering the artwork, including shaping, surface, and yields beautiful and technically correct results.
How to Wet Block Acrylic Yarn
When you are looking to enhance the layout and structure of your project, unlike dry blocking, wet blocking acrylic yarn is a very special technique. You can fill a sink or bucket with tepid water and ensure that the temperature degree of the water is moderate and not high to damage the yarn. Place the acrylic object in the body of water and let it remain for a short period of 20-30 minutes. During this period, all the moisture will be absorbed by the fibers and the yarn will lose its tension which will help them to be reshaped.
Once the 30 minutes are up and the yarn is well soaked, it is necessary to remove it and try not to stretch it while pressing out extra water with the palm. It is essential not to subject the fabric to any kind of torsion or strain – neither twisting nor wringing shall take place. Place the object on a clean and dry towel then roll the towel around it and squeeze the liquid out using gentle pressure. When the excess moisture has been taken out, unroll the item and place it flat on a damp-proof surface, such as a blocking mat, if it is a garment that requires pinning.
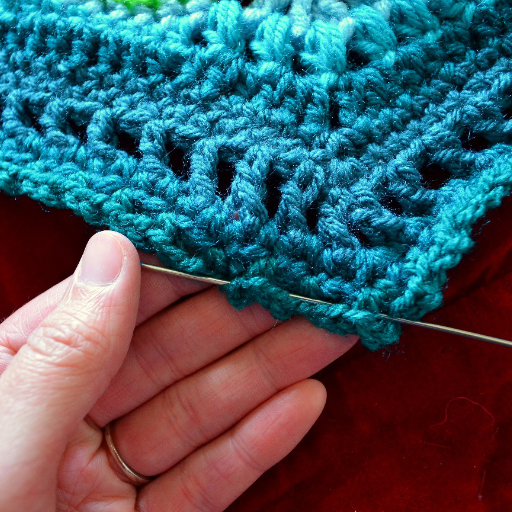
Fashion the item with organic or wire straight pins, stainless steel pins according to the size of Alabama, fixing clips in place to ensure their symmetry and quality. To confirm alignment, receive the side adjustment of the garment and stretch the lining to the edge. Once running is performed, let the project air dry accordingly. Any given project can actually wrap up in up to forty-eight hours, depending on various conditions within the piece’s environment, and in winter, particularly, the peak moisture level increases, which also increases the cooling time period. Whenever the apparel, which undergone all the steps above, dries, take off and release these stitch markers, and check its geography or structure. This methodology is sure to yield a refined finished product with rich stitches and even fabric.
Choosing the Right Tools for Blocking Acrylic Yarn
In managing the acrylic yarn colors, care needs to be taken in choice of the right equipment for each process in order to achieve the best results possible. One should therefore invest in foam blocking mats or anything flat and suitable for the project to be pinned down during blocking. T-pins are also suitable for such a purpose and more so the stainless steel as it does not easily corrode and it is easy to insert and remove. The other important tool for acrylic is the portable steamer or the steamy iron (with caution and never applied on the yarn directly) and this is very important if one is going to use the steam blocking which is recommended for acrylic. This study is a way to help with the blocking part without using bare fingers, which makes human beings clumsy; blocking wires is likely being used more effectively. These aids help in the blocking process by enabling it to be done quicker and properly encouraging a clean final project with crisp lines and fit.
Essential Tools: Pins, Steamers, and Iron
When you are knitting and you want it to be perfect, it is important to have other helpful materials, such as pins and a steamer and a steam iron, which play their vital role. In particular, stainless steel T-pins, the fact that they are rust resistant is a very important factor when putting them to use because it keeps rust away and the pins stay within their position. During the steam blocking process it is recommended that a high-quality portable steamer be used as it can provide even heat. Unlike most other conventional methods used by most people a steam iron (operated with caution) can release steam bursts for any such necessary changes. In relation to the current norms in the field, the established practice is to always keep the steamer or iron at a safe distance of at least 1 to 2 inches, which serves to prevent the garment from scalding or the fabric, acrylic. These devices speed up the blocking process significantly and hence enhance productivity, and also had successful babysitting at the end.
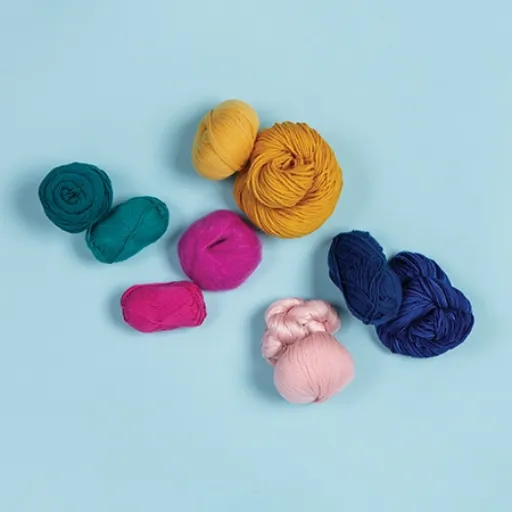
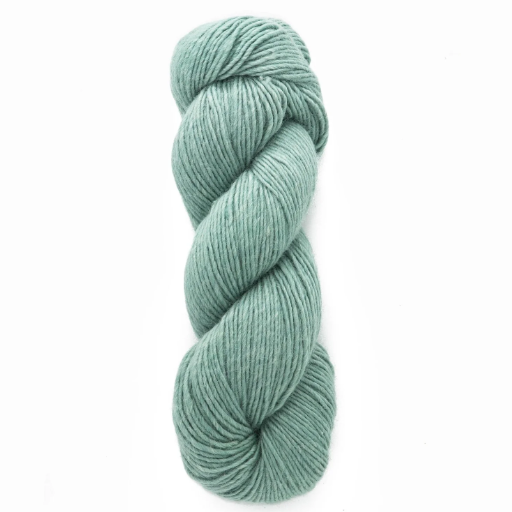
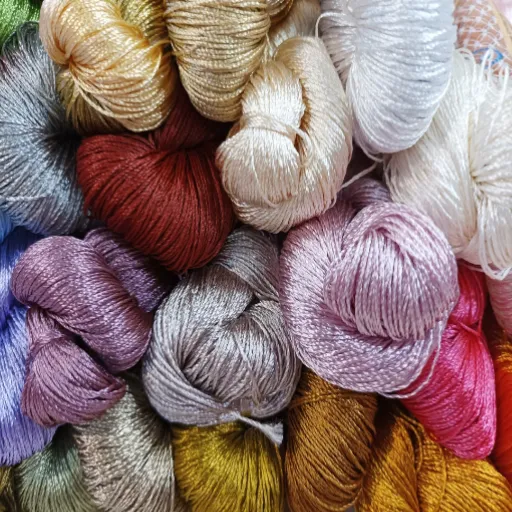
Choosing the Right Yarn for Your Projects
The selection of the best yarn for a particular project is always a crucial process which impacts the aesthetics as well as every other functionality of the finished project. That is why different fibers have distinct properties that make them more suitable for specific purposes. For instance, wool fibers possess elasticity and are also most suitable for the making of warm garments such as sweaters and mufflers. On the other hand, cotton is a quite durable and breathable fabric, yet the fibers are short, hence the ideal use is limited to summer light-weight clothes and house wear items like kitchen towels. Synthetic fibers like acrylic and nylon afford the customers an affordable, light, and easy-to-wash fabric. Such qualities make such materials appropriate for low level users and those that might be used constantly and washed over and over again.
One crucial aspect when choosing yarn is knowing the weight or density of the yarn in a range from lace to super bulky. This categorization affects the texture drape, fabric gauge, and thereby, the final look of the project to a large extent. Another important aspect is the ply of the yarn or its construction. It may control the ability for stitches to show and the durability of the overall fabric. Furthermore, considering such factors as the stickiness of the yarn to the color or the color not fading easily, consistency of the color makes it important to know the dye.
Best Practices for Using a Steam Iron
One can produce the desired professional levels of fabric with a steam iron only if used properly. It is therefore very necessary to protect the appliance in order to lengthen the period the appliance will be useful. To start with, you need to help with that by filling in the appropriate amount of clean mineral-free water, and then keep from the scale forming in the openings for steam. Controlling all clothing materials confiscated on incredulous and adjusting the steam iron to the correct temperature for the material will call for the use of an ironing chart or dial in the iron box. There, sweeter items such as silk or acrylic dissimilate and synthetic fabric would be set on lower heat levels of the iron than other heavy and thickened materials such as linen and cotton
Before ironing, always try the iron on the fabric’s steam output, on a small and unnoticeable area, to ensure that the temperature and humidity level had been set correctly for that particular fabric. With delicate fabrics, place a thin cloth as protective coverage before ironing to avoid melting or shiny patches. Keep in mind that appropriate padding should be used under the green cloth especially if the fabric does not have the same length straight lines. And most importantly, do not forget to plug off and wipe out the remaining water inside to prevent mold bacteria, such as those caused by deposits. Also, clean your iron regularly according to the manufacturer’s instructions to ensure optimal function. With proper ironing techniques at your disposal, you can care for your clothing correctly while maintaining the quality of your steam. For a longer service life of the items, it is important to observe these guidelines even during post-care of the iron.
Common Mistakes to Avoid When Blocking
Critical Mistakes That Can Ruin Your Project:
Using the Wrong Materials
Blocking cannot be executed without some essentials, including a set of rust-proof pins, a blocking mat, and a suitable liquid or steam. Failure to use the correct materials will ruin the fabric.
Ignoring Fabric Care Instructions
Please be sure to read the instructions about what to wear around the fabric before starting the proccess of blocking a project, as in any case exposure to heat and moisture of various materials, such as synthetics and the finest ones, could cause problems, because they might melt, shrink, or get completely out of shape.
Overstretching the Fabric
Straightening and flattening the cloth is another common mistake that leaves it looking misshapen with the wrong fill. With a gentle tap to the fabric, it would need to be reshaped what its repair requires.
Blocking on the Wrong Surface
Never block on rough, wobbly, uneven or non-hot surfaces in fear that your blocking may end up both skewy and blundersome.
Rushing the Drying Process
The time enough waiting for drying is to be observed after blocking. Getting rid of the pins, or pulling the fabric away too soon causes it to scrunch back to its original condition that it was before blocking. It is something that requires patience in order to accomplish proper and neat results.
Neglecting to Test the Blocking Method
Lack of testing the way the blocking should work can be dangerous, especially for people working with such materials, as they can hardly take any kind of treatment. Different fibers such as wool, cotton and acrylic, behave differently under wet, steam, or spray blocking depending on the structure and finishing. Acrylic yarns on the other hand, as an example, would lose their elasticity from the steam and hance die during “killing the yarn,” while wool is at high risk of shrinkage or felting if one blocks it too much. Making a swatch is a good idea because it will show how the material behaves in some set conditions and whether the aims made up are possible to be achieved. In this way, a controlled stage of testing interventions reduces the risks of changes in the project, including variations in form, color, and weakening of fabric parts, thereby maintaining the work’s integrity and utility over an extended period.
Ignoring Care Instructions for Acrylic Fabrics
The use of acrylic in textile fabrics like a sweater, woolen jacket or suit can look untidy, ruin their prior state, and weaken the structural elements. With the conditions, manufacturers wanted to keep, and even enlarge, the surface provided out of wool fibers, and also prevent the fabric stains more successfully, so they invented a new type of manmade fiber which is today widely known as acrylic, in particular, its cornerstone was a polymer modification. Yet, inappropriate washing or storing can destroy the texture of acrylic knitwear by causing pilling, loss of spring, or easy breaking of the fabric. For instance, forcibly washing even modern acrylic clothing at high temperatures or using hair dryers to dry them at high temperatures may melt or twist the fibres they are made of, as acrylic has a low melting point in comparison to the vast majority of natural fibres. Also, not wearing recommended hand wash or delicate cycle programmes can lead to excess agitation of the fibres with the pealing or deformation of the fabric. Recent studies have also emphasized the importance of taking care of the garment in a specific way involving washing only at low temperature, refraining from the use of chlorine-free bleach, and opting for air drying to ensure the fabric’s long-lasting color and elasticity. Failure to follow these directions directly reduces the utility of acrylic articles and brings about premature wear of the garment.
Reference Sources
-
A Crocheted Simplicity: How to Block Acrylic Yarn
- This article explains five methods for blocking acrylic yarn: wet blocking, steam blocking, spray blocking, “killing” acrylic yarn, and no-pin blocking. It emphasizes that blocking enhances stitch definition, evens out tension, and improves the overall appearance of projects.
-
Mary Maxim: How to Block Acrylic Yarn – Different Methods Explained
- This article outlines various blocking methods for acrylic yarn, including wet blocking, steam blocking, spray blocking, and using a hairdryer. It emphasizes that blocking can improve the appearance and drape of acrylic projects, even though it is not always necessary.