


One of the most rewarding crafts is Crocheting because it assists in great self-expression and creativity and learning its basics is the beginning of the journey. This blog post intends to teach beginners the basic skills of crocheting by helping them crochet the second row of the work in a single crochet stitch, which is critical in making patterns and designs. You’ll gain an understanding of the fabrics needed, mastering how to see and count your stitches, while following pictorial instructions provided to facilitate ease and familiarity. By the time you are through with this tutorial, you will have acquired the necessary skills that will enable you to commence crocheting and complete those projects with a broad range of items. Regardless of if you want to create warm quilt-like thick dishtowels chic and fashionable clothing or even some attractive artistic decorative items for the house, single crochet on the second row is essential for you to attain basic crocheting skills that will ease your crafting efforts.
What is the Second Row Crochet?

The second row crochet considers itself as a part of the first chain or foundation row. The first row, made up of stitches, is a repetitive action used to work up the stitches you have created in a given row and build the crochet up another time. It is very important in going on with the structure and pattern of the piece you are working on and it mostly determines the contour and orientation of the piece. Working into this row is dependent on the particular stitch concerned but sort of entails the insertion of the hook under each stitch at the last row of single crochet then wrapping the yarn around and pulling the yarn into the stitch to make new single crochet stitches. The second row crochet is a hundred percent a must-stall for any endeavor as far as members’ completion of the image is concerned.
Understanding the Basics of the Second Row
Before starting to crochet the second row, there are some aspects worth knowing. So firstly, let us examine the initial chain or base row by practicing his consistent stitch size since it will help in the overall success of your project. When beginning this second row crochet work make sure that you put the hook into the stitches of the preceding row, under both loops so that the structure is stronger and secure. In this bicep curl, you will need to ”scoop” some yarn in which case you will place the yarn around the hook in the opposite direction of its rotation and pull through. Also, you must have some stitch limit in order not to affect the shape and pattern that was meant to be. Therefore practicing these steps properly will enhance your comprehension and skill of crocheting the second row emphatically making a strong base for your crafts.
Importance of the Second Row Crochet Patterns
The second row crochet patterns is critical as it provides the foundation upon which the rest of the crochet pattern will be embedded. Even though I might not need further stitch definition in the second row, I always try to keep in mind stitch size and tension matching with the first row. This row is often of tremendous significance since it sets the overall pattern’s texture and drape, especially if I experiment with other stitch styles like single or double crochet. Furthermore, I consider the second row important since it helps me to rectify all the discrepancies that surfaced from the initial chain and ensure the necessary firmness further into the pattern. Further, stick counting as a task is very simple and prevents you from carrying out any pillow block hikes or pillow blocking hikes that change the desired configuration of the blanket. With these factors in mind, I feel I can carry out my crochet projects further without any fear of failure.
How Do You Start a New Row in Crochet?

Crocheting a new row requires some steps to be taken with special consideration. First, I do a turning chain which, of course, depends on the stitch to be worked on, for example, 1 chain for a single crochet and 2 chains for double crochet. This turning chain is essential because it helps maintain the height of the stitches as well as their alignment. Then, I turn my work and start working on what I call the stitches of the earlier row and take the hook, going through both the loops this time for better stability unless it is to be otherwise dictated in the pattern. If the tension remains constant and mindful of the stitch count and the rows are well formed, it means that all the pieces will interact seamlessly in the selected area.
Step-by-Step Instructions to Start a New Row
- Complete the Current Row: Complete the current row by completing the last stitch as required in your pattern to ensure that you have the correct number of stitches.
- Make a Turning Chain: Make chains that will enable the next stitch to be done. In single crochet, chain one; in double crochet, chain two; while in half double crochet, chain also two. The turning chain is essential to enhance the height of the forthcoming row.
- Turn Your Work: Once the turning chain has been made, this is the moment to turn your work around proceed in the opposite direction, and commence crocheting in the stitches that you have just made.
- Start the First Stitch: Start the first stitch that you take in the first stitch in the previous row. In single crochet, the first stitch is taken in the first stitch itself, in double crochet typically a first stitch is left and the next is worked into the second.
- Insert the Hook: Unless otherwise indicated in the pattern, insert the hook in both top loops of the stitch, as this provides more security.
- Maintain Consistent Tension and Stitch Count: When crocheting across the row, especially when using the class 111 stitch, be mindful to apply even pressure to finish the fabric uniformly. Count your stitches often and measure them against the pattern conditions compliance.
- If one completes every single one of these steps and pays attention to instructions that are related to any pattern sometimes; one can ensure uniformity in the appearance and shape of a crochet project.
Understanding the Turning Chain for the Second Row
As I am trying to comprehend the turning chain for the second row, it must be noted that this chain serves as a base, determining the height of the subsequent stitches. Based on the most credible sources, it has come to my attention that a turning chain also acts as a compensatory addition to the spacing that may arise due to the difference in height between the rows. For a single crochet row, I make one chain; for this one, it is a double crochet row – two or three chains are needed depending on the sketch. This critical process makes sure that a perfect edge is formed, making it look more professionally done, and at the same time, protecting the construction of my crochet work.
Common Mistakes When Starting a New Row
A fresh row in crochet can sometimes be challenging to initiate, and I have come across such challenges. One of the most common blunders is treating the turning chain as an additional stitch, or exchanging it for comprehension of the stitch sequence. This experience may encourage some freedom with stitch counts or even construction without considering the equal shapes produced in the making of the project. In addition, sometimes I notice that I tend to change my tension at this point whence I start a new row, and this affects the regularity of the crochet material. Last, it is not uncommon to begin a new row with an inappropriate stitch and completely misplace the entire row causing alteration of the picture. Reflecting on these possible mistakes assists me in achieving better-finished products in my crochet work.
How to Crochet the Second Row of Single Crochet Stitches?

Here are the steps to complete the second row of single crochet stitches: After finishing your first row, do not forget to chain one at the end of it as this is a turning chain and it will bring your hook to the right place in terms of height for the next row to come. Turn the workaround so that you can start crocheting in the other direction. Insert your crochet hook into the first stitch of the previous row, yarn over and pull it back through so that two loops of yarn are now on the hook. Wrap the yarn around the hook once more and pull it through the two loops already on the hook, making a single crochet stitch. Continue these steps across the row, inserting your hook into the next stitch from the row below. At the end of the row, your piece should look consistent with even edges through the use of a turning chain and the right number of stitches.
Inserting Your Hook Correctly
Placing the hook required for cloth making has to be done efficiently to attain precision and even crochet. Because of my study and practice, kindly be informed that inserting the hook under the stitch is mostly advised unless otherwise provided in the pattern instructions. The hook should be inserted from the front to the back while keeping the yarn tense but not too snug. This permits mobility and stitch size stability. A well-distributed tension will help in mitigating the over-stretching or the under-stretching of the material. This is why I have been able to practice this technique on my crochet designs and they have all turned out to be uniform and of better quality helping in eliminating the basic mistakes made and improving the quality of the final product.
Making the First Stitch in the Second Row
I proceed to do the first stitch in the second row of single crochet by turning over my works with the chain one at the same lower height of the striving yarn. In this, pushing the work up to the first row creates an under-the-butt loop in the first column of the row. I ym over, draw, and complete the stitch by yam putting over and drawing both loops from my hook. The causes of this common mistake of nubbs are many, it is however critical to control tension when performing this wrongful surgery. It is possible, most especially, if I carry out these processes consistently guided by some reliable and well-written resources and a bit of practice.
Continuing with the Row of Single Crochet Stitches
Once again in the row of single crochet stitches, I make sure to follow the process for each stitch and complete a row entirely. After finishing the first stitch, I put my hook into the next stitch, under the two loops as done before, yarn over, and pull through. I then yarn over again and pull through with the two loops to finish the stitch. Avoiding uneven tension is necessary, which I manage through being worried about the tension of the yarn within my hand. As top sources unveiled, practicing this skill over and over again together with stress on the right technique is vital. From the above points, however, I have observed that in my crochet work, such will bring about uniform crochet work and neat finishing of my projects.
What is a Single Crochet Stitch?

A single crochet stitch is the most basic of the crochet stitches and can be considered a beginner crochet stitch. It is easy to understand and is a workable stitch which yields a very strong and compact fabric useful for dishcloths and amigurumi as well as for making clothes. To perform the single crochet stitch, you insert the hook in the specified stitch in the previous row, then take yarn on the hook and pull it through, take yarn on the hook and once again pull it through two loops on the hook. This stitch is usually suggested to the novice ones because it is easy and the texture is uniform.
Step-by-Step Guide to Make a Single Crochet
- Start with a Foundation Chain: As the name suggests, start off by making a chain of your preferred length. This chain serves as the basis of your project.
- Insert Hook into Chain: Insert your hook into the second chain made after your first chain. This is important as it helps to maintain the correct stitch number.
- Yarn Over and Pull Through: Take the yarn and wrap it around your hook then insert your hook inside the chain stitch and pull the yarn through so that there are 2 loops on the hook.
- Yarn Over Again: Prop the yarn over again and pull both of the loops on your hook. In this step, the first single crochet is achieved.
- Repeat Across the Row: Achieve these steps for every chain on that row. Tension should be controlled to achieve equal stitches.
- Turning the Work: After finishing that row, chain one, swing your work to the other side, and initiate the next row as you have done previously without changing anything.
- I believe that my development in single crochet stitches working based on these steps and using such expert recommendations should in no way be overshadowed. However, with every practice session completed more and more complicated patterns can be realized with a greater feeling of self-confidence.
Variations: Half Double Crochet vs. Single Crochet
What Tools Do You Need for Crocheting the Second Row?

In case you are reworking the second row, there are basic things that should be collected and are usually found in all crochet. To begin with, it is important to properly size the crochet hook that goes with the yarn – yarn wraps the hook size on the label. Also, there is a need for a tapestry needle to weave in the ends and a pair of scissors for cutting off the leftover yarn after completing the project. If possible, get additional items such as stitch markers which help in counting the rows of your work or outline certain stitch designs. Finally, a tape measure proves to be a beneficial tool that one can use to check if the size of the work done corresponds with the size prescribed in the design.
Choosing the Right Crochet Hook
For the success and comfort of any crocheting project, it is important to know how to choose the right crochet hook. When choosing a hook, I usually think about the size and the material used; these are important for the tension and the aesthetics of the stitches. Usually, it is also indicated on the yarn label, which hook size is the most suitable. To ensure ease of use, I tend to use ergonomic crochet hooks, which tend to minimize strain, especially during ‘marathon’ crocheting sessions. Some yarns may slide better on metal hooks. I can see the advantage of bamboo or plastic hooks if I want them lightweight. Thanks to the information I’ve found online and from some proficient crocheters, I have managed to try different combinations to establish what is suitable for my style and the requirements of the project.
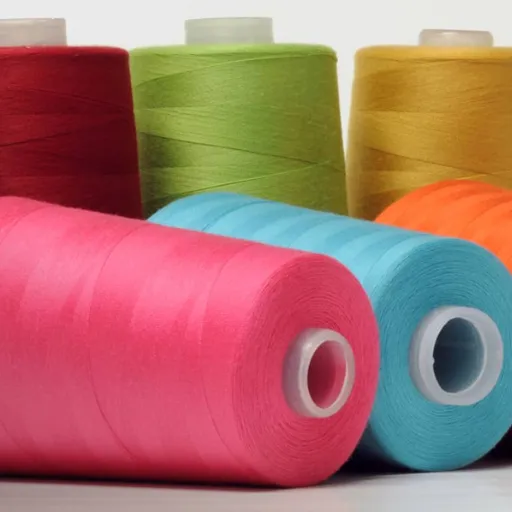
Understanding Different Yarn Types for Beginners
When I took to crocheting, learning about the various types of yarn was significant in enhancing my projects. This is how it is with yarns, they are arranged in order of weight from lace to super bulky and this determination affects the texture and size of the project. For novices, it’s best to go for the worsted-weight yarn since it shows the detail of the stitches well and it is quite easy to work with. The composition of the yarn whether cotton, wool, or somewhere in between does affect the end result. In general, I have found cotton to be great since it is durable and good for summer garments while wool has warmth and elasticity.
Are There Any Helpful Crochet Tutorials for Beginners?

Indeed, the understanding curve can be assisted by some crochet lessons available for beginners. YouTube is filled with tutorials providing stepwise instructions coupled with visuals from the most basic to the advanced. There are also channels like “The Crochet Crowd” and “Bella Coco” where novice crocheters will be spoilt for choice. Besides, resources like Crochet.com offer written content and details explaining videos. Such resources will enable beginners to appreciate basic stitches, follow patterns, and solve problems that arise hence equipping them for their first crochet experience.
Books and Resources for Learning Basic Crochet Techniques
During my period of learning, I came across some useful books and online materials. The Crochet Answer Book by Edie Eckman had helpful answers and tips that explained anything from the most basic stitches to the most elaborate patterns. I, as it has been said, am an arbitrator by being a national And English grammar For pupils in school. For such people, the Croacchet Stitch Dictionary by Sarah Hazell contained over 200 printed illustrations about stitches. On the internet, Yarnspirations.com offers free patterns and video tutorials which proved extremely useful to grasp an understanding of some technical details like the size of the hook, the number of stitches needed, and so on. In addition, crochet.com has a wide selection of advanced tutorials that help explain the differences between the yarn, details of how much tension is needed for each design, and so forth. These resources together with consistent practice enabled me to acquire an impressive level in various crochet techniques.
References
- How to Crochet in Rows – A guide on starting a second row crochet by flipping your work.
- How to Move Up to your Second Row of Crochet – A video tutorial on moving up to the second row using single crochet stitches.
- How to Crochet the Second Row of Stitches – An article detailing where to insert your hook and how to complete stitches for the second row.
Frequently Asked Questions (FAQ)
Q: What is the foundation chain in crochet?
A: The foundation chain is the initial series of chain stitches that form the base of your crochet project. It is essential before you begin working the second row or any subsequent rows.
Q: How do I start the second row when working on a crochet project?
A: To start the second row when working in rows, you typically turn your work and begin crocheting into the stitches of the first row of single crochet. Make sure to insert your hook into the correct stitch, usually the second chain from the hook.
Q: What are some basic crochet stitches I should know?
A: Some basic crochet stitches include the single crochet, double crochet stitch, and treble. Learning these will help you as you advance in your crochet projects.
Q: How many chains to make at the beginning of the row?
A: Typically, you chain one for single crochet and chain three for double crochet stitch at the beginning of the row, but this may vary depending on your pattern.
Q: How do I make the next stitch in my crochet project?
A: To make the next stitch, insert your hook into the next stitch to start, yarn over, and pull through. Continue this process until you finish a row.
Q: Can you explain how to finish a row in crochet?
A: To finish a row, complete your last stitch, then turn your work if you are working in rows. This will prepare you to make the second row or continue with the next row of your project.
Q: What are “v’s” in crochet terms?
A: In crochet terms, “v’s” refers to the shape that the top of each stitch makes when viewed from above. Each “v” represents a single crochet stitch where you insert your hook.
Q: Where can I find a transcript for crochet tutorials?
A: Many crochet tutorials, including those on platforms like the world on YouTube, provide a transcript or written instructions alongside the video to help you follow along.
Q: What is a swatch, and why is it important?
A: A swatch is a small sample of your crochet work used to test gauge and ensure that your stitches are the correct size. It helps in making sure your project will turn out as expected.
Q: What is meant by zero-waste crochet patterns?
A: Zero-waste crochet patterns are designed to minimize yarn waste by using up leftover yarn or planning projects that leave minimal scraps, promoting sustainable crafting practices.