


If you want to master the 4×4 Rib Stitch, which is a gorgeous knitting technique that is definitely the mainstay of textured and elastic designs Ms. Fagan and Caroline Martin, here is an exclusive step-by-step approach to ribbing at its very best starting from the right wool yarn for the 4×4 rib stitch to the very basics of knitting principles behind this stitch. This is suitable for all knitters regardless of level or experience in the craft. Those at the outset of their knitting endeavors and those who wish to polish up their craft are all welcome. This will be a complete guide to create strong and attractive knitted pieces. The intricacies of the knitting process will now be revealed and perfected. The 4×4 rib stitch has now been included on various projects which the readers are welcome to undertake.
What is the 4×4 Rib Stitch?

The Uses of Ribbing and its Definition
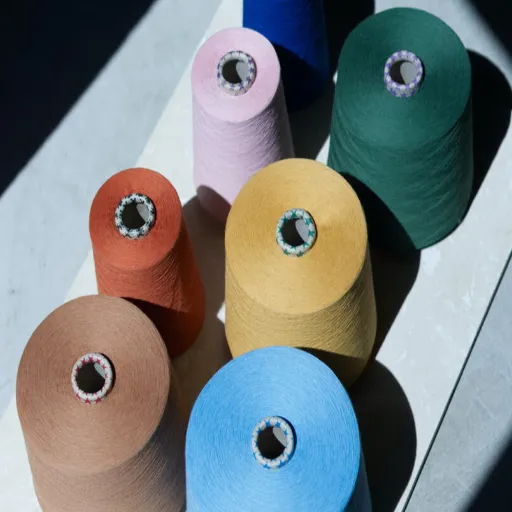
The 4×4 rib is one of the common sewing methods in which four knit stitches followed by four purl stitches are marked out and the sequence is repeated. The ribbing type made with this stitch pattern is stretchy and fits comfortably. Stretchable ribbing is typically added to the bottoms or collars and other areas in the sleeves or necklines. The knit and purl stitches distribute the tension and stress across the fabric with a size that has a depth structure to the smooth loops making it quite stretchable. As for the stitches technical specifications, a patterned rib stitch can brace medium load yarn knitted with no 7-9 needles but this may be determined by the type of yarn used in the project. Its adaptability enables it to be used in most of the possibilities giving the knits a variety of elegance and usefulness.
Establishing the Rib Stitch Pattern
A rib stitch pattern can be elongated created by casting on the stitches into the multiple of the ribs desired, so for instance for a 4×4 rib stitch, eight would do. Thereafter, start the first row by knitting four stitches and purling four across. In the following rows, proceed to knit the knit stitches and purl the purl stitches in that order. This repetitive process builds the ribbing and creates the texture and elasticity inherent in this stitch pattern. Chains of knit and purl development in a turn of the head are gradually developed over time creating a ribbing suitable for many kinds of projects.
Differences Between 4×4 and Other Ribbing Patterns
First and foremost, the rib knit and purl sections are generally wider in the 4×4 ribbing than in other ribbing patterns. The term “4×4 rib” refers to the knitting of four stitches, and then four stitches are purled. The resulting rib pattern is wider than that of one or two stitch ribs and therefore it is more elastic and prominent. The 4×4 rib, despite being able to stretch wider, is less pronounced than 1×1 or 2×2 versions which allows for more elasticity due to the nature of the stitching. Beside the construction and tension issues, the choice of ribbing also depends on how the finished garment would look like. 4×4 ribbing presents a more coarse visual impact and is applicable in cases when vigorous elastic qualities of the rib are needed.
How to Knit the 4×4 Rib Stitch?

Required Stitch Techniques: Knit and Purl
In order to knit the 4×4 rib stitch, start with a cast on that is a multiple of eight stitches. Every row may be worked using the following sequence of two steps: knit four stitches and then purl four. Complete the row with the repeat of these processes. For the succeeding rows, just knit the yarn and purl the yarn that is presented in the rows. This technique preserves the configuration of the ribbing pattern, which creates a highly flexible and interwoven panes.
Step-by-Step Transcript for Beginners
For those who have never knitted before, it is necessary to first cast on a multiple of eight stitches in order to create a 4 x 4 rib knit. That is very important as it helps to secure the pattern throughout your work. Go on and work each row for knits between which four purl stitches are to be done, all repeatable on the same row. If this is the case, then subsequent rows require that you knit the knit stitches while purling only the purl stitches. The repeated alternation of knit and purl patterns produces the unique rib stitches of 4 x 4 ribs and at the same time looks very attractive while being elastic. Don’t forget to span consistent tension to reach the best results.
Common Mistakes and Knitting Tips
First and foremost, a helpful hint is to count how many stitches you have made on the working needle so you do not exceed the rows at any time that are the eight quilt basis. This avoids errors down the line when you are halfway through your project. During the change over between knit and purls ensure the tension of the yarn is maintained so that slack stitches don’t occur. It is sensible to check your progress before you move further to ensure your work is not in contradiction with your head drawings so that you can correct any mistakes in the early stage.
Why Use 4×4 Ribbing in Projects?

The Essence of Resilient Ribbing Material
In this photo, the knitter has extended the 4×4 ribbing beyond the general 2-3 cm range and seems to have placed it where the neck line is. Using 4×4 ribbing in any knits or working on ribbed cuff knits which feature a wide or larger ruching can be employed for pieces that require a proper and more firm fitting around areas where cuffs, waistbands or hats expand. The ribs are so flexible that they can be stretched to provide comfort and can return to shape even after being stretched. Besides, the materials perform an aesthetic function, which is the texture itself and can be used in a number of projects adding both purpose and beauty.
Best Projects 4×4 Ribbing Can Be Used to Make
2 x 2 inch ribbing is suitable for scarfs and beanies that exhibit both stretch and sculps but beanies also require both 4 x 4 inch ribbing. Its elastic aspect allows for the roughness of the texture pattern that goes well and looks clean on skin or even clothe making it extensible for all kinds of purpose. The shape crimped in the ribbed design efficiently preserves the structure increasing the usability of the garment in the daily occurrences.
4×4 Ribbing and Other Stitch Patterns: An Approach
Knitted four by four ribbing when introduced with any other stitch patterns in knitting adds diversity to the project while enhancing the texture aspect as well. The most common combination is where the ribbings are placed together with fabric or seed or cable stitches to provide a balance effect. This combination is quite interesting and at the same time lifting some parts of a dress and providing relaxation areas as per the requirements. All these features make the application of 4 by 4 ribbing suitable in many projects.
How to Fix Common Rib Stitch Knitting Errors?

Best Projects 4×4 Ribbing Can Be Used to Make
2 x 2 inch ribbing is suitable for scarfs and beanies that exhibit both stretch and sculps but beanies also require both 4 x 4 inch ribbing. Its elastic aspect allows for the roughness of the texture pattern that goes well and looks clean on skin or even clothe making it extensible for all kinds of purpose. The shape crimped in the ribbed design efficiently preserves the structure increasing the usability of the garment in the daily occurrences.
4×4 Ribbing and Other Stitch Patterns: An Approach
Knitted four by four ribbing when introduced with any other stitch patterns in knitting adds diversity to the project while enhancing the texture aspect as well. The most common combination is where the ribbings are placed together with fabric or seed or cable stitches to provide a balance effect. This combination is quite interesting and at the same time lifting some parts of a dress and providing relaxation areas as per the requirements. All these features make the application of 4 by 4 ribbing suitable in many projects.
Reference sources
Frequently Asked Questions (FAQs)
Q: What is the 4×4 rib stitch in knitting?
A: In knitting, the 4×4 rib stitch takes the form of a pattern which is made through knitting and purling into the fabric. One has to first knit 4 stitches and then purl another 4 consecutively all across a row. This is unlike most forms of knitting patterns, especially the common purl and knit variation that provides the highest degree of elasticity to knitted fabric. In a single row, a combination of both may be required, but the final result is achieved using only one technique.
Q: What is an appropriate method for knitting rib stitches in a 4 by 4 rib pattern?
A: While working on a 4×4 rib pattern, the first step requires knitting rib stitches. The basic element is to always cast an even number of stitches onto the needle. Then, the first row begins with the knit and purl pattern of 4 followed by another 4 whereby this would be repeated as it has been done in all the other rows. This should be followed for the next rows where the rib has to be knits.
Q: How does a 4×4 rib differ with 2×2 rib style?
A: The only difference found between these two styles is the configuration of knit and purl stitches defining the style. A 4:4 rib configuration alternates four stitches of the knit with another four stitches of the purl while a 2:2 rib configuration incorporates only two stitches of a knit before backing it up with another two stitches of a purl. Each one of these techniques proves to be beneficial in more than one way.
Q: Can you explain how to incorporate a 4×4 rib stitch into a knitting pattern?
A: To incorporate a 4×4 rib stitch into a knitting pattern, ensure first that there are an even number of stitches in the needle. Start with row one by knitting four stitches and purling four stitches. End off by repeating this sequence throughout the row. For the following rows, continue with this pattern to form the desired ribbing.
Q: What are some common mistakes to avoid when knitting rib stitches?
A: Common mistakes when knitting rib stitches include losing count of the knitting and purling sequences which leads to no more than an average ribbing pattern. Though these stitches seem basic, it is imperative that you keep them in order and count them. More specifically maintain the 4×4 sequence for every single row. Likewise, be consistent in your tension as well to prevent a distorted fabric.
Q: How does the 4×4 rib stitch compare to the basic rib stitch?
A: The four-four rib stitch involves four knit stitches and four purl stitches in succession and a basic rib stitch is a one by one rib stitches and purl stitches, which is most often used in knitting patterns. Ribbing can be said to be the four by four rib stitch since it is broader and a better option providing more texture and elasticity when compared to the basic rib stitch.
Q: What are other types of ribbing stitches that could be worked like a 4×4 rib?
A: Other types include the twisted rib, broken rib or brioche stitch. Each of these offers different textures and appearance by changing the combination and order of knitting and purling. These can be used to create different kinds of designs in knitting works.
Q: What are the advantages in the use of the 4×4 rib stitch in garment knitting?
A: In garment knitting, the 4×4 rib stitch is used because it offer a balanced amount of stretch and a given structure which is desirable in cuffs, collars and hems. It helps shape the body of the garments and gives neat and structured appearance to the garment. The ribbing even more so provides deep pleasure to knitted pieces.
Q: Why is it important to know how to knit a 4×4 rib stitch?
A: The 4 by 4 ribbing stitch is a perfect technique for advanced knitters wanting to add more varied and intricate wasp like patterns to their work. It enables knitters to make a variety of functional and fashionable items including sweatshirts and scarves. The stitch is still very useful as the beginner knitter will find its techniques useful when progressing to more complicated forms of ribbing.