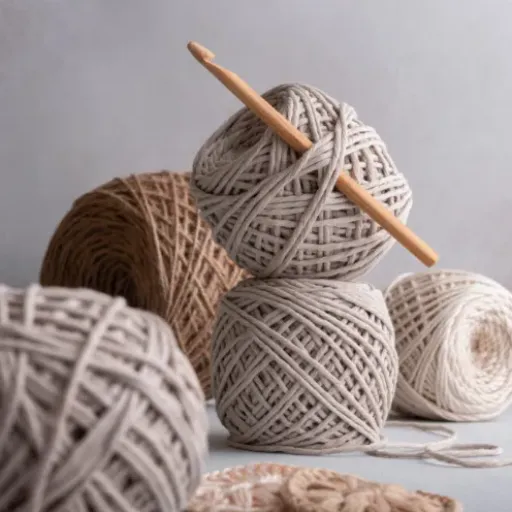


The art of crocheting combines handmade creativity and precise skills, enabling for remarkable forms of self-expression. With a great understanding of the crafting techniques, additional skills like weaving and embroidering can also be integrated with crocheting. Like many other crafts, crocheting initiates with a foundation row. After getting through with it, the second row, which is widely regarded as the “work” row, begins forming the groundwork of the piece. The second row is also known as the “work row”. It is essential in determining the texture of the piece, along with the width, alignment, and piece cohesiveness. From beginners to expert crocheters, being skilled at each step unlocks a treasure chest of options. With the correct instructions and steps, all these techniques accompanied with the right tools can be mastered.
What is the Second Row in Crochet?

In this straightforward explanation, I will take you through all the parts of crocheting with step-by-step instructions so that you feel more confident at every step. No matter whether you are a beginner trying to perfect the technique or an advanced crocheter trying to solve techniques, this guide, with all its tips and instructions, will make any problem super easy to solve. The second row outlines the next level of crocheting and is created by joining new stitches with the foundation chain or the preceding row of stitches. These steps guarantee lasting reliability and precise crafting.
Understanding Crochet Rows
Each crochet row is built up sequentially on the previous one, more like a foundation. The alignment and uniformity of these rows as well as how symmetrical the finishing is, determines if the crochet looks professional. Each row is made of individual stitches, from single crochets to variations like double or triple crochets which determine the flexibility of the fabric. In addition, crocheting with the right amount of tension ensures that the rows do not warp in width or spiral.
Maintaining proper understanding of each step of the row is critical in working with patterns as skipping or altering steps renders even the simplest shapes uneven. More recent advances in crocheting have enabled the incorporation of linked stitches or interlocking rows which improve appearance as well as the structural stability of a piece. Having the freedom to create more intricate and delicate patterns spells the importance of mastering row construction on every piece for crocheters.
Importance of the Second Row
The second row in crocheting helps in the formation of shape in standard structure and also acts as a foundation on which the entire project base is created. This row marks the critical break from the foundation chain. It sets the control for how tight or loose, straight or crooked, and how patterned the progress of the piece will be. During the second row, any variations with regard to the uniform stitches will be considered in the entire project and will cause distortion or imbalance in the design. Recent developments across crochet techniques and practices highlight row two’s impact with regard to controlled tension and precise stitches, especially when interfacing with more complex patterns like lace or textures. Also, these stitches and researchers within the fiber arts acknowledge the fundamentals of the stitch structure done in this row also becomes the underpinning aspect of the item’s longevity and strength as stitches contribute towards the maturity of the item, thus making this step important amongst many other advanced crocheting techniques.
Common Mistakes in the Second Row
One common misconception is that lack of uniform tension on the second row can weaken a project, causing it to lose structural integrity and form unsightly patterns. This problem is most problematic in lace or textured designs which require precision since even the smallest detail can alter the symmetry drastically. Another blunder commonly made is stitch counting at the edges which causes some to mistakenly add or remove stitches resulting in faulty increases or decreases that disrupt size. Blunders also include failing to place the hook correctly which causes working into wrong loops resulting in gaps. Specialists have advised that meticulous counting and concentration are a must at this stage, as the amount of work required to fix the mistakes is disproportionate to the effort invested to correct them.
How to Make the Second Row in Crochet?

For the second row in crochet, first turn your work to crochet back along the foundation chain or previous row. If you are following instructions within a pattern, insert the hook into the first stitch or the head of the specified stitch for each unique stitch. Proceed to execute the stitch required by the pattern whether single crochet, double crochet, or half-double crochet and continue working across the row keeping even stitches while maintaining the correct number. At the end of the row, perform the last stitch as per the pattern and step towards the next row and turning chain if needed.
Starting with a Foundation Chain
First, accomplish a slip knot on your hook which serves as a foundation chain. Then, yarn over and pull through the loop on the hook to create the first chain. Continue the same process until a number of chains meeting the required pattern is achieved. It’s important that you maintain even tension while working to achieve a balanced chain that is neither too tight nor too loose. Even a chain determines the structural soundness and alignment of the project. For highly detailed patterns or projects that expect a lot of movement, you might want to go up a hook size when forming the foundation chain to avoid too much tension. Also, for verification purposes, it is important to check your chains repeatedly as discrepancies of chain count would result in mistakes for the subsequent rows.
Inserting Your Hook for the Second Row
Aligning your hook in the proper place is critical for starting the second row. Typically, you will place the hook on the top loop or both loops of the stitch in the foundational chain, depending on the type of stitch described in the pattern. Carefulness is very important here. For every hook placement, there is a specific guide for the alignment and tension of the work. A single crochet stitch would entail, for example, placing the hook under both loops of the next chain. In situations where the project is meant to be more decorative or textured, there might be different instructions telling the person to work in only the back loop or the front loop of the chain.
As you pull the yarn through, special care accompanied by great attention should always be given to ensure that the tension is evenly distributed and your loops are evenly sized. Attention to detail such as these contribute to uniformity and a polished finish to the product. Always follow the pattern and check how to insert advanced techniques like spike stitches and cluster stitches because they usually come with specific guidelines.
Making a Single Crochet Stitch
In order to perform a single crochet stitch, it is necessary to begin by placing the hook into a particular space or stitch, which in most cases is mentioned in your pattern. As part of getting the right insertion, a nominal amount of slack space has to be defined so that you do not lose control of alignment and accuracy in the form of your piece. After the hook has been placed, do a yarn over by putting a working yarn on the back of the hook. After placing it, pull the yarn through the stitch. You will end up with 2 loops in your hook. Next, do another yarn over and this time draw it through the loops on the hook to complete single crochet.
Maintaining an even level of overall tension requires attention if one is to maintain uniform size and looks for the stitches. Single crochet stitches usually need uniform control over all the stitches however these types need balance with regards to the texture and placement of stitches. To help beginners, using the same angle of hook insertion and amount of working yarn slack can be beneficial. More advanced methods use single crochet as part of advanced designs, so even the simplest crochet project needs this foundational stitch.
What is a Turning Chain and How Do I Use It?

A turning chain is a group of chain stitches carried out at the commencement of a new row in crochet to raise the height of the yarn to the level of the stitches in that row. The number of chain stitches in the turning chain varies according to the type of stitch used in the row. A single crochet normally requires one chain for the turning chain. However, a double crochet needs three. In the case of using a turning chain, form the turning chains after finishing a row and then turn the work and start working in the next row as per the pattern. The turning chain assists in keeping your project in the right alignment in terms of height and shape.
Defining the Turning Chain
The turning chain is crucial for the structural integrity of a crochet project as it provides a base that will bind all the rows together and keep them properly aligned. It enables the movement to the next row changing the height to the amount needed for the type of stitch in the pattern. A single crochet normally requires one chain for turning but, three chains for double crochet.
The Adjustments of the length of the turning chain impacts directly on the overall look and continuity of the fabric, right or uniform motion. Attention to detail is crucial in achieving a result that does not have gaps, inconsistencies, or distortions. Some advanced techniques may also use altered turning chains for other purposes such as improving the overall beauty or blending into more complex designs. Knowing the application of turning chains is a must in order to achieve the professional quality expectations for such projects.
When to Use a Turning Chain
A turning chains assists in proper height adjustment of stitches during the new row or round in a crochet. The type of stitch dictates the particular height of the turning chains, for instance, a single crochet takes one chain, double crochets generally take two or three chains and taller stitches like trebles may take more. Depending on the fabric’s integrity and uniformity, correct number of chains can be critical. Moreover, turning chains are critical in projects such as geometric and intricate motifs which require exact placement and alignment of stitches. Crafters can finely tune the tension, eliminate unsightly spaces, and achieve a clean finish by adjusting the turning chain stencil for precise stitch placement. In non conventional styles and advanced techniques, knowing when and how to modify turning chains is key and enhances the functionality and versatility of crochet projects.
How Many Chains to Create?
The amount of chains needed for commencing a project varies according to several stitches, such as the piece’s length, breadth and the thickness of the yarn being utilized. Take as an example single crochet stitches, which generally require one turning chain as the double and treble crochet stitches require two or three, respectively. Furthermore, the initial chain row must cater for the stitch repeat increment as per the pattern in order to ensure the motif is centered accurately. To determine the correct number of chains for a piece, one has to calculate them using the gauge, which reflects the stitches and rows for each inch of the selected yarn and hook size. It is advisable to complete a gauge swatch before commencing a project to avoid missing the vital construction and verifiable standards intended for the project.
How to Crochet a Row of Single Crochet Stitches?

To execute a row of single crochet stitches, please take the following steps:
- Insert Hook: Into the second chain from the hook, insert your hook.
- Yarn Over: In the backward to forward direction, wrap the yarn over the hook.
- Draw Up a Loop: Pull the yarn through the chain. Two loops on the hook should now be present.
- Yarn Over Again: The yarn can be wrapped over the hook once again.
- Complete the Stitch: With the yarn, pull through the two loops on the hook.
By performing all the steps in the row, this will generate a clean row of single crochet stitches.
Steps to Create a Row of Stitches
To create a precise and even row of single crochet stitches, one needs to pay great attention to their technique and tension control. Tension that is too tight can cause the stitches to be too close together causing gaps. Maintaining the proper tension will ensure that the stitches are placed perfectly with no gaps. For the best results, the crochet hook should be inserted into each chain space as previously discussed. The crocheted yarn’s texture will contribute to the overall appearance of the item and must be gripped firmly, but not too tightly.
Like preventing twisting, paying attention to the orientation of the hook during the yarn over steps is equally important. From a bird’s eye view, each completed stitch should look like a “V” for victory. More adept methods recommend checking your stitch count after finishing a row to verify that the row’s progress is in line with the pattern and intended design. In shaping designs, for instance, parts of apparel or adornments, even small changes can cause significant issues. Following these steps, your single crochet rows will be visually impressive as well as architecturally sound.
Counting Your Stitches
Having an accurate count of your stitches is crucial for consistency and precision in any sewing project. To count your stitches repeatably, look for the ‘V’ shapes at the top of every stitch, as every ‘V’ represents a stitch that has been completed. For row-wise worked projects, make certain to include the very first and the last stitches of the row because missing them may result in uneven edges over time. When dealing with larger sections of patterns or complex designs, put larger markers after every, say, 10 or 20 stitches so counting becomes easier and help helps spotting errors earlier. Also, the use of row counters and digital stitch-tracking software greatly help in accurately keeping track of the pattern stitches where the counts fluctuate or there are a lot of increases and decreases compacted into a small section of the pattern.
Tips for Maintaining Even Tension
Achieving uniform tension at a constant level requires an attention to detail and an orderly technique when knitting or crocheting. First, consider the manner in which the yarn is held. The way the yarn is held is critical, as it can prevent stitches from being too slack or too tight. Try different ways of gripping the yarn until you achieve a proper grip which ensures a constant flow of tension. Another significant factor is the size of the needle or hook; make sure that the tools are in accordance with the type of yarn, as well as the pattern and its requirements. Other aspects such as posture and workspace setting also have important bearing on the outcome. Therefore, make sure to sit comfortably, keep the work area well lit so as to not strain the eyes, and periodically check stitches to ensure uniformity. Above all, strive for constancy by trying to control pace while working, because rushing tends to result in uneven tension.
Advanced Techniques: Incorporating Double Crochet

In order to add double crochet into your work, make sure to complete a foundation chain that is equal to the stitch number needed for your project first. Then, yarn over once more before placing the hook in the stitch or chain space that is assigned. Pull a loop, and you will have three loops on the hook. Yarn over a second time to complete the first double crochet stitch. For the completion of a double crochet stitch, you have to do three yarnovers, with the first being after the first two loops and the second after the remaining two loops. To achieve accurate results, maintain even tension throughout and regularly check your stitch count.
How to Transition from Single to Double Crochet
Moving from single crochet to double requires shift in height and technique as well. While going from a single crochet row to a double one, the first turning chain needs to be handled properly. To do that, one generally has to do three braid for the start of double crochet row that represents the first double crochet of the row. Make sure the chain is not too loose or tight to maintain ideal alignment with the stitches that follow it.
As soon as you finish with the turning chain, look for the right stitch to work into on the prior row. Unlike in single crochet, where the hook goes to the next stitch, double crochet requires skipping the base of the turning chain for the first stitch. Proceed with yarning over, inserting your hook into the desired stitch, and completing the double crochet as expected. If you observe proper stitch placement and tension, it is possible to maintain a seamless change over in the two stitch types while keeping your work neat and tidy.
When to Use Double Crochet Stitches
Double crochet stitches are as versatile as they come and are best suited where stuff is neither too dense nor too sparse. Because of their height, they are perfect for lightweight fabrics needed in scarves, blankets, and shawls, especially when faster progress rather than single crochet is needed. They also do superbly in granny squares where double crochet allows for defined shapes but intricate patterns. In pieces that require structure, double crochet offers the needed strength and support without being too rigid. Its versatility is also useful in blending with other stitch types to introduce variation in texture in complex patterns.
Common Issues with Double Crochet
One challenge that stands out with double crochet is keeping the correct tension throughout the project. Crochet workmanship may change due to tension, which may affect the consistency of the piece’s overall beauty. Another common challenge is recognizing the turning chain at the start of rows which usually leads to accidental increase or decrease of stitches. Also, some crocheters face the challenge of properly stacking double crochet in more intricate patterns which may lead to gaps in the design. Misplaced stitches, skipping stitches, or working in the wrong loops add to these problems. Achieving precision in placing stitches and having consistent tension are the few methods to these problems.
Reference Sources
1. ByGoldenberry – How to Crochet the Second Row1:
- Working in Rows:
- Begin the second row with a “turning chain” to match the height of the stitches (e.g., chain 3 for double crochet).
- Work the first stitch into the last stitch of the previous row.
- Continue until the end, ensuring the last stitch is placed in the first stitch of the previous row for straight edges.
- Working in Rounds:
- After completing the first round, join the ends and create a starting chain.
- Skip the joining stitch and work the first stitch into the second-to-last stitch of the first round.
- Typically, make two stitches into each stitch for the second round.
- Join the round by skipping the starting chain and making a slip stitch into the first stitch of the second row.
Frequently Asked Questions (FAQs)
Q: What is the first step to crochet the second row?
A: The first step to crochet the second row is to make a chain stitch, usually a chain 2 or chain 3, depending on your crochet pattern. This will help you reach the height of the stitches in row 1.
Q: How do I ensure I have the correct number of stitches in row 2?
A: To ensure you have the correct number of stitches in row 2, count the number of stitches in row 1 and replicate that number in your second row. Use a stitch marker to help keep track of your stitches.
Q: What should I do if I accidentally skip a stitch while crocheting the second row?
A: If you skip a stitch while crocheting the second row, simply go back and find the stitch you missed. You can add a half double crochet stitch or other basic crochet stitches in that space to maintain the stitch count.
Q: How do I handle the turning chain when I crochet the second row?
A: When you crochet the second row, the turning chain often counts as the first stitch. For half double crochet, chain 2 at the beginning of the row, and then stitch into the next stitch from the previous row.
Q: Can I use a slip stitch at the end of row 2?
A: Yes, you can use a slip stitch at the end of row 2 to join your work before starting the next row. This is a common practice for finishing a row in crochet and helps maintain a neat edge.
Q: How can I keep track of each row while crocheting?
A: To keep track of each row while crocheting, you can use stitch markers to mark the start of each new row or note down the row number in a notebook. This will help you avoid confusion as you progress through your tutorial.
Q: What do I do when I reach the end of row 2?
A: When you reach the end of row 2, make sure to stitch into the last stitch of the previous row. This will ensure that you have a complete row before starting the next one.
Q: Is it normal to have loops on your hook when crocheting the second row?
A: Yes, it is normal to have loops on your hook when crocheting the second row, especially if you are working with half double crochet. Just make sure you complete each stitch before moving on to avoid losing count.