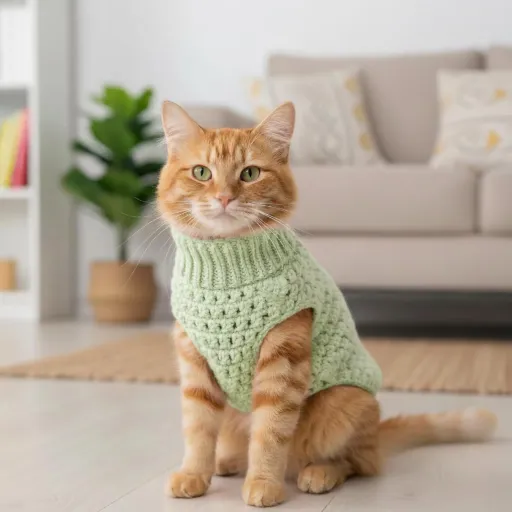


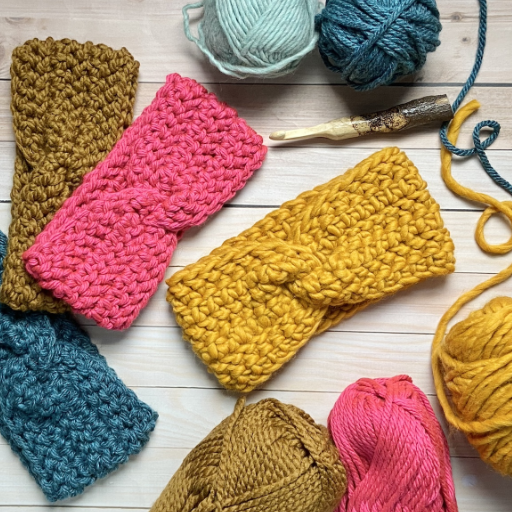
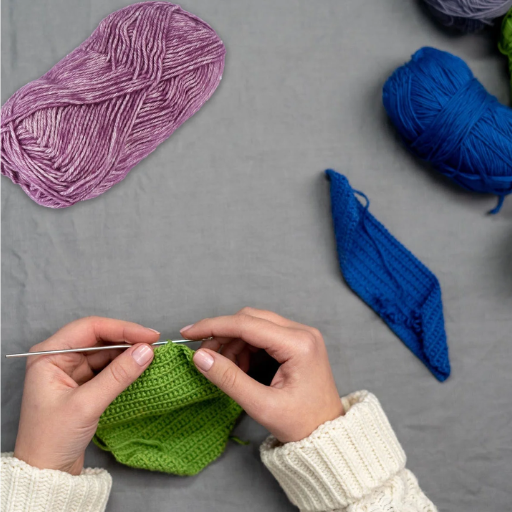
Blocking is a commonly overlooked yet fundamental technique in crochet and knitting projects, particularly concerning acrylic yarn. Unlike wool which blocks easily, the synthetic properties of acrylic fibers pose specific problems that need to be solved with a unique approach. The right blocking technique enhances a piece’s shape, drape, and texture while also ensuring the stitches and pattern details are showcased beautifully. In this article, we will discuss the best methods of blocking acrylic yarn for crochet and knit projects. This guide will take you through all the steps and tools required to get professional results, whether you’re a beginner wondering how to block an item or an advanced crafter looking to learn more about working with acrylic. Read on to learn how to transform your handmade masterpieces with the technique of acrylic blocking.
What is the Best Way to Block Acrylic Yarn?
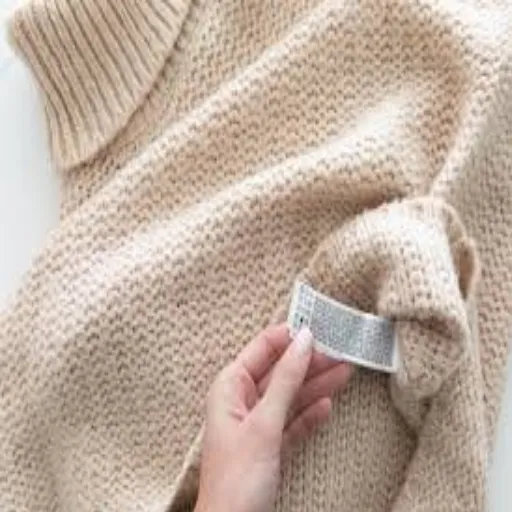
The best way to block acrylic yarn is via steam blocking. Unlike natural fibers, acrylics don’t respond to wet blocking well, given their synthetic nature. To steam block, ventilate a garment steamer or steam iron a few inches away from your piece, permitting steam to relax the fibers without direct contact. While warm and flexible, gently reshape it to the project’s final form, and let it cool down in that position. In doing so, the project’s stitches are locked in place and the project receives a polished finish enhancing the stitches from the previous rough appearance.
Understanding the Blocking Process for Acrylic Projects
Wet blocking is difficult to use for acrylic projects because the synthetic fiber does not respond to water like wool and other natural fibers would. That said, it is possible to use wet blocking for some cases, especially if you are trying to finely tune the measurement of the piece. In order to achieve wet blocking, the project should be placed into a lukewarm bath containing a gentle detergent suitable for silks or other delicate textiles. After soaking for about 15 minutes, lifting away excess moisture by pressing between two towels is a gentle way to remove moisture without causing perming distortion from twisting the fibers. After this, shape the project on a blocking board making sure that every edge and point is aligned with where it will be in the final version. Fix it in that position with rust-proof pins and let it dry completely. The lengthy drying period is essential because acrylic takes longer to dry than natural fibers because it is less absorbent. Even though the structure of acrylic fibers does not respond to this method as much as wool does, wet blocking still helps with achieving uniform stitches and even the tension under the surface for a better look.
Why You Need to Block Your Crochet and Knit Pieces
Proper workflow scheduling is of great importance because it helps reduce lead time, enforce logical scheduling processes, minimize costs, ensure deadlines are met, allocate personnel effectively, automate repetitive tasks, and finally identify problem areas. Balanced workflow processes also allows for monitoring of resource use and leads to reduced errors. Enhanced order fulfillment and tracking automation results in improved client interactions and increased sales. All of these factors lead to increased revenue and a robust ROI. Wouldn’t you want to have a robust workflow? Now let’s talk about how scheduling works and what processes it entails.
Different Methods of Blocking Acrylic Yarn
|
Method Name |
Description |
Key Tools Needed |
Ideal for These Projects |
Key Precautions |
|---|---|---|---|---|
|
Steam Blocking |
Uses steam to set fibers |
Iron, pressing cloth |
Delicate, intricate stitch patterns |
Avoid direct iron contact |
|
Wet Blocking |
Thorough soaking and shaping |
Water, towel, blocking mat |
Flat projects like scarves |
Ensure thorough drying |
|
Spray Blocking |
Light misting and shaping |
Spray bottle, pins |
Lightweight items, small areas |
Avoid over-saturating |
|
Heat Setting |
Heat sets synthetic fibers |
Heat gun, towel |
Durable or sturdy pieces |
Use moderate heat only |
|
Pin Blocking |
Stretch and pin without water/steam |
Pins, blocking mat |
Geometrically shaped items |
Avoid over-stretching fibers |
|
Combination Blocking |
Combines methods for flexibility |
Multiple tools as needed |
Complex or varied fabric types |
Test on small swatch first |
How Do You Wet Block Acrylic Yarn?
Acrylic yarn can be wet blocked using the following steps:
- Set Your Water Targets. Do not apply hot water as it will melt the structure of the yarn. Fill the basin with warm water.
- Immerse the Item. Do not apply pressure or squeeze the item. Instead, gently press the acrylic piece to fully immerse and fill the item with water.
- Eliminate Extra Water. Gently take the object out and press it between two clean towels to extract extra moisture. Do not twist or squeeze.
- Shape and Pin Using a blocking mat, clean surface or table, place the surfaced item flat. Shape it gently to the desired measurement and hold it with rust-proof pins or blocking wires for straight edges.
- Dry Completely: Make sure air-dry the item completely and do not expose it to sunlight or any kinds of heating devices.
While wet blocking is useful for shaping acrylic yarn projects, care should always be taken to handle them with care.
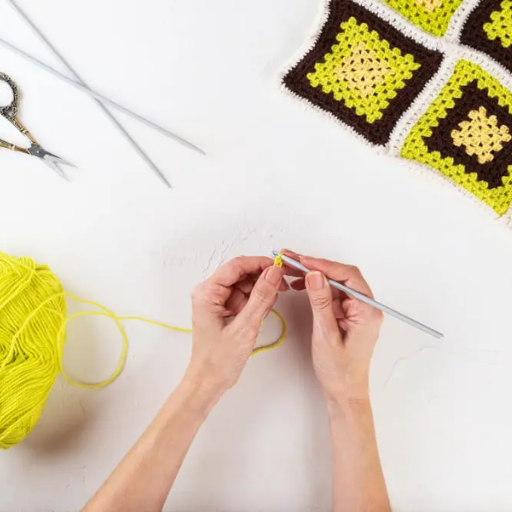
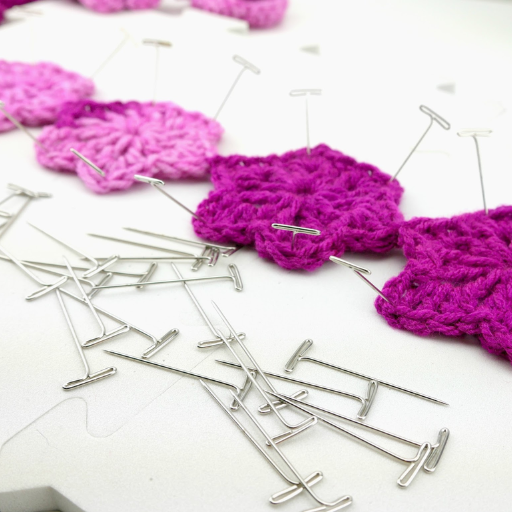
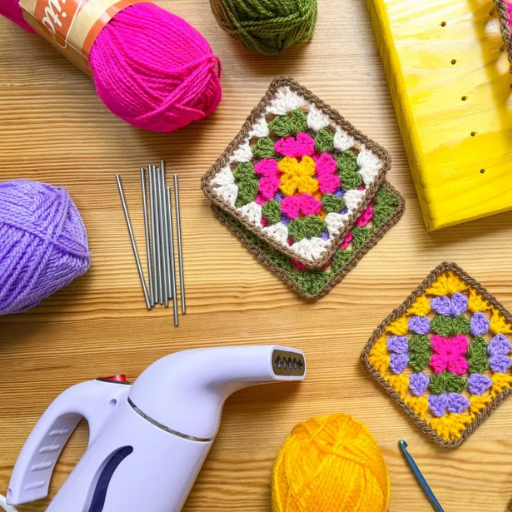
Techniques for Blocking Crochet Granny Squares
Achieving correct and exact results when merging crochet granny squares requires the use of techniques along with tools. First, spray the square with clean water and dampen it. Make sure the square is moist but not so much that it drowns. Alternatively, soak the square in lukewarm water and release any excess moisture while ensuring a twisting-free, gentle squeeze.
Next, use a blocking mat with a grid design for even scaling and alignment. Position the square on the mat and secure the edges at regular intervals with rust-proof pins as per the mat’s grid for symmetry. For larger or more elaborate squares, straight blocking wires can be inserted along the edges to cut the square and provide alignment and even stress. Let the square air-dry fully in a well-ventilated area to set the fibers into position without distortion.
Advanced techniques include steam blocking—using a steam iron or handheld steamer on the square without touching the fabric surface directly. This works well to adjust the shape and give edges a clean finish on natural fiber fabrics such as wool and cotton. In contrast, works done with synthetic materials, for example, yarns of acrylic, need to be handled with care because the steam may soften or melt the fibers. Crochet granny squares will keep the intended shape and beauty with the right amount of steam, tools, and extra care while using the appropriate medium.
Tools Needed for Wet Blocking Acrylic Projects
In order to wet block the crochet projects that are made of acrylic yarn, you need to have some materials/tools that are effective and safe for working with synthetic fibers. Below is some of the main equipment that is essential:
- Blocking Mats – Mats provide a flat, even surface on which your piece can be pinned into the desired shape. The gridded mats are particularly useful for alignment and uniformity.
- Rust-Proof T-Pins – Cuts can be secured with rust proof t pins without causing damage to the work and these t pins are made of sturdy materials that can get wet without rusting.
- Steamer or Steam Iron – Hand held steamers or steam irons with adjustable temperature settings are very effective for applying heat and moisture. Care should be taken not to cook the acrylic fibers by using high temperatures. Low or medium heat must be used.
- Spray Bottle – Clean water filled spray bottles can be used to “water” the surface of the piece evenly without giving too much or too little, thus eliminating chances of saturation.
- Measuring Tape or Ruler – These instruments provide support in resolving issues with accuracy. They assist in measuring changes needed during the blocking process to ensure that the final size is within the intended parameters.
Each of the tools mentioned aids in ensuring that an acrylic crochet project not only gets blocked appropriately, but also maintains and improves its beauty and charm.
Can You Steam Block the Acrylic Yarn?
It is possible to steam block acrylic yarn, but caution must be observed. Acrylic fibers are synthetics, and as such, are prone to melting if subjected to high temperatures. The most effective method of steam blocking acrylic yarn is with a hot steam iron or a garment steamer set on low, but held several inches away from the yarn. The iron must not touch the yarn directly. Steam should be applied lightly to the project, which should then be allowed to cool completely in the shape provided. This approach keeps the yarn in the desired configuration without losing its integrity.
Using a Steam Iron: Tips and Techniques
With acrylic yarn blocking using a steam iron, specific attention to detail must be observed in order not to damage the material. Below are some tips and methods that have been provided to ensure success.
- Set the Temperature Appropriately
Always set the steam iron to the lower, synthetic-safe or low steam setting. Heat above 300°F (149°C) will melt and irrevocably damage the structure of acrylic yarn, therefore keep the iron well below this temperature.
- Use a Pressing Cloth
Always place a clean pressing cloth of damp cotton or muslin over the project before placing the steam iron on it. The steam iron can then be placed directly over this covering. This serves as a smokescreen that lessens the effect of scorching the essential parts of the yarn.
- Maintain Distance from the Yarn
The steam iron should not touch the yarn but be held at a distance of about 1–2 inches (2.5–5 cm). While holding this position, the steam can escape freely and penetrate the yarn, allowing the gentlest form of exposure to heat without direct weight that will smother the project and warp it.
- Control Steam Output
Regulate the amount of steam being produced to a moderate level. Too much steam can oversaturate the material, and too little will not be effective. The best approach is to achieve an even and steady steam which helps in relaxing the fibers off evenly.
- Work in Small Sections
For uniform blocking, divide the project into smaller parts. Concentrate the steam iron on one area at a time using gentle, sweeping motions to ensure no one spot gets overheated.
When safety measures are observed, and these detailed approaches followed, steam blocking acrylic yarn with a steam iron becomes a dependable method to achieve flawless results.
Advantages of Steam Blocking for Acrylic Yarns
- Enhanced Shape Retention
Projects made from acrylic yarn are better maintained when shaped with steam blocking. Carefully administered heat along with steam loosens fibers, then binds them in place, ensuring that the completed project will endure long-term handling without losing its shape.
- Improved Stitch Definition
The combination of steam with the stitches makes them sharper enhancing their visibility. Intricate designs such as cables, lace, or textured patterns become more pronounced and defined. Uneven tension is smoothed, enhancing over all polish to the work, making it look professionally finished.
- Reduction of Curling in Edges
Particularly for the stockinette stitch based designs, edges tend to curl. Steam blocking is helpful in removing these to enable smoother refinement to the shape.
- Time Efficiency
Compared to other methods developed for steam blocking, this one stands out as the most effective and time-saving. The heat sets the acrylic fibers quickly without the extensive drying period required for wet blocking or other methods.
- Enhanced Durability
Acrylic yarn projects become more resilient with steam blocking. The fibers are less vulnerable to distortion during washing, routine activities, or wearing.
By leveraging these benefits, steam blocking can be optimized by crafters to consistently achieve high-quality results in their acrylic yarn projects.
What Are the Best Blocking Methods for Acrylic Yarn?
The best method for blocking acrylic yarn is steam blocking. This approach applies precise heat and moisture to set the fibers without risking harm to the material. The following steps detail the steam blocking process for acrylic yarn.
- Pin the Project – Affix the project onto a blocking mat and shape it to the desired dimensions.
- Apply Steam – Turn on your steam iron or handheld steamer. It should be around one or two inches away from the fabric so steam isn’t too close. Avoid direct contact as this may cause the acrylic fibers to melt.
- Allow to Cool – Leave the project alone until it has cooled off completely. This step is important to ensure the project is unpinned without losing shape.
The heat responsiveness of acrylic fibers make steam blocking highly recommended as it helps shape and structure them with a very low chance of damage.
Comparing Wet Block vs. Steam Block
Wet blocking is more effective than steam blocking for natural fiber types and larger projects. For wool and cotton, wet blocking is the most effective method because these fibers tend to absorb water. However, it can be quite labor-intensive since it involves full immersion, reshaping, and requires a lot of time to dry. In contrast, this method is ideal for long lasting shape retention as well as for intricate patterned pieces, especially delicate lacework.
With steam blocking, projects become easier to do if the materials used are heat-sensitive, like acrylics. It is also significantly faster because only steam is used, and moisture is not soaked into the material. This method does allow for a lot of control over edge shaping and complex designs which don’t have to worry about severe distortions from drying and long waiting times. In addition, steam blocking is best for finishing off projects that require polish,a professionally finished look like clothes or accessories.
Using a Blocking Mat or Board for Your Projects
Utilizing a blocking mat or board is critical if you want to finish your project sleek and crisp. They give you a flat, undisturbed surface with measurement grids to slice or shape your item in proportion accurately. Furthermore, blocking mats are compatible with steam and wet blocking methods since they do not get damaged easily. For bigger projects, interlocking blocking mats provide the flexibility to resize the workspace. When combined with t-pins or blocking wires, these tools ensure the piece is maintained in the fixed position during the shaping process, and as a result, the edges are clean and the fabric uniformly stretched. This method is optimal for maximizing the drape, stitch definition, and form, which is why it is a go-to method for crafters who want a professional-looking finish.
What Tools Do You Need for Blocking Acrylic Yarn?
A blocking mat has replacement parts such as:
- Working Mats: Helps keep your workstation tidy by organizing materials.
- Blocking Pins: Used to secure the yarn without damaging the fabric.
- Steamer: Provides heat to set the acrylic fibers without direct exposure.
- Steam Lite – Works like a regular steamer but only requires mists.
- Measuring tape: Guarantee accuracy during fabrication as you shape the item’s dimensions.
These tools enable accurate and efficient blocking while simultaneously improving the aesthetics and form of the project you have finished.
Essential Tools for Effective Blocking
Achieving professional results in fiber projects requires the proper application of blocking techniques tools. Start with T-pins or rustproof pins ensuring each one is properly anchored into the blocking mat or surface where your material will be placed. Always control symmetry for every edge, especially for intricate lace or patterned pieces. Next, apply the steamer or steam iron by holding it 1-2 inches above the work without touching it to prevent distortion of the fibers while setting the shape of the fabric. For projects that need more moisture, stubborn dried sections can be pre-steamed using a spray bottle to lightly dampen the area. Always double check accuracy with a measuring tape to ensure all the numbers and dimensions are as intended. With these tools, and through an orderly process, the materials will not only be refined but the texture and drape will be bettered while simultaneously retaining the durability of the fibers for years.
Choosing the Right Blocking Mat and Steamer
While choosing blocking mats, it is useful to focus on the exact material of the mat, its dimensions, and the grid pattern it comes with. Mats made of high foam density are preferable since they are waterproof, durable, and stand up to repeated pinning. Make sure there is a grid that is clearly marked to aid in achieving alignment for every piece, because that makes attaining uniform edges and symmetrical shapes easier. The dimensions of the mat should fit your average projects and modular ones are convenient for blocking larger pieces.
For steamers, pay attention to eriable output options so that you can modify the amount of water vapor emitted depending on the fibers in use. For best results during long jobs, steamers should have quick heating, ergonomic shapes, and the ability to steam continuously. Also, the use of a steamer with an auto shut-off feature is safe and prevents overheating. These tools, used carefully along with the right prep work, make sure the professional and durable finish is achieved.
Reference Sources
1. Craft Consumption and Participatory Consumerism: This study explores the relationship between crafters and their materials, focusing on how they engage with and transform materials like yarn. It highlights the importance of tools and techniques, such as blocking, in achieving desired results in knitting projects.
2. The Best Way to Block Acrylic Yarn: This article identifies heat-based methods, particularly using a hair dryer, as the most effective way to block acrylic yarn. It compares five methods (hair dryer, wet blocking, washer/dryer, steam blocking, and spray blocking) and concludes that heat softens the synthetic fibers, allowing them to be shaped effectively.
3. How to Block Acrylic Yarn: Steam blocking is recommended as the most effective method for acrylic yarn. The article warns against traditional wet blocking, which is ineffective for synthetic fibers, and advises against direct contact with an iron to avoid melting the yarn.
Frequently Asked Questions (FAQs)
Q: What is the best way to block acrylic yarn?
A: The best way to block acrylic yarn is to use a method that helps the fibers relax, such as steam blocking or the washer and dryer method. Both techniques can effectively shape your finished piece.
Q: Can acrylic yarn be blocked?
A: Yes, acrylic yarn can be blocked. However, it’s essential to use the right techniques to avoid damaging the yarn. For example, using an iron on a low setting or steam blocking can help you shape your crochet project without melting the yarn.
Q: What is the washer and dryer method for blocking?
A: The washer and dryer method involves dampening your finished piece, placing it in the washer on a gentle cycle, and then drying it on a low heat setting in the dryer. This method can help block your acrylic yarn projects effectively.
Q: How do I use steam blocking on my crochet piece?
A: To use steam blocking, lay your finished piece flat and use an iron set to the steam setting. Hold the iron above the work without direct contact to avoid melting the yarn. The steam helps the fibers relax and hold the desired shape.
Q: Should I block my acrylic sweater before seaming?
A: Yes, it is advisable to block your acrylic sweater pieces before seaming them. Blocking will help ensure that the dimensions are accurate and that the pieces fit together well when sewn.
Q: What should I do if my yarn label says not to block?
A: If your yarn label advises against blocking, consider using a gentle method like steam blocking instead of soaking the yarn. Always test a small swatch first to ensure you won’t damage the fibers.
Q: How can I make sure my crochet squares are blocked evenly?
A: To block your crochet squares evenly, use a set of blocking mats and pins. Lay each square flat, pin it to the desired size, and use steam or spray blocking to help shape them uniformly.
Q: How do I prepare my finished piece for blocking?
A: Before blocking, weave in all ends and dampen the finished piece lightly. This preparation will ensure a smoother blocking process and help the fibers relax properly.
Q: Can I use an iron directly on my acrylic yarn projects?
A: It is not recommended to use an iron directly on acrylic yarn projects, as high heat can melt the yarn. Instead, use the steam setting from a distance to avoid direct contact.