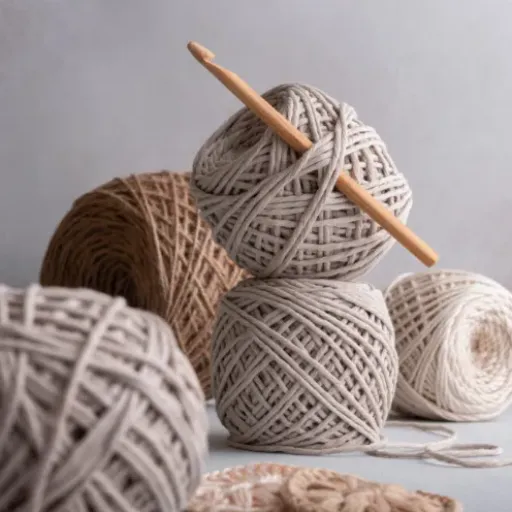


We would like to welcome you to our beginner’s crochet tutorial which will help you practice the crochet 2nd row of your crochet. No matter if you have already done crochet for the first time or if you wish to polish your skills, this post will enable you to know the basics and become confident in your art. There will be a brief recap of the major stitches covered in row one and how to seamlessly shift to the next one. The diagrammatic instruction, tips and guides that will be provided through the tutorial make it easier for everyone to practice and appreciate crochet. This tutorial will ensure that you will not only be able to perform a crochet 2nd row but will acquire the knowledge of how to create even more rows. Together let us take this exciting adventure of creativity and explore the possibilities of your crochet stitches.
How Do You Begin the crochet 2nd row?

With the work properly begun, begin the crochet 2nd row on your crochet by first making sure the first chain and first row have been finished to your satisfaction. At this point, position your work to face away from the first row you created. Now, For a single crochet, create a chain of one or a single stitch which is the required height for the next row. For Double crochet, create a chain of three because that is the required height. After chaining, place the hook into the first stitch of the row underneath, yarn over pull through, and make your stitch as usual. Proceed to make more stitches in that row in the same manner while ensuring the height and tension of each stitch is the same. These basic steps will guarantee the correct start of the crochet 2nd row and all other rows that follow for the period of this crochet piece.
What Is the Importance of the Foundation Chain?
Every crochet project begins with the foundation chain which creates the basis of the work and practice confirms, the necessity of making a correct foundation chain, as it influences the location, the stretching, and the rows in the coming work. It is required for establishing the parameters and measuring the width and structure of the work, within which the basic construction is to be done. Besides, if there are no problems with the foundation chain, we do not have to worry about distortion, internal curves or decorative edging being uneven turning out which makes the work look completely flat.
How to Insert Your Hook in the Second Chain from the Hook?
Placing your hook right into the second chain from the hook is a basic technique in crochet. Here, I grasp the crocheted item with my non-dominant hand, always making certain that the active yarn runs out in the direction of the yarn ball. Starting from the loop on the crochet hook, I consider the chain nearest to the hook as the first one and do not take it into account as I move to the second chain. This is the point where the hook has to be buried because it was aimed at being placed between the top 2 strands so that they won’t be disturbed. Subsequently, by yarning over and pulling through, the stitches are firm which is ideal for starting off any of my projects.
What Are the Steps to Turn Your Work for the Next Row?
Once ready to work the next row, I finish with the last half of the last stitch of the current row. If I’m crocheting in a single stitch, I chain one, if double, then I chain two, or for half double, I chain two. This gives the proper height to the subsequent row. At this point, after chaining, I make a quarter turn to my right to position my feet for the start of the next row. I position the working yarn over my index finger also to have some control over it. When starting the first stitch of the subsequent row, I take care that tension is uniform throughout the piece. Many experienced crocheters have, in fact, made mention of this basic task: changing between rows is facilitated and the construction and positioning of my work is emphasized.
What Are Common Crochet Stitches for the crochet 2nd row?

As you transition into the crochet 2nd row of your project, there are a number of stitches which can be practiced all of which add their own features to the workpiece being created. One of the most fundamental stitches is the single crochet stitch (sc), which produces a dense material and is useful for amigurumi or a dishcloth. The half-double crochet stitch (hdc) is also taller than the single crochet stitch but does allow for some flexibility while still being relatively dense. Double crochet stitch (dc), as the tallest stitch, produces a wider stitch that has a significant flow that can easily be used as stitches for scarves or shawls. Beginning with these stitches at the onset of your project provides you with a larger platform to exploit your creativity and any design that you intended for the project.
How to Perform a Single Crochet Stitch?
A single crochet stitch begins with me going ahead and inserting my hook in place within the next stitch of the row. I then yarn over and pull the yarn through the stitch so that I have two loops on my hook. I then yarn over once again, all the while drawing the yarn through the two loops on my hook. At this point, I have made a single crochet stitch and therefore, I have added one stitch more to my row. Care should be taken in maintaining even tension in every stitch made in order to ensure consistent fabric appearance. In an identical manner I proceed in every row within which there are no undue disturbances in how my crocheted piece looks like. Basic stitches are the most common type used in the construction of crochet patterns and they are often used in many combinations.
What Is the Double Crochet Stitch Method?
I use one yarn over one stitch, pull my crochet hook through the space created by the yarn over I, and then repeat the same process, which lets me have three loops on the hook. I yarn over and pull the first pair of loops on the hook; thus, there are two copies left. In the end, I yarn over again and pull the last copies through each other, successfully completing the double crochet stitch. Hence, this technique results in a higher crochet fabric with a looser texture allowing for good draping and airy feel making it suitable for clothes and bigger projects.
Explaining the Half Double Crochet Technique
To make a half double crochet I begin the process by yarning over, and proceeding to insert my hitch into the appropriate stitch for that row. Then I yarn over and pull the yarn through the stitch to get three loops on my hook. Afterward, I yarn over again and pull the yarn through the three loops on my hook. It is noteworthy, with this type of stitch, while working a half-double crochet, a consistent gauge should be kept throughout to ascertain uniformity in the appearance. The stitch results in a fabric that is stronger than a single crochet but weaker than a double crochet, which makes it ideal for constructing a wide range of items like blankets, scarves, and hats. One technical parameter that I tend to always remember is the necessity of using the hook size appropriate for the weight of the yarn because it will impact the finished drape and texture of the fabric.
What Challenges Might Beginners Face While Crocheting the crochet 2nd row?

The crochet 2nd row is surrounded by several challenges, particularly for beginners. Even in one of the more straightforward crochet techniques, on the other hand, the beginner can come across the challenge of making the crochet 2nd row, some issues may arise, such as not maintaining the tension consistently. This affects the overall appearance and the uniformity of the fabric. Furthermore, the foremost stitch in which the hook needs to go is the pattern set in the first row can be difficult to place. Another obstacle is counting stitches, what one stitch is it going to be in the first place, and how many of those stitches are in it, if the answer is not remedied will result in degraded design edges or an overall design that is on the slant. Another set-up that is also related is getting the flow of moving from one single stitch to the next and even in the next rows can be different. Sufficient time, stitch markers if necessary, and lots of top lesson videos or even text to saturate the newbie with the level of confidence necessary to make them confident in their ability to do the aforementioned.
Why Might You Miss the Last Stitch?
In the course of crocheting a design, I often at times need to do the last stitch and leave it out. One reason is that I may get performing distractions, and end up not making the final stitch and affecting the symmetry of the row. Other times when I consider to be working on the final stitch, I find it to be too invisible as I may be focusing on a complicated stitch work or using textured yarns which can be easy to miss the last stitch. And finally, by the time I reach the end of the row, in the sequence of stitching I may have knit fatigue or lack of concentration and forget to count. What I have come to appreciate is that making it a practice to always finish each row by counting stitches, as well as the use of stitch markers, has contributed greatly towards avoiding this problem and making sure I retain the correct shape and even edges in the project.
How to Avoid Losing Count of Your Row of Stitches?
To keep from losing track of my stitch row, I have come to find stitch markers quite useful—they are great markers that indicate every couple of stitches or key locations in the design. Another effective method is keeping a record on a piece of paper or using a row counter app, which informs me of the progress without breaking the flow. Similarly, slow, progressive counting as I work on the crochet makes it hard for any overlooked stitch not to be detected and rectified. Reducing clutter in my working space and limiting incoming interruptions also assist in placing my focus where it is supposed to be. Consistent effort and a fair amount of endurance have been instrumental in the development of my counting skills over the years.
How to Advance Beyond the crochet 2nd row?

There are specific practices in advancing beyond the crochet 2nd row such that they can improve the chances of completing the work scale successfully. Start by reading the pattern and any additional instructions as this prevents confusion and mistakes as you work through the first rows. Be mindful to check the number of working stitches for evenness and keep on using a stitch marker or any other counting technique to keep track of how many stitches you have. As time progresses, keep track of all pattern repeats or the different stitch techniques employed for each row within the pattern’s progression. Each time you work a row, look back at the pattern so that you can ensure that the work done so far is in line with the design. In some time moving over the crochet 2nd row will be nothing out of the ordinary, but rather a normal step in a crochet routine.
What Are the Techniques for Creating the Next Row?
In order to be able to proceed to the next level in my crochet project creativeness, I focus on a few essential techniques. First, while progressing to the next row, I pay attention and try to find out if there are any new stitches used or altered in the particular row by reading the pattern instructions. I try to keep my tension even throughout the work and make it neither too loose nor too tight. In case I run into stitches that are new to me I often like to use a guidance tool such as a how-to video or a picture. When it is a matter of complex stitch patterns, I do not forget to use stitch markers which help me in remembering large stitch patterns. With this technique, I am confident in extending my crochet piece, as every new row complements the existing pattern perfectly.
Understanding Crochet Patterns for Progression
As a beginner in crochet, the first step that I take is to look at the vocabulary and the pictograph symbols that are available. moreover, delve into the pattern so as to look for any special styles or versions that I may come across. Furthermore, I utilize a notebook for taking notes about changes that I make during the process so that it is easy to understand how the work proceeded. With this approach, I am confident that I will be able to take the next steps without disturbing the intended relationship and flow of the pattern.
References
-
How to Crochet the crochet 2nd row – Tutorial Eight by Golden Berry – This tutorial provides detailed steps on starting the crochet 2nd row with turning chains.
-
Reddit Discussion on Adding a Crochet 2nd row – A community discussion that offers various tips and personal experiences on crocheting the crochet 2nd row.
-
How to Crochet the crochet 2nd row of Stitches by Smart Knit Crocheting – This article explores where to insert your hook and how to complete stitches for the crochet 2nd row.
Frequently Asked Questions (FAQ)
Q: What is the first step in working the crochet 2nd row when doing basic crochet?
A: The first step in working the crochet 2nd row is to chain one and turn your work, which prepares you to start crocheting back across the previous row.
Q: How do I determine how many chains to make at the beginning of the row?
A: To determine how many chains to make at the beginning of the row, consider the type of stitch being used. For example, you chain one for single crochet, chain two for half double crochet, and chain three for double crochet.
Q: What should I do if I need to skip a stitch in crochet tutorials?
A: If instructed to skip a stitch in a crochet tutorial, simply move your hook to the next stitch as directed. Skipping stitches can create patterns and textures in your work.
Q: How do I insert the hook into the second chain when working in rows?
A: To insert the hook into the second chain when working in rows, find the second chain from your hook, guide your hook underneath the top two loops, and proceed with your stitch.
Q: How do I ensure my crochet 2nd row is straight and even?
A: To ensure your crochet 2nd row is straight and even, count your stitches as you go, make sure each stitch is worked correctly, and maintain consistent tension throughout.