


Knitting is an enjoyable and constructive skill that most people can attain; however, when common knitting mistakes occur, it can be rather disheartening. This article seeks to particularly highlight some of the common knitting mistakes made and how to resolve them at the level of a complete beginner. Problems range from missed stitches to tension trouble and improper yarnovers. For each mistake made in the process of a knitting project, we will suggest several ways how to address the concern at hand and more importantly boost your self-assurance as a knitter. You learn how to go about, not only these errors but how to fully understand your knitting that you will appreciate more in the long run and improve your skills gradually.
What Are the Most Common Knitting Mistakes?

- Dropped Stitches: With this, also known as a dropped stitch, the stitch does not remain on the knitting needle but slips out and makes a gap in your fabric.
- Twisted Stitches: A twist is also known to happen when one knits stitches on the back loop instead of straightforwardly knitting the regular way. The result is usually tight and all-wrapped-up hence unattractive.
- Uneven Tension: Lack of focus in techniques may lead to knots that are unduly big or minimal further distorting fabric from the normal texture.
- Incorrect Yarn Overs: When creating patterns common knitting mistakes and yarn overs are badly executed; a possibility of creating extra holes or even conflicting the intended purpose arises.
- Miscounting Stitches: Altered counting may affect the counted stitches making the stitch patterns for a piece cracked or with some tipped edges.
Awareness of such common knitting mistakes is pivotal as remedial measures can be taken in advance which will help you complete your knitting projects successfully.
Understanding Common Knitting Mistakes
As a passionate knitter, it is fair to say that dropped stitches are among the worst blunders that can occur. If I lose a stitch, and there’s a hole where the stitch should have been, I know that I can reach for the crochet hook and fix the stitch so the whole thing is orderly. Twisted stitches were also an obstacle with excessive difficulty, particularly when I unaware of this policy, didn’t see the problem until several rows were completed. This was a spinning stitch that knitting through the correct part of the strand of the loop made unnecessary. Early on, inconsistent tension was a hurdle that I needed to overcome, and I did so with the help of conscious practice, working on the yarn tension I applied and on checking my work from time to time. Understanding of such kinds of mistakes helped me not only to avoid them but also to learn from them and make them useful for developing my skills.
How to Identify a Dropped Stitch
Whenever I suspect a dropped stitch in my knitwork, my first step is to closely inspect the entire fabric for any loose loops that disturb the smoothness of the pattern. I then take a risk and pull the area of the fabric in which I expect the mistake has taken place as dropped stitches normally show the error as vertical lines below the rows. In the event that I notice a difference, for example, a skipped loop in the row basically or the absence of the V shape extended between two rows, then it is expected of me that a stitch has been dropped. A stitch that has been lost can be picked up by means of a crochet hook or a knitting needle and in this circumstance, it is useful to lift the row from the center toward the top part of the project where the stitch has been lost. This keeps me to properly executing the pattern and resume knitting undeterred.
Recognizing Twisted Stitches
Twisted stitches can be distinguished through the observation of the direction of the stitch on the needle. Stitches that are supplemented by a leg or surface that seems to have been twisted bottom upwards or one that is oriented differently is targeted. Usually, the leading leg of stitched untwisted stitches should be pointing towards the front of the needle while that of the twisted stitches will be pointing in the opposite direction. In order to confirm that both stitching legs are firmly slanted off the angle, bisectional visual confirmation is carried out. If some stitches seem to be twisted, I attempt to correct that by knitting the right loop through the set stitch to advance the leading leg. Taking care of the shape and style of tapes and their frequent control allows me to prevent common knitting mistakes that are associated with twisting instead of stretching tapes and fabrics.
How Can You Fix a Dropped Stitch?

When repairing a dropped stitch, it is advisable to first inspect the area in question on the fabric by pulling the fabric to look for any holes or spaces in between. If any holes are seen, go ahead and utilize a crochet hook to pick up the dropped stitch. Place the hook into the dropped stitch’s loop and carry the yarn over successive horizontal threads (or rungs of the ladder) until the stitch reaches the correct elevation on the needle. Before returning the stitch to the needle, double-check to ensure that it is in the right position. This technique lets you add the dropped stitch back into the pieces as if it were never removed and carry on with the knitting.
Using a Crochet Hook to Fix It
In cases where there is a dropped stitch which I intend to correct with a crochet hook, I reach out for the affected area and start pulling at the fabric. I then bring my crochet hook into action when the stitch has been identified. I look for the top of the dropped stitch loop and stick my hook into it, then pull the strands up slowly, row by row, until the stitch is grabbed by the other on the needle. While pulling the stitch back up, I pay attention to the fact that the leading leg of the stitch is the front one. Many knitters would wait patiently until the knitted piece is finished for a dropped stitch to be picked up, then moved back to the needle where it was taken from in the first place. I do it all over again, check my previous operations and make sure that the pattern has not broken and proceed with the knitting. It is important to remain succinct and keen during this all to ensure that once more any dropped stitches can be dealt with efficiently.
Steps to Fix Knitting Mistakes
To begin with, I resolve errors knitting errors. Understanding the cause of an error is essential, and therefore the first step is to examine it. When I notice a stitch type error, I use the ‘thinking’ technique which means knitting backwards so stitches can be undone all the way back to the site of error. In addition, I may also use lifelines for more challenging common knitting mistakes that I cannot fix with ease, and which is a strand of contrasting yarn threaded through a horizontal row of stitches so that I am able to pull back without getting my work ruined. It was important that I do not lose my cool and that I do not rush since this may cause more problems. So with this approach, scope for wastage is very much limited and the project is kept intact.
Preventing Dropped Stitches in the Future
To avoid dropped stitches next time, I pay lots of attention to tension and check my progress regularly. Picking the right needle size and type of yarn allows for closer stitches which in turn minimizes chances of gaps between stitches. I particularly try to develop the practice of taking a break after two or three rows to visually assess the factory for irregularities. In the process also, I try to deploy stitch markers as aids since I have noted they help in following instructions correctly for knitting complex patterns. In a similar fashion, I do not overcoat the yarn but maintain a satisfactory tension that reduces the probability of having loose stitches that can be pulled out. With such practices and techniques, I understand that dropped stitches can be reduced considerably and therefore my knitting projects shall look perfect and clean.
Why Do Beginners Make Mistakes?

Starting out in any new craft can lead to unnecessary mistakes as the beginner has to learn both the basics and the intricacies of that craft. They might not have perfect practice yet, being able to keep tension consistently, for instance, forgetting how to do it correctly within the stitch itself. They also might experience trouble when it comes to reading and executing knitting patterns or instructions and making mistakes like dropping stitches and counting them wrong. The presence of common errors is also increased due to accidental misleading and unsteady mind. With passage of time, through performing the craft skill, such common knitting mistakes decrease as one becomes more and more adept in executing the craft.
Common Pitfalls Beginners Make
In my knitting journey as a novice, I can say that one of the major common knitting mistakes I would make is failing to keep the tension even which resulted in my stitches being uneven and quite unsightly. There was an instance when I also paid too harsh of a focus on intricate designs, which resulted in either skipping sequences or layering in stitches that were unnecessary. An additional problem was getting bored too quickly, thereby making errors that compelled me to frequently unpick and rework sections of my design. In order to rectify these problems, I worked on my patterns on a daily basis, was more observant when reading various patterns, and attempted to work in a quiet area, which, thankfully, has worked out for the better as my skills and confidence improved over the period of time.
How to Unravel and Start Again
When pulling out the knitting and starting another piece, I slowly try to locate the place where I made a mistake. I unfasten the needle from the stitches that have the mistake and undo the hull so that it has to be only to the hull where the mistake is. In this course, I remind myself that I do not straining or twisting the yarn which may be difficult to manage in the future. After achieving that, I place the needle into the stitches that I want to repeat and turn them the way a normal knitting process would require. I work at a steady pace to rekindle my project this time avoiding the errors I had made in the past. By focusing on the level of patience as well as the attention given to detail, I have come to appreciate this particular activity since it not only enhances my knitting abilities but also my patience and ability to find solutions to problems more effectively.
Understanding Your Knitting Pattern
Playing with my yarn requires me to take great care of many things. Looking for such future problems before I start my project has become a habit of mine now. The firm foundation that develops as I advance through my project’s phases allows me complete assurance that I will not fail. In my case, however, it is vital to pay attention to very minute details. I can still recall one of my first mistakes when I didn’t understand that there are patterns somewhere in the knitting world that require you to use a seam and that some projects should be done in stages. Knowing the full range of techniques before starting to stitch makes the steps that need to be carried out in detail on my project help me in developing the background in which I stitch. It means that before picking up any needles I take a good look at the whole pattern that there is. In my case, the phase of a project does not affect how I look at the whole project because I try to mentally divide it into multiple parts, or modules at least.
How to Avoid Knitting in the Wrong Direction?

To avoid knitting in the opposite direction, do not lose track of whether you are working on the right side or the wrong side which is also known as the ‘RST’ and ‘WST’ corners respectively. Place a stitch marker or a contrasting thread to the right side of the work to remind yourself of its position. Remember to consider the position of your work every time you pick it up, particularly after breaks. Get into the habit of examining the previous row of stitches for evidence of which side you finished on. Developing a knack for managing the knitting direction in such a way that it is completely effortless requires practice and concentration.
Signs You’re Knitting in the Wrong Direction
There are usually some telltale signs that let me know if I’m knitting in the rear end while making lace pieces. Firstly, the uncomplicated one is seeing that the garter fabric structure is different or there are flaws on the fabric structure because I did the stitches forward and then shocked local them in either reverse. Another hint is the exacerbated alignment where the edges are said to be misaligned leaving the piece in an awkward curvilinear shape or an incomplete cut. I’m likely to observe that there are twisting out of stitches or the row disparity I have to count seems high in contrast to the diagram. Lastly, if I’m making a garment and notice, for instance, that the waist shaping looks in the ribbing rather than the swatch, this effectively is a smoking pistol that I’m doing it the wrong way round. Checking which way around the pieces has gone, and scanning previous rows that date back about my knitting patterns helps me reduce these errors as much as possible.
How to Correct the Direction of Your Knitted Fabric
When my knitted material gets twisted, I usually stop and analyze my defeat in order to figure out what went wrong. I am faced with the problem of determining the alignment of the stitches and the last row that has been drawn. Then I unpick the rows I’ve knitted in the wrong direction. I’m careful to replace the stitches in the appropriate orientation once I recreate the point at which the error began. In the process of returning, I make it a point not to allow any twist in the stitch in any form. Lifelines can be especially useful in this regard; they enable me to go back to an error-free location as far as possible. Looking at the knitting graph for a few seconds is sufficient to remind me of the position of my polygons and of the words I need to continue in the forward direction. This procedure raises my concerns about errors and makes me more conscientious in subsequent projects.
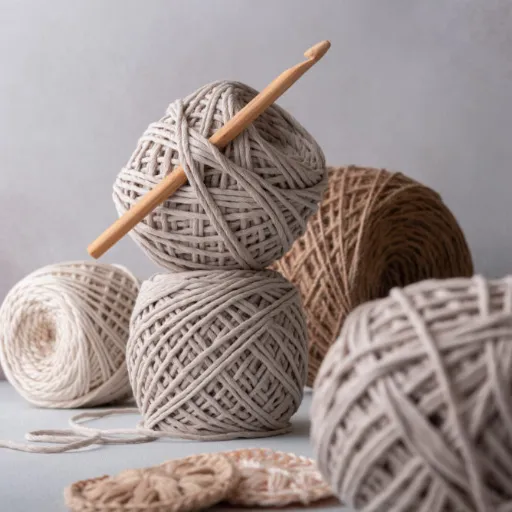
What Are Effective Ways to Yarn Properly?

Selecting the right type of yarn for your project marks the beginning of proper yarning since various fibers and textures will influence the end product. Holding the yarn at the same pressure will guarantee that you do not have stitches that are too tight as well as loose stitches which would create loose areas. It is important to keep your yarn organized so that it will not tangle, and a yarn bowl or a dispenser can help with that. Also, picking the right size needle relevant to the yarn and fabric density intended will result in favorable outcomes. Being able to periodically observe the progress made and performing minor changes wherever necessary will help reduce the chances of errors and consequently the quality of work within the knitted piece.
Choosing the Right Yarn for Your Knitting Pattern
A general recommendation is to always look at the specifications of the pattern. It is important to note the most appropriate suggestions such as the type of yarn, its weight or specific features required to create the finished product. Additionally, I want to note the softness and texture of the yarn so that the feel of the finished product matches the one envisioned in the pattern making it more comfortable to wear. I would assume that the gauge stated would be the correct one applicable to my pattern and make changes accordingly to my knitting tension if required, beating out a test piece beforehand to see if it is appropriate before proceeding to the whole work. All this care helps me to choose the best yarn for the desired characteristics making my improvement of knitting to be more enjoyable.
How to Manage Accidental Yarn Tangles
If I tangle my yarn by accident I first breathe out and try not to panic so that I do not make it worse. It is all about working out the tangle slowly as opposed to yanking it. My first step is to look at the structure of the tangle and see if there are any loops or knots which I can seize and push apart with my fingers. In most cases, I am also more effective when I use a tool such as a yarn needle or crochet hook to help me remove tighter knots. In other cases, if I feel that the tangle is too much, I have no option but to cut the yarn only leaving a bit at the end so that I can weave in the ends later. To me, the most important factors that enable me to deal with the frustrated and fairly tangled yarn are patience and gentle pulling of the threads. In fact, patience does really help to maintain the integrity of the yarn. Due to this, I’m now doing my best to keep my knitting materials orderly, using a yarn swift or a ball winder, as recommended by online resources.
Ensuring Even Yarn Tension
To maintain consistently even tension when working yarns I adopt at the very outset a relaxed grip on both the yarn and needles. An appropriate grip that does not interfere with the smooth flow of yarn ought to be constructed. While stitching I am consistently vigilant to avoid the habit of yarn over slack, which can cause irregular stitches. It is also beneficial for me to practice with different yarn and needles in order to manage my tension well. We all understand that there should be no inconsistencies, and I have trained myself to frequently check gauges during the course of a project. Any variations I have noted lead me to change my hands further to a relaxed position or larger needles until the tension equalises. Regarding technical parameters, on a worsted weight yarn a gauge of 18 stitches and 24 rows per 4 inches is often suggested, but this may vary depending on particular patterns and yarn kinds.
References
- 7 Common Knitting Mistakes that Beginners Make and How to Fix Them
- Common knitting mistakes and how to fix them
- 4 Common Knitting Mistakes—and How to Quickly Fix Them
Frequently Asked Questions (FAQ)
Q: What are some common mistakes and how to fix them when knitting a sweater?
A: One common mistake is dropping a stitch. To fix this, you can use a crochet hook to pull the dropped stitch back up to the last row. Always ensure to check your stitch count regularly to avoid this.
Q: How can I fix a hole in my knitting that appears in the middle of a row?
A: If you notice a hole in your knitting, you can learn how to fix it by picking up the dropped stitches around the hole and knitting them together with the corresponding row. This will help eliminate the hole and maintain the integrity of your work.
Q: What should I do if I accidentally twist my stitches while knitting?
A: If you accidentally twist your stitches, it’s easier to fix if you catch it early. Simply unravel the last few stitches and re-knit them correctly. If you’ve been knitting for many rows, you may need to knit down in the middle to correct the twist.
Q: I’ve finished my project and found an extra stitch. How can I fix this?
A: An extra stitch can usually be resolved by simply knitting two stitches together to decrease the stitch count back to the correct number. This is a common issue and part of knitting that beginners often encounter.
Q: What do I do if I’ve dropped a stitch after many rows of knitting?
A: If you’ve dropped a stitch after knitting several rows, you’ll need to carefully unravel back to the point where the stitch was dropped. Use your knitting tools, like a crochet hook, to pull the yarn back up and secure it. This may seem daunting, but it’s a learning opportunity in fixing knitting mistakes.
Q: Can I find tutorials on fixing common knitting mistakes on YouTube?
A: Yes, the knitting community on YouTube is vast, and many creators upload original content that includes transcripts of how to fix common mistakes and how to fix knitting issues step-by-step. Just search for the specific mistake you are having trouble with.
Q: What is the best way to check my stitch count while knitting?
A: The best way to check your stitch count is to count every stitch on your needle after completing a row. If you’re working with a circular needle, it’s helpful to count every stitch before you start the next row to ensure you maintain your intended stitch count.
Q: How can I prevent making mistakes while learning to knit?
A: To prevent mistakes, make sure you understand how to knit and purl stitches correctly before starting a project. Take your time with each stitch and use a lifeline periodically in your work, which allows you to unravel back to a certain point if you encounter issues.
Q: What should I do if I accidentally knit the last stitch of my row incorrectly?
A: If you realize you’ve knitted the last stitch incorrectly, simply unravel that stitch and re-knit it properly. If you’ve been knitting for a while, it might be a good idea to check your work with a transcript or guide to ensure you are following the correct pattern.