


To neaten the edges of the items created by crocheting and knitting, a technique known as ‘blocking’ is usually used, it is the blocking of finishing. Similar to the main part of the project, in order to make its appearance finished and neat, blocking is also used. While it is popular to assume the blocking word derives from woolen natural fibers, crochet enthusiasts and the knitters who make use of acrylic yarn often question its effectiveness. Can you successfully block a crochet garment made of acrylic? And if you can, how is this blocking is possible with other types of fibers? In this article, we will delineate the different procedures involved in blocking acrylic yarn while removing any misunderstandings, highlighting the differences in synthetic fiber, and offer a how-to approach to get you through it. Depending upon the item you are making, be it a blanket, a dress, or crochet tatted lace, being conversant with blocking acrylic textile can improve your ability and ensure that your work is in its best condition.
What is Blocking?
Numerous people are involved in the art of handling the knitting and crocheting needles while knitting or crocheting. It is the technique used to correct or make adjustments to the shape and size of a crocheted or knitted creation. It is achieved by making the knitwear slightly damp, subjecting it to a dry heat or both a wet and dry heat. Such treatment makes the stitches even and brings the patterns into focus. Thus, it is cosmetic, or rather subdues, the retro aspect and helps to keep the project in shape, rendering it more elegant and professional.
Definition and Purpose of Blocking
Since it helps to condition the size, shape, and texture of craft knowledge, the blocking is a necessary step in knitting and crochet. It entails the controlled use of moisture, steam, or heat to reposition the fiber. The purpose of blocking is addressed in the previous paragraph, as it forms part of the mechanics of knitting that any knitter firmly grasps. Wet or steam blocking can also be used depending on the type and composition of the fiber, including a woolen blend of grain. Such is necessary for intricately designed patterns like lace, as it facilitates the even visualization of the design so that the outline is even and complete. Proper blocking achieves both form and function, which helps maintain any piece of handicraft item, both aesthetically and functionally.
Benefits of Blocking Your Projects
- Enhanced Stitch Definition
Using Block allows each stitch to settle into the correct proportions, so the entire surface does not look as a separate stitch. This is particularly of use for all cables as well as bobble and lace patterns, where intricate designs mask smoothly and crisply.
- Improved Fabric Drape
This process also gets idle in the material fibres, making the fabric less rigid and more easily fall around the body or on surfaces. It is very important for things like shawls, cardigans, scarves, apart from tight and stiff booties, to be in their specific shape, and for the proper wearing of the garment and its appearance as well.
- Size Precision and Adjustment
One more benefit of blocking is, a finished garment will be easily and quickly changed to exact measurements because it is much easier for fitted wear as opposed to non-fitted wear. Insufficient fit and functionality can be avoided if the project is assessed properly because as research shows, the dimensional accuracy of blocked projects is several times higher than that of unblocked projects.
- Pattern Symmetry
The purpose of blocking is also to correct rigid or non-parallel edges when creating something. It might be square for a blanket or any other item with a repeated pattern. There is a need to ensure that those outside edges are in agreement. With the help of blocking the skewed edges or variations due to the unevenness of the material can be modified.
- Fiber Stability
Blocking can also be used to finish the work as it stabilizes the way the fibers are set into position in the work. The practice serves a significant reduction in elasticity to the fabric, leading to problems such as warping, poor reduction of uneven shrinkage or wrinkle marks after the cloth has been washed.
When Do You Need to Block?
Methods for Blocking Acrylic Yarn
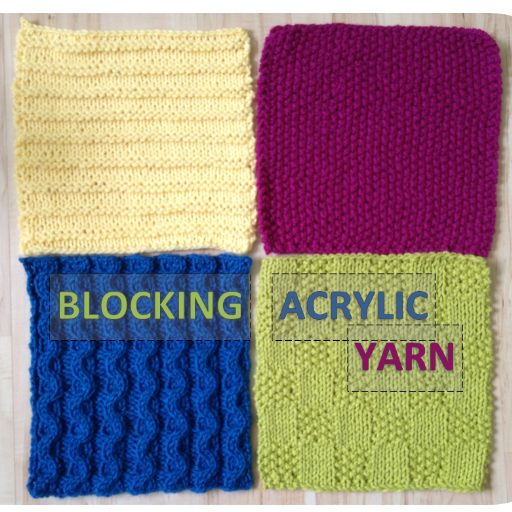
Acrylic yarn is very popular since it’s a great yarn that is easy to work with. However acrylic yarn is a synthetic material that is not well suited to traditional wet blocking and therefore can cause a lot of problems when shaped incorrectly. Among all methods, steam blocking is the best one. If you wish to block your acrylic item by steaming, there are several simple instructions to follow:
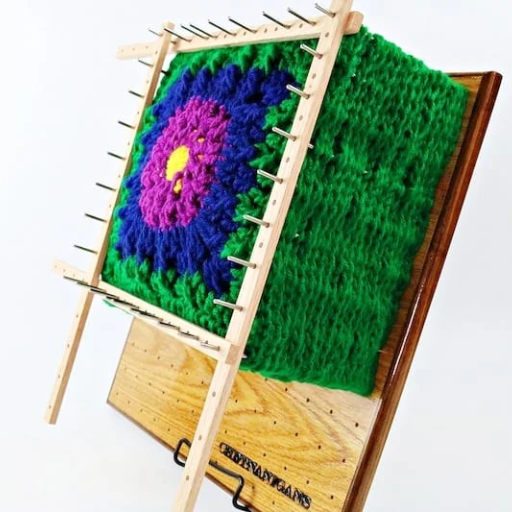
- Make the project: Place the finished garment on a smooth surface, preferably heated to avoid crumpling. Pull it into the right shape and fix this shape by pinning the knit or crocheted outwork using stainless steel pins.
- Apply Steam: Using a portable steamer or an iron with a steam generator, direct steam on an altered stand-by direction, which is located 1-2 inches above the surface. Do not expose the steam to the yarn since it can wear out the fibres in any way through heating up.
- Leave It to Cool: Allow the object to relax in its previous position without any active handling of the finished work until it is at room temperature and the fibers are well set.
- Look at the Operation: Check the operation for compliance with the expectations and make the necessary adjustments.
In this method, the acrylic fiber is focused, enhancing its look while not decreasing the strength of the material. Always (also) first try it on a small swatch before blocking the full item/section.
Steam Blocking: A Step-by-Step Guide
- Preparation of Tools and Surface: Iron the clothing smoothly while using a steam iron if possible. Place the clothes on a flat, heatproof support, in this case, a blocking board or a towel, to make sure it doesn’t shift and stay cut out during cleaning.
- Handling Temperature and Pressure: Adjust the steam iron to temperatures particularly for the acrylic yarn, say, low to medium setting. Often, as in many cases, the safest method is to avoid pressing the iron directly into the garment since this might cause the fibers to melt or shrivel up from the heat. Opt to heat the fabric equivalents of 1 to 2 inches above to the iron, but tend with this to press shall:
- Monitoring Fiber Response: Please pay attention because the energy levels of the yarn may increase beyond the levels of comfort and safety. By using the steam irons in repeated sequential motions, you are inadvertently preventing any confusion with the shaping or wearability of any constructed design you do. On more complex knitwear constructions like lace, use of blocking hard pins help to keep intact the form of whatever one has made all throughout span intended for blocking.
- Drying for Final Structure: Leave the garment to dry eventually and totally, till every part of the fabric has reached the environmental room temperature and do not in any way disturb, even by removing the blocking pins, until the completion of the procedure. This can ruin the expected appearance of the item.
Wet Blocking: Techniques and Tips
- Prepare the Project: First, ascertain that the final project is clean and free from any grit or oils that can impede the blocking. Optionally, second, clean the project by hand carefully using a gentle, synthetic-friendly soap if needed.
- Saturate the Material: Fill a big tub with lukewarm water, and immerse the project completely into the water for the next 15–30 minutes. This will help in making sure that the results obtained are uniform by hydrating the fibers, this time ensuring no drying out certain parts too quickly.
- Remove Excess Water: Carefully remove the project from the water, trying not to let it get dragged down by its weight. Using a towel, do a gentle moulding of the fabric as opposed to twisting in between the fabric to remove the absorbed water. If the object is larger, then step down a towel and do not twist the towel hard. Just apply some slight pressure while rolling it and a light one will do.
- Shape and Pin: Place the project over an absorbent surface such as a towel or a blocking mat. Stretch out the damp shape of the project as much as it would accommodate. Handle the fabric edges with corrosion free pins or blocking wires to maintain the shape wear needed. It is crucial that the outline is followed to the letter, as misconceptions will lead to an imperfect finish.
- Allow Natural Drying: Hang up the item in a well-ventilated position without any direct sunlight or heat sources, which may interfere with the fiber inside the yarn. Be sure to let the product remain untouched during this period of time as extruded activity may compromise the integrity of the blocking.
Spray Blocking: A Quick Overview
When it comes to delicate or labor-intensive fiber projects, spray blocking provides perfect results, making it very useful. This technique is most effective in modifying projects with little or no extensions in the original fabric. Water must be used sparingly; it must be sprayed on the item using a spray bottle in enough quantity that it wets the surface, but not enough that it drips on the carpet. Use either your hands or an iron to smooth out the fabric and square it to the desired shape. Place some rust-proof pins or blocking mats along the edges in order to prevent the fabric from losing its shape as it dries.
One of the major benefits of spray blocking is that it may be used with heat or heat sensitive fabrics. As previously stated, the fibers have been steamed within the fabric, hence they have not settled, vary entertaining. The fabric should be left alone in a dry place for hours and even overnight, depending on the humidity and the type of fibers. This blocking technique offers a targeted approach to fabric creation, as it can be adjusted to suit the extent of the desired manipulations.
Tools and Supplies Needed for the Blocking
- Blocking Mats – Helps you to shape the garment by pinning and laying the fibers on this cushioned end-level block. Please, look out for individual square pieces with interlocking sides.
- Rust-Free Pins – Having the project secured but without mutilating the fabric is encouraged. Get a set of T-pins or specific blocking pins that are meant for blocking.
- Measuring Tape or Ruler – It helps in achieving blocking with consistent dimensions, as well as symmetry.
- Spray Bottle (for wet or damp blocking) – Unevenly spreads water in the fabric to ease the easing process.
- Knit Blockers or Comb-Style Pins (optional) – Makes pining mothers easy by providing structure to marking larger portions of the work out jewellery while providing uniform tension along the edges.
- Absorbent Towels – Utilized for different reasons such as deckling of tightly knitted clothes, mopping of excess spillage or even inserted underneath fragile fabrics.
Essential Tools: Blocking Mats and Pins
To begin with, blocking mats and pins are essential for achieving a professional and precise block in any knitting or crocheting project. Typically, blocking mats or boards are made of stiff, heat-resistant, and indestructible foam with grid lines that help maintain the correct gradient while working on rounded or curved shapes. Moreover, they ensure that the project does not move or slip. Simultaneously, T-pins and stainless steel non-rusting pins are essential for holding the fabric ends taut and even so that the required form and size are maintained. For bigger projects, enhancement of the workspace can be achieved with locking interlocking mats. Moreover, pin placement while blocking also helps prevent distortions and enhance evenness. These utilities are also very beneficial, especially if one plans to achieve smooth, delicate finishes, particularly in intricate patterns such as lacework.
Using a Steamer or Steam Iron Effectively
If there is any fabric that has to undergo blocking, a steamer, or rather a steam iron, is at the heart of making sure that the shape of the fabric and the structure of the fiber is achieved. However, the use of heat requires cautious movement so as not to burn or shrink the fabric. Set the steamer/steam iron to the appropriate temperature for the fabric. For example, the use of steam irons on some materials, such as acrylic, which is a synthetic fiber, would require very low temperatures compared to if one were ironing cotton or wool, in which case the temperatures would be higher. A towel should be placed between the fabric and the steamer to prevent the cloth from absorbing too much steam and becoming fragile. Remember to apply some pressure on the iron when pressing the fabric, but not too much, especially on the damp material or smoothing fractal braids out. This technique ensures tension is distributed evenly over the material and a polished finish is enjoyed in more complicated lace designs, raised stitches, and the highly detailed projects. Utilizing proper steam technology in the blocking process reduces risks and enhances the overall quality of the end product.
Testing on Swatches: Why It Matters
Expert Tips for Successful Blocking
- Use the Right Tools
It is important to equip oneself with blockers, pins, and a tape measure in order to maintain the sizes provided. Such services help me to the fact that in common cases post-treatment improves the look of the cloths without inducing artificial thickenings or deformations of the fabrics from the blocks.
- Select the Appropriate Method
Find out which treatment is better for the type of fabric- wet blocking, steam blocking or spray blocking and do the same. Few examples- if made up of delicate fibers like wool – it is better to involve wet blocking whereas steam blocking is more effective with moderately stable type of fibers.
- Work on a Clean, Flat Surface
A clean surface prevents contaminants from transferring onto the fabric. Blocking on a flat, stable area ensures even tension and alignment.
- Monitor Drying Time
There should be a period for which the fabric should dry completely in that blocked form so that the desired measurements stay the same. Make sure not to skip this stage as rushing can change the intended outcome.
- Check Measurements Regularly
Make sure you use a ruler, a set square, which is a corner of a cardboard box for example throughout the exercise if you need an exact replication. Reposition objects for example pin markers to obtain the requirement that is there.
Getting the Best Results from Your Blocking
- Understand Fiber Properties
Wool is made of elastic materials that will compress under tension and are likely to distort more easily than say, acetate. The different chemical properties of the fibers should as well be kept in mind and applied to any of the blocking procedures as wet, steam and even spray.
- Use Precision Tools
Shop for kits that have mats marked and ready for blocking, pins that will not brown, and edging blockers. This is because a mat having a grid printed on it helps one maintain an exact right position, especially in patterns having symmetrical or geometrical shapes, and pins of high quality ensure that the fabric does not get damaged or a permanent mark.
- Control Environmental Conditions
Blocking can also be compromised without some degree of control being maintained. To put it another way, variables such as humidity, heat, and wind speed need to be properly adjusted and monitored to facilitate drying in confined settings. As such, the sufficiency of air in the room with an average moisture content speeds up the process and ensures a completed work.
- Perform Spot Testing
Do a spot test on an inconspicuous area of the garment before committing to blocking. This step will ensure that the method used to block the garment will not spoil it and that the garment will still be left in its original state without any distortion or color bleeding.
- Store Properly After Blocking
Store the blocked item appropriately once the procedure is complete to maintain it. It is advisable to put away blocked objects flat in the room storage – especially if they are soft and heavily shaped objects, and for harder constructions, that they are rolled up. This can help prevent mishaps along the way upon use.
Avoiding Common Mistakes While Blocking
- Overstretching the Material
Frequent errors may be seen in blocking, for example, applying too much tension and, therefore, permanently destroying the fiber or changing the desired position of the piece. Avoid this by adjusting the tension based on the fragility or strength of the material, and by its capability to equally stretch and return to its original shape as possible.
- Blocking with Improper Moisture Levels
Too little or too much moisture can break the blocking process. Be sure all areas of fabric are subjected to spray, and spray one after the other without exception. Avoid running water with the help of a sprayer where you wish to block some material, as sprinkling here can cause patchy and or mold formation.
- Neglecting to Test Blocking Surfaces
Most seamstresses underplay the importance of a blocking board which is disinfected, does not suck up the moisture, is heat resistant and ensures firm blocking of a material. Always make sure that your blocking surface or mat is clear, of smudges that may be inappropriate for the garment you are pressing and for whatever blocking method you are using. This is to prevent unnecessary markings or damage as the shaping process is done.
- Failing to Monitor Drying Conditions
Comparing Blocking Acrylic Yarn with Natural Fibers
The practice of blocking acrylic yarn considerably varies from blocking natural fibers due to the nature of the materials. Natural fibers like wool or cotton depend on blocking with water or steam as they have fibers that engage well with water and can even be molded to shape. The persistence in shape after blocking with these fibers is such that it conforms better to the shape, and they can retain the new appearance to the end.
There is another view concerning synthetic fibers, such as acrylic, that are not easily deprived of water; therefore, the traditional technique of wet blocking is not easy to apply. Instead, the steam clothing method is preferred, as it involves the generation of low-temperature heat, which helps to change and shape the strands temporarily • However, care should be taken not to allow overheating, as this warming may lead to pilling of the fibers.
Behavior and Ease of Blocking: Acrylic vs. Wool
|
Key Point |
Acrylic Yarn |
Wool Yarn |
|---|---|---|
|
Reaction to Water |
Minimal relaxation after soaking |
Fibers relax and reshape easily when soaked |
|
Heat Sensitivity |
Susceptible to melting at high temperatures |
Tolerant to moderate heat; avoids scorching |
|
Blocking Method Compatibility |
Steam blocking preferred for shaping |
Wet blocking highly effective for shaping |
|
Fiber Memory |
Retains shape moderately post-blocking |
Excellent at retaining new shapes |
|
Durability Post-Blocking |
More resistant to deformation |
May stretch but stabilizes after blocking |
|
Texture Changes |
Minimal softening during blocking |
Noticeable softening post-blocking |
|
Elasticity |
Lower elasticity, harder to reshape |
High elasticity, reshapes effectively |
|
Drying Time |
Dries quickly due to synthetic composition |
Slower drying due to natural fibers |
|
Color Response |
Colors stay consistent during blocking |
Colors deepen slightly when fibers are wet |
|
Cost Considerations |
Economical, suitable for high-volume crafting |
More expensive, ideal for premium projects |
Long-Term Results of Blocking Different Fibers
Blocking in the overall performance and endurance of various fibres is very important. That is to say that synthetic fibres like acrylic have the benefit of being shaped and stay that way for a very long time thanks to their low elasticity and resistance to factors like humidity and change in temperature. However, they can experience the gradual deterioration of the fibres with time and my lose the original look especially because it is washed regularly or due to exposure to sunlight. This calls for specific care handling.
Wool and cotton as natural fibers also react to prolonged blocking differently. Wool, consumed nicer effects of being blocked, primarily when applied the wet or steam blocking technologies. The way the material behaves with age due to its high elasticity and ceramics is quite different. On the other hand, cotton may have to be re-blocked occasionally as it is likely to recover and lose its stress especially when high moisture level is reached.
The durability of the results in blocking depends on the combination of fiber type, blocking procedure, and the service environment. Part of this goes through how to prepare and store the treated fibers because it is only through that process that the desired shape and the desired structure of the fibers would be retained over a long period of time. It is possible to select the most suitable fibers also for constraining purposes in solving problems and creating works for durability by understanding these characteristics.
Final Thoughts on Choosing Your Blocking Method
Reference Sources
-
Near Infrared Transmission Through Various Clothing Fabrics:
- Focus: Examines the transmission properties of different fabrics, including acrylic, under near-infrared light.
- Key Insight: Acrylic exhibits lower porosity compared to wool, which may influence its surface backscatter properties.
-
Synthetic Dye Application in Textiles:
- Focus: Reviews the application of synthetic dyes in textiles, including yarn and fabric.
- Key Insight: Discusses the integration of dyes into textile materials, which could indirectly relate to the finishing processes of yarn.
-
Thermal Efficiency Using Translucent Water-Based Acrylic Paint:
- Focus: Explores the use of acrylic-based materials for energy efficiency in housing.
- Key Insight: Highlights the versatility of acrylic in applications beyond textiles.
Frequently Asked Questions (FAQs)
Q: Can you block acrylic yarn to achieve the desired shape?
A: Yes, you can block acrylic yarn to achieve the desired shape. The process of blocking helps to set the stitches and improve the overall appearance of your finished piece. Many crafters use steam blocking, which involves using a steam iron or garment steamer on a low setting to gently shape the acrylic. This method is effective for items like sweaters or baby blankets made with acrylic yarn. Just remember to follow the yarn label instructions, as some acrylics may react differently to heat.
Q: What is the best way to block acrylic yarn projects?
A: The best way to block acrylic yarn projects is through a method called wet blocking. This involves soaking your finished piece in cool water, gently pressing out excess moisture, and then laying it flat on a blocking board. Pinning the piece in place allows it to dry in the desired shape. For larger projects, like blankets, you may want to pin sections down to ensure they hold their shape effectively. Always ensure the piece is completely dry before removing pins to avoid any distortions.
Q: How do I use steam blocking for my crochet project?
A: To use steam blocking for your crochet project, start by placing your finished piece on an ironing board or a flat surface. Use a garment steamer or a steam iron set to the steam setting, holding it a few inches above the project. Gently steam the fabric without direct contact to avoid scorching the yarn. This technique is particularly useful for crochet pieces, as it helps to smooth out uneven stitches and gives a polished finish. Remember to let it completely dry before handling to maintain the shape.
Q: Can I wet block acrylic yarn pieces?
A: Yes, you can wet block acrylic yarn pieces, and it’s a great way to help them take shape. Begin by submerging your acrylic piece in cool water for about 10-15 minutes. After soaking, gently squeeze out the excess water without wringing it out, which can distort the shape. Lay the piece flat on a clean towel and pin it to your desired dimensions. This wet block method is effective for any size project, including larger ones like an acrylic sweater or blanket.
Q: What happens if I can’t block my acrylic projects?
A: If you can’t block your acrylic projects, you may notice that they retain a somewhat uneven or crumpled appearance. Blocking is an important finishing step that helps to define the shape and texture of your work, especially for items like crochet bags or garments. Without this process, your finished piece might not look as polished or professional. However, if you are in a hurry or your project cannot be blocked, try using a spray bottle filled with water to lightly mist the fabric before shaping it by hand.